Fanvil
Automatic Provisioning of Fanvil Phones
The PBX is able to automatically provision Fanvil desktop phones through zero-touch LAN provisioning, DHCP option 66 provisioning URL, and Fanvil RPS.
Supported Fanvil IP Phones
| Fanvil Desktop Phones | LAN Provisioning | Zero Touch | Encryption | Buttons | Provisioning |
|---|---|---|---|---|---|
| X1S | ✅ | ✅ | ✅ | ✅ | ✅ |
| X1SP | ✅ | ✅ | ✅ | ✅ | ✅ |
| X2 | ✅ | ✅ | ✅ | ✅ | ✅ |
| X2P | ✅ | ✅ | ✅ | ✅ | ✅ |
| X3S | ✅ | ✅ | ✅ | ✅ | ✅ |
| X3S | ✅ | ✅ | ✅ | ✅ | ✅ |
| X3SP | ✅ | ✅ | ✅ | ✅ | ✅ |
| X3G | ✅ | ✅ | ✅ | ✅ | ✅ |
| X3U | ✅ | ✅ | ✅ | ✅ | ✅ |
| X4 | ✅ | ✅ | ✅ | ✅ | ✅ |
| X4S | ✅ | ✅ | ✅ | ✅ | ✅ |
| X4G | ✅ | ✅ | ✅ | ✅ | ✅ |
| X4U | ✅ | ✅ | ✅ | ✅ | ✅ |
| X5 | ✅ | ✅ | ✅ | ✅ | ✅ |
| X5U | ✅ | ✅ | ✅ | ✅ | ✅ |
| X5S | ✅ | ✅ | ✅ | ✅ | ✅ |
| X6 | ✅ | ✅ | ✅ | ✅ | ✅ |
| X7 | ✅ | ✅ | ✅ | ✅ | ✅ |
| X7C | ✅ | ✅ | ✅ | ✅ | ✅ |
| X210 | ✅ | ✅ | ✅ | ✅ | ✅ |
| A1 | ✅ | ✅ | ✅ | ✅ | ✅ |
| A2 | ✅ | ✅ | ✅ | ✅ | ✅ |
| A32I | ✅ | ✅ | ✅ | ✅ | ✅ |
| C01 | ✅ | ✅ | ✅ | ✅ | ✅ |
| C56 | ✅ | ✅ | ✅ | ✅ | ✅ |
| C58 | ✅ | ✅ | ✅ | ✅ | ✅ |
| C60 | ✅ | ✅ | ✅ | ✅ | ✅ |
| C62 | ✅ | ✅ | ✅ | ✅ | ✅ |
| C66 | ✅ | ✅ | ✅ | ✅ | ✅ |
| C210 | ✅ | ✅ | ✅ | ✅ | ✅ |
| C400 | ✅ | ✅ | ✅ | ✅ | ✅ |
| C600 | ✅ | ✅ | ✅ | ✅ | ✅ |
| D400 | ✅ | ✅ | ✅ | ✅ | ✅ |
| D600 | ✅ | ✅ | ✅ | ✅ | ✅ |
| D800 | ✅ | ✅ | ✅ | ✅ | ✅ |
| D900 | ✅ | ✅ | ✅ | ✅ | ✅ |
| F52H | ✅ | ✅ | ✅ | ✅ | ✅ |
| F58 | ✅ | ✅ | ✅ | ✅ | ✅ |
| F62 | ✅ | ✅ | ✅ | ✅ | ✅ |
| F600 | ✅ | ✅ | ✅ | ✅ | ✅ |
| FH-S01 | ✅ | ✅ | ✅ | ✅ | ✅ |
| G100S | ✅ | ✅ | ✅ | ✅ | ✅ |
| G200S | ✅ | ✅ | ✅ | ✅ | ✅ |
| H2 | ✅ | ✅ | ✅ | ✅ | ✅ |
| H2S | ✅ | ✅ | ✅ | ✅ | ✅ |
| H2U-V2 | ✅ | ✅ | ✅ | ✅ | ✅ |
| H2U | ✅ | ✅ | ✅ | ✅ | ✅ |
| H3 | ✅ | ✅ | ✅ | ✅ | ✅ |
| H3W | ✅ | ✅ | ✅ | ✅ | ✅ |
| H5 | ✅ | ✅ | ✅ | ✅ | ✅ |
| H5W | ✅ | ✅ | ✅ | ✅ | ✅ |
| I10 | ✅ | ✅ | ✅ | ✅ | ✅ |
| I10D | ✅ | ✅ | ✅ | ✅ | ✅ |
| I10S | ✅ | ✅ | ✅ | ✅ | ✅ |
| I10SD | ✅ | ✅ | ✅ | ✅ | ✅ |
| I10SV | ✅ | ✅ | ✅ | ✅ | ✅ |
| I10V | ✅ | ✅ | ✅ | ✅ | ✅ |
| I12 | ✅ | ✅ | ✅ | ✅ | ✅ |
| I16S | ✅ | ✅ | ✅ | ✅ | ✅ |
| I16SV | ✅ | ✅ | ✅ | ✅ | ✅ |
| I18 | ✅ | ✅ | ✅ | ✅ | ✅ |
| I18S | ✅ | ✅ | ✅ | ✅ | ✅ |
| I20S | ✅ | ✅ | ✅ | ✅ | ✅ |
| I20T | ✅ | ✅ | ✅ | ✅ | ✅ |
| I21T | ✅ | ✅ | ✅ | ✅ | ✅ |
| I23 | ✅ | ✅ | ✅ | ✅ | ✅ |
| I23S | ✅ | ✅ | ✅ | ✅ | ✅ |
| I30 | ✅ | ✅ | ✅ | ✅ | ✅ |
| I31 | ✅ | ✅ | ✅ | ✅ | ✅ |
| I31S | ✅ | ✅ | ✅ | ✅ | ✅ |
| I32V | ✅ | ✅ | ✅ | ✅ | ✅ |
| I51W | ✅ | ✅ | ✅ | ✅ | ✅ |
| I52W | ✅ | ✅ | ✅ | ✅ | ✅ |
| I53W | ✅ | ✅ | ✅ | ✅ | ✅ |
| I56A | ✅ | ✅ | ✅ | ✅ | ✅ |
| I61 | ✅ | ✅ | ✅ | ✅ | ✅ |
| I62 | ✅ | ✅ | ✅ | ✅ | ✅ |
| I63 | ✅ | ✅ | ✅ | ✅ | ✅ |
| I64 | ✅ | ✅ | ✅ | ✅ | ✅ |
| PA2 | ✅ | ✅ | ✅ | ✅ | ✅ |
| PA2S | ✅ | ✅ | ✅ | ✅ | ✅ |
| PA3 | ✅ | ✅ | ✅ | ✅ | ✅ |
| SE780 | ✅ | ✅ | ✅ | ✅ | ✅ |
| V62 | ✅ | ✅ | ✅ | ✅ | ✅ |
| V63 | ✅ | ✅ | ✅ | ✅ | ✅ |
| V64 | ✅ | ✅ | ✅ | ✅ | ✅ |
| V65 | ✅ | ✅ | ✅ | ✅ | ✅ |
| V67 | ✅ | ✅ | ✅ | ✅ | ✅ |
| W610W | ✅ | ✅ | ✅ | ✅ | ✅ |
| W611W | ✅ | ✅ | ✅ | ✅ | ✅ |
| X1 | ✅ | ✅ | ✅ | ✅ | ✅ |
| X1SG | ✅ | ✅ | ✅ | ✅ | ✅ |
| X2 | ✅ | ✅ | ✅ | ✅ | ✅ |
| X2C | ✅ | ✅ | ✅ | ✅ | ✅ |
| X3 | ✅ | ✅ | ✅ | ✅ | ✅ |
| X3S | ✅ | ✅ | ✅ | ✅ | ✅ |
| X3SG | ✅ | ✅ | ✅ | ✅ | ✅ |
| X3U | ✅ | ✅ | ✅ | ✅ | ✅ |
| X3V | ✅ | ✅ | ✅ | ✅ | ✅ |
| X305 | ✅ | ✅ | ✅ | ✅ | ✅ |
| X4 | ✅ | ✅ | ✅ | ✅ | ✅ |
| X4U | ✅ | ✅ | ✅ | ✅ | ✅ |
| X4U-V2 | ✅ | ✅ | ✅ | ✅ | ✅ |
| X5 | ✅ | ✅ | ✅ | ✅ | ✅ |
| X5S | ✅ | ✅ | ✅ | ✅ | ✅ |
| X5U | ✅ | ✅ | ✅ | ✅ | ✅ |
| X5U-V2 | ✅ | ✅ | ✅ | ✅ | ✅ |
| X6 | ✅ | ✅ | ✅ | ✅ | ✅ |
| X6U | ✅ | ✅ | ✅ | ✅ | ✅ |
| X6U-V2 | ✅ | ✅ | ✅ | ✅ | ✅ |
| X7 | ✅ | ✅ | ✅ | ✅ | ✅ |
| X7A | ✅ | ✅ | ✅ | ✅ | ✅ |
| X7C | ✅ | ✅ | ✅ | ✅ | ✅ |
| X7C-V2 | ✅ | ✅ | ✅ | ✅ | ✅ |
| X210-V2 | ✅ | ✅ | ✅ | ✅ | ✅ |
| X210I | ✅ | ✅ | ✅ | ✅ | ✅ |
When provisioning a Fanvil phone, you should first set the required settings on the PBX as shown in provisioning document Steps Before Provisioning.
Reset X-Fanvil series Phone
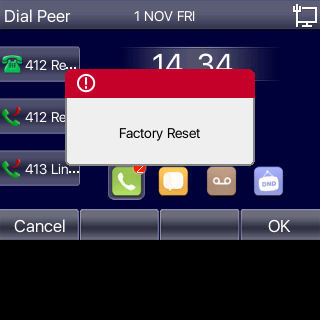
To Factory reset a Fanvil phone make sure you in the main page of the phone. Press the OK button for about 10 seconds.
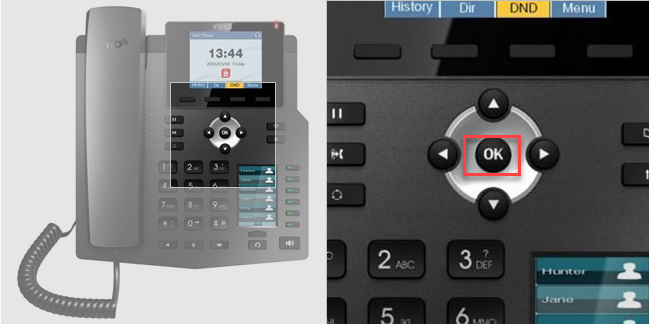
The phone will show you the Factory reset message, it will then reboot.
RPS Provisioning
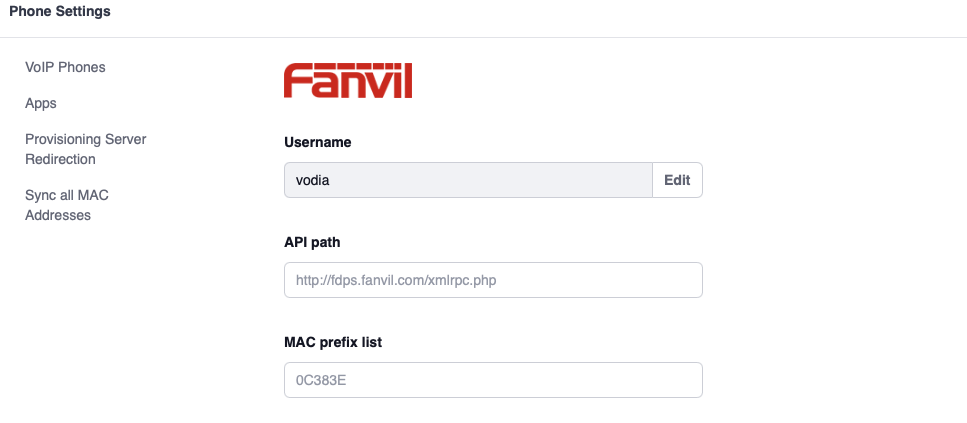
If you're using the Vodia multi-tenant PBX you can acquire an RPS account from Fanvil here https://fdps.fanvil.com/
You'll need to register first, Fanvil will then provide you with a user and password , you can it apply on the Vodia PBX. Under Admin -- Phone -- Settings --Fanvil
Once you have entered your credentials on the Vodia PBX save the configuration.
- Version 69
- Version 70

The older phone models (for e.g X4 etc.) need the as "Configuration File Name " as "prov/fanvil.txt " (will be found inside RPS --> Group --> Edit button --> Phone Flash section). The old models also may need multiple factory resets at each periodic interval during provisioning (Heads-up if you don't see the phone doing anything).
The newer phone models (for e.g. X4U etc.) need the as "Configuration File Name " as "prov/fanvil-sysconf.xml " (will be found inside RPS --> Group --> Edit button --> Phone Flash section)
In order for Fanvil's RPS to work, you will need to add the phones MAC address to the extensions using the Device Management setttings.
In order to start provisioning for the Device i.e. click on the MAC address and then click on Start.
Reboot the Fanvil X device. The phone will contact Fanvils RPS, and send the phone to the Vodia PBX to get its the config file.
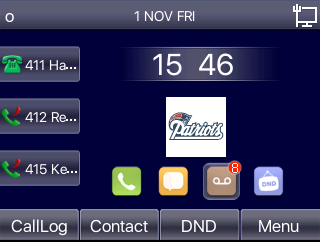
You should see the phone register.
Adding Buttons
To add Buttons to your phone, navigate to your Extension → Buttons. Vodia can detect any Fanvil model and button scheme. To add buttons to your phone, choose a type and parameter, once your done save.
Reboot the phone once, so it can fetch its new button config. For more information on Button check our buttons setup.
There is a special "Fanvil" mode where you can explicitly set the values for the XML files. Please use the parameter field to specifiy the values that should be sent in the format type=<type>;value=<value>;title=<title>;icon=<icon>, for example type=1;value=4006@1/ba*87;title=4006 Jim Demo;icon=Green.
Setup Devices In LAN
If your phone is in the same LAN as the PBX, you can provision the Fanvil devices by visiting the (Phones in the LAN) under the Administrator level (Phones→LAN Devices ).
Make sure the phone is factory reset (or at least has the default username and password). By default Vodia is listening on port 20 for device info, make sure it's not blocked.
- Version 69
- Version 70

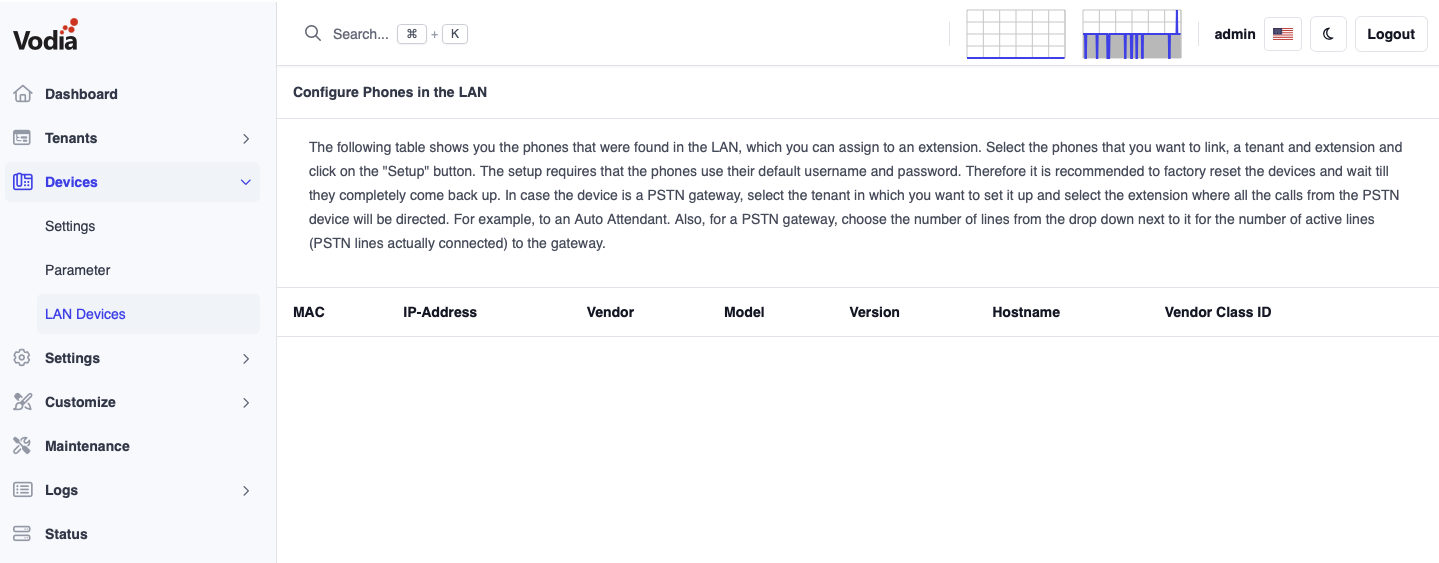
Make sure Steps Before Provisioning is completed before LAN provision. Continue and choose your Fanvil phone you want to provision and click on the setup button to assign the phone to one of your extensions.
Manual Setup of Provisioning Server
If you need to set the provisioning server manually for the device, you should use the path /prov/fanvil-sysconf.xml. For older models that do not properly support the XML provisioning and need ASCII-based provisioning please use the path /prov/fanvil.txt. You need to manually select the HTTP protocol. For the older models, it is also recommended to use the latest firmware in order to avoid problems with the provisioning.