Types of Provisioning
A. DHCP Option 66 Provisioning
- Enter the PBX IP address in your Local Router as "http://PBX_IP_ADDRESS"
- Turn on the DHCP 66 option on the phones.
- Reset the phone to factory default settings, add the Mac address under the "provisioning" tab as shown above, open the phone for "Mac based provisioning" and then reboot the phone.
B. Manual Provisioning
-
Step 1: Map the MAC address of the phone to the PBX extension using Device Management.
-
Step 2: Under
Tenant>Advanced>General Settings>Provisioning Parameters, add the authentication password and PIN to login into the phone (after it gets provisioned). -
Select the Dial plan scheme for your country as well from this section.
-
Step 3: Navigate to the Device Management under Tenant Advance settings and start provisioning for the Device i.e. click on the MAC address and then click on Start.
-
Step 4: Navigate to the web GUI of the phone and add the URL of the PBX Server as below:
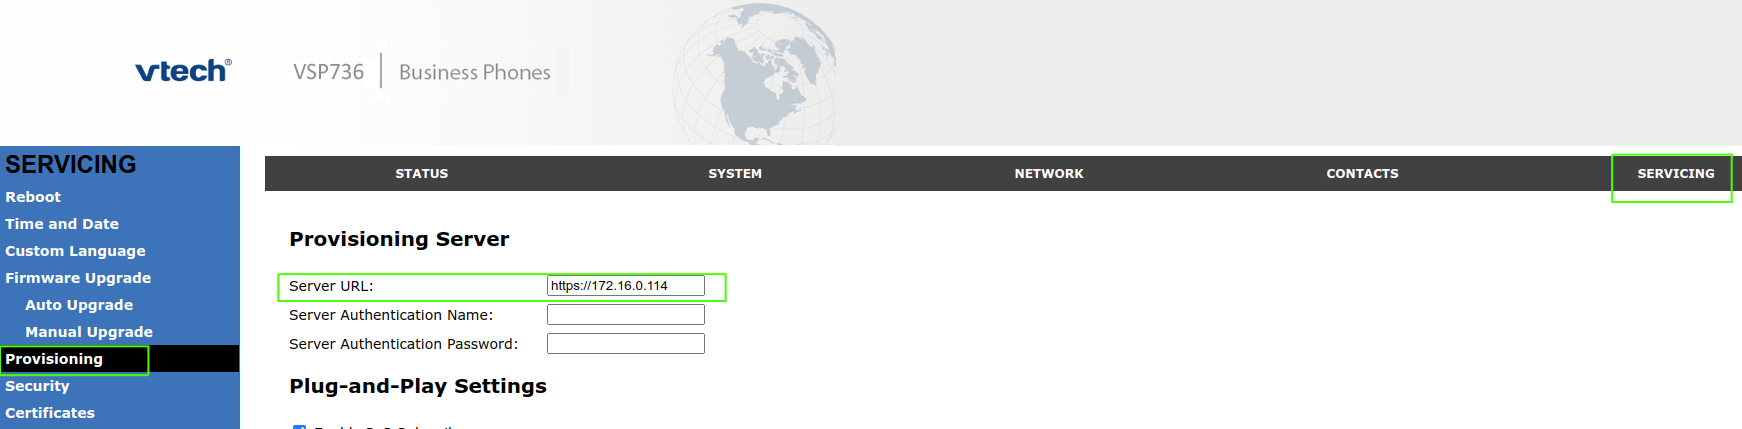
- Step 5: Reboot the phone. The phone might take 2-3 reboots before it is up and registered.
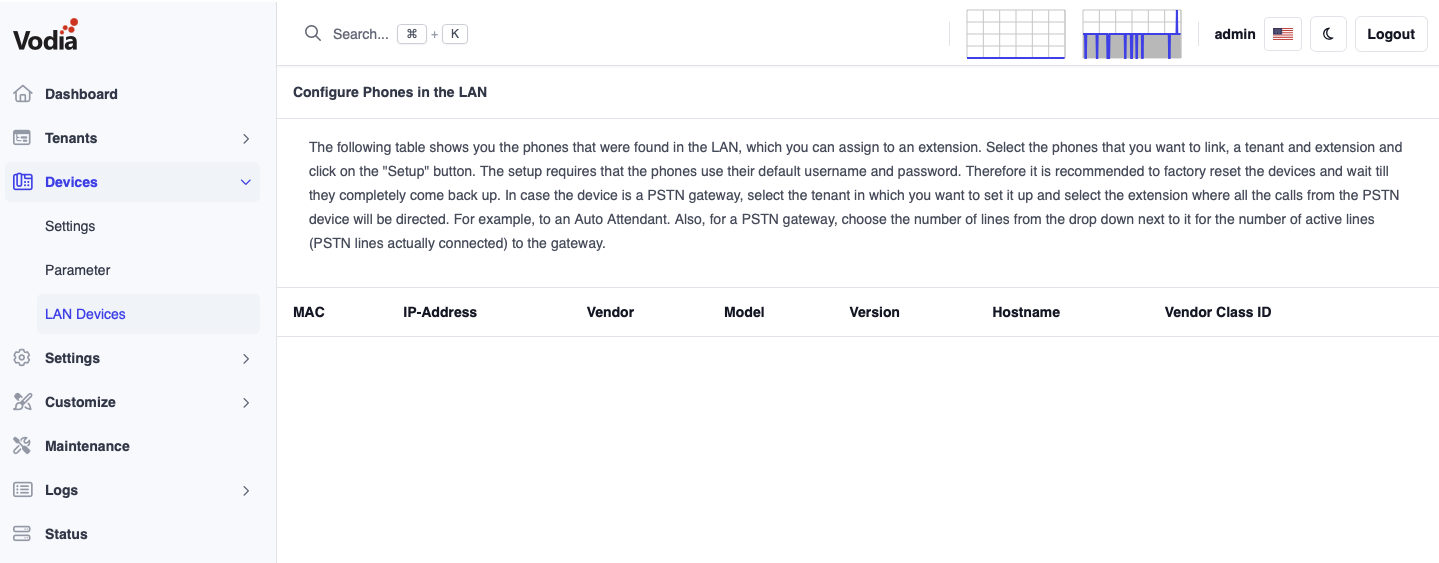
C. LAN Provisioning
- Step 1: Navigate to
Admin>Phones>LAN Devicesand select the MAC and click onSetup.
- Version 69
- Version 70

-
Step 2: Assign it to domain and the extension inside that domain as shown.
-
Step 3: The PBX should automatically add the MAC address of the phone to the extension, reboot, provision and register !