Poly
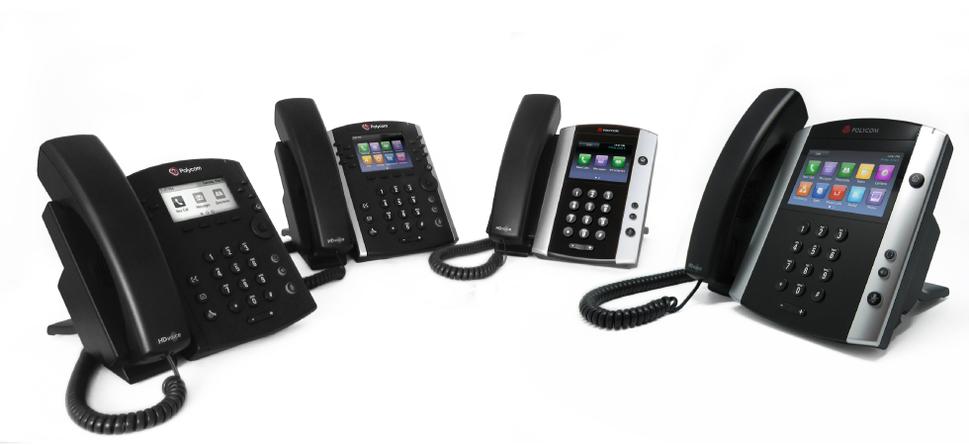
Supported Devices and Features
The Vodia PBX currently (version 60.0) supports provisioning Polycom phones VVX101, VVX201, VVX300, VVX301, VVX310, VVX311, VVX400, VVX401, VVX410, VVX411, SPIP300, SPIP301, SPIP320, SPIP330, SPIP321, SPIP331, SPIP335, SPIP430, SPIP450, SPIP500, SPIP501, SPIP550, SPIP560, SPIP600, SPIP601, SPIP650, SPIP670, SSIP4000, SSIP5000, SSIP6000 and SSIP7000.
When using the automatic provisioning, you will be able to make and receive calls, transfer calls, control the DND and redirection status on the PBX, use the Polycom buttons (restrictions apply) and access the PBX address book through LDAP. LDAP uses TLS so that the address book credentials and the address book information stays secure between the phone and the PBX. The PBX can use TLS transport layer for the SIP messages, eliminating NAT problems and problems with UDP message fragmentation due to the Problems with UDP on Polycom phones. If TLS cannot be used, it is strongly recommended to use at least TCP.
If the domain contains a logo, the PBX will provide that logo to the phone as the background image. The logo takes up by default a size of 50 % of the screen, which provides enough space for the button information on the phone. For the background color, dark color seem to work better for the phones. Consequently, if a domain is using mostly Polycom phones, it is suggested to choose a dark background color when uploading the logo into the domain.
Polycom VVX 300/310/400/410 Reboot & Factory Reset
Pressing multiple key combinations enable you to perform certain operations on the VVX 300, 310, 400, and 410 phones. The multiple key combinations on theVVX 300, 310, 400, and 410 phones are as follows:
- Reboot the Phone—Press and hold the dial pad keys 0, 1, and 3 simultaneously for about three seconds , or until you hear a confirmation tone.
- Restore Factory Defaults—Press and hold the dial pad keys 1, 3, and 5 simultaneously during the Updater process until the password prompt appears. Enter the administrator password to initiate the reset. Resetting to factory defaults will also reset the administrator password to 456.
- Upload Log Files—Press and hold the dial pad keys 1, 5, and 9 simultaneously until you hear a threesecond confirmation tone.
Lost the Administrator Password?
To restore a third-party phone to factory defaults (or when you otherwise can't access the Admin Password):
-
Power cycle the phone:Simultaneously press and hold 0 1 3 dial pad keys * until a confirmation tone is heard (or for about three seconds).
-
Except VVX 1500: 2 4 6
-
Press Cancel soft key during the boot process.
-
During the countdown, simultaneously press and hold the 1 3 5 dial pad keys until the password prompt appears.
-
Enter the MAC ID of the phone. (The MAC ID/address should be visible on a label on the underside of the phone.)
Note: When entering the MAC ID of the phone use lower case for the letters.
Preparing Secure Provisioning
The PBX will attempt to use secure provisioning for Polycom devices through HTTPS if the setting Try to provision phones securely is set. By default, the PBX will provision the Vodia Root CA into the phone, so that a trust relationship can be established. Instead the administrator can upload a certificate chain into the PBX; in this case, it is important that the whole chain including the Root CA is imported so that the PBX is able to provision the Root CA into the phone. This step is not needed when the PBX is using a certificate that is on the list of trusted Root CA for Polycom phones.
Establishing a secure connection is also required for using TLS for the SIP signaling messages. If you cannot establish a secure connection, you should assign the TCP transport layer to the device.
Providing the Firmware
The firmware for the Polycom phones can be updated through the web interface of the phone or must be downloaded from the Polycom web site. You may use the tftpfolder for storing the firmware files.
Supported Button Modes
Polycom phones can use the BLF-based modes that monitor accounts (such as Extension BLF, ACD, Hunt groups or service flags). Speed dial is also supported; this has to be done through the Polycom address book which is automatically generated for the PBX. Park orbits can also be monitored on the Polycom phones. Because of the way the Polycom phones work, it is at times difficult to exactly position the buttons on the device. When there is a display next to the button, users should use that display to confirm the button functionality. It is important that you assign at least one line button to the button profile; otherwise, the phone will not accept the BLF configuration.
Supported Transport Layers
Polycom phones may use TLS, TCP and UDP transport layers. It is recommended to use the TLS transport layer unless there is a problem provisioning the certificate information for the phone. UDP is discouraged, as it causes problems with large packets and UDP fragmentation.
Preparing the Device
Before you can provision a phone, you must add the MAC address to the extension in the PBX web interface. This can be done either by adding the MAC address to the extension or by assigning the MAC address to an extension on the system level (for LAN provisioning). You need to tell the phone the provisioning server (where it will get its settings and firmware). For this, you have several possibilities:
LAN discovery
Manual Setup
After the phone booted up, you can change the settings for the provisioning server from the phone user interface:
- Press the menu button.
- Select Settings (3)
- Select Advanced (2)
- Enter the password (by default 456)
- Select Admin Settings (1)
- Select Network Configuration (1)
- Select the Server Menu
- Set the Server Type to "HTTP"
- Set the Server Address to the address of the PBX. If you are deploying the device in a hosted environment, you need to enter the name of the domain here; otherwise, the IP address is sufficient.
Manual Provisioning:
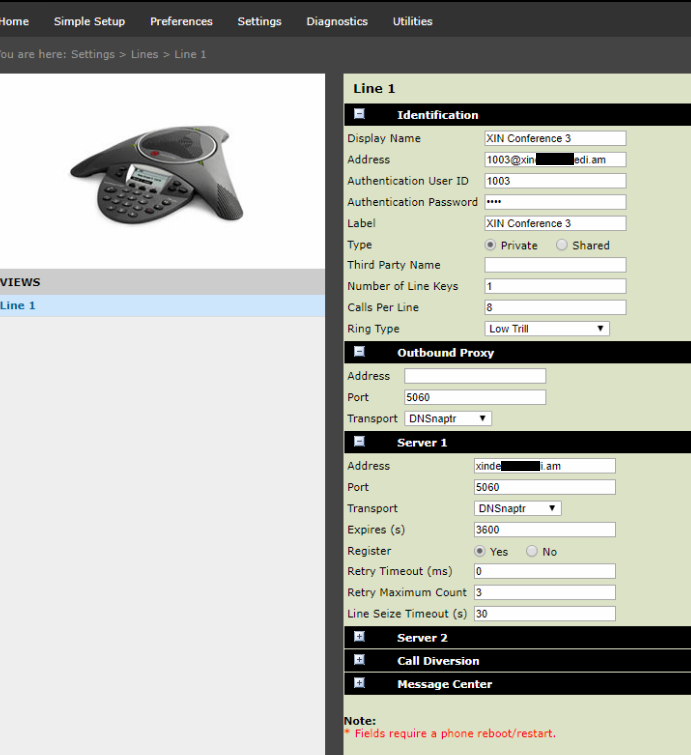
When provisioning a Polycom phone, you should first set the required settings on the PBX as shown in provisioning document Steps Before Provisioning .It is important to note in the document "Steps Before Provisioning", how to map the MAC address of the phone to the PBX extension using Device Management.
It is also important to note in the document "Steps Before Provisioning", under "Configuring the Domain Settings", the "Provisioning Parameters" as shown again below. The Authentication user, Authentication password and Authentication PIN settings allow administrators to provision phones and log into a phone's web interface remotely.
For provisioning buttons, the setting up of buttons is described in buttons. There, you will see how to prepare a new buttons profile, how to set up the individual buttons (like BLF) and how to map that profile to a specific extension.
P.S: There should be at least one " Private Line" button assigned in the button list of the Polycom phone which is about to be provisioned, for the phone to register. Otherwise, the phone will not register.
Open MAC Provisioning
For security reasons, navigate to the Device Management under Tenant Advance settings and start provisioning for the Device i.e. click on the MAC address and then click on Start.
Polycom Phone Settings for Auto Provisioning
Log into the web interface of the phone and navigate to "Management", then "Auto Provision" page. In the "Config Server Path", add this URL http://PBXIP after the URL has been set in the provisioning page, you can restart the phone to start the process.
Using the DHCP Server
When you have a DHCP server then can set option 66, you can just enter the address of the PBX there. If you are deploying the device in a hosted environment, you need to enter the name of the domain here; otherwise, the IP address is sufficient. Please make sure that the setting is an HTTP URL.