Vodia IOP Installation
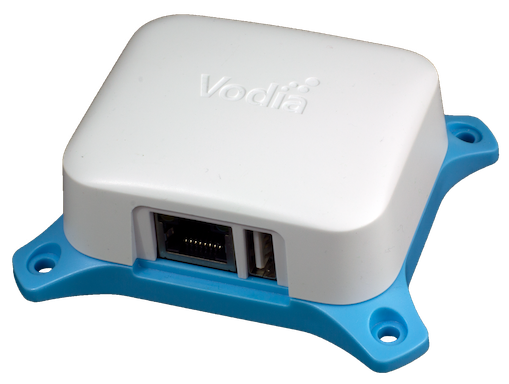
Vodia IOP is a hardware appliance that runs the Vodia PBX. The intended use is on customer premises where low-power, no noise and minimal maintenance is key.
Hardware Installation
The hardware installation is very much straightforward. We recommend mounting the device on a wooden board (screws are included). Also it makes sense to fix the Ethernet and power cable, so that they don't stress the connectors to the device. A dangling power connector is the main source for problems with the device.
Connect the Ethernet RJ-45 cable with a Ethernet switch and connect the power. The LED lights of the Ethernet connector will start lightening up and flicker, according to the traffic in the network.
When a backup is required, connect an empty USB stick with 64 GB capacity to the USB slot.
More information can be found in the printed version inside the box.
Initial Setup
The rest of the setup is done through the web browser. Because the Vodia IOP is based on the Vodia PBX, the documentation describes how to use the device. For example, the Logging In describes how to access the device.
Software Update
After the initial setup, it makes sense to check what software version is running on the PBX. Navigate to Maintanence → Software Update and load the latest software version. The availability of software version might depend on your license. Please contact support if you have questions about the license.
Writing the software update files to the built-in SD card takes around two minutes. During this time don't disconnect the device from power or reboot the operating system. In newer versions, the web interface will show how much data is waiting to be written to the card. Only when data is completely written to the card, reboot the system. Or just end the PBX process, which will avoid rebooting the operating system.
Setting Static IP Address
It is important that the device always gets the same IP address after a power failure or a system update. In most environments it is the best solution to fix the IP address on the DHCP server, which will make sure that there is no IP address conflict in the network.
If you want to set a static IP address nevertheless, navigate to Settings → Network → Device IP Address and switch the addressing type to "Static". The form will then show the fields neccessary to set a static IP address. After setting the address, double check that the settings are correct and try rebooting the device.
Be careful setting the static IP address. Entering the wrong address will make it difficult to access the device later on.
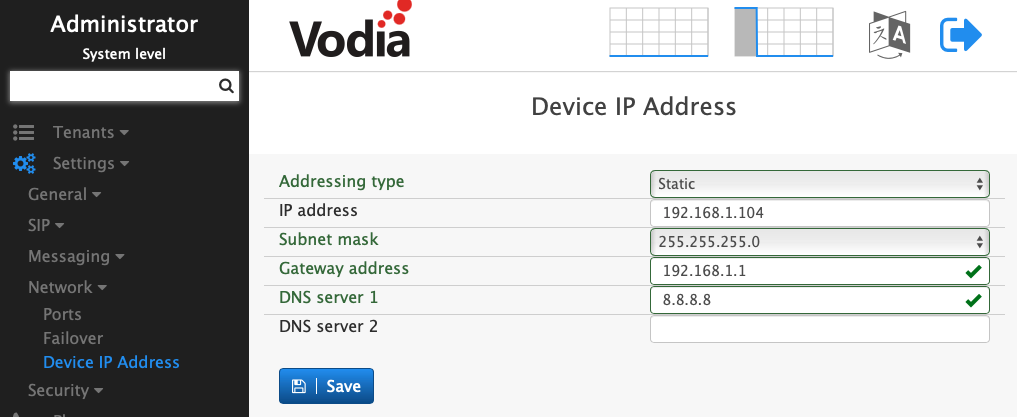
If you need to get access to the device, you can still use the IPv6 link local address of the device. However it is tricky to make browsers access that address. You will have to find out how your browser supports link local addresses.
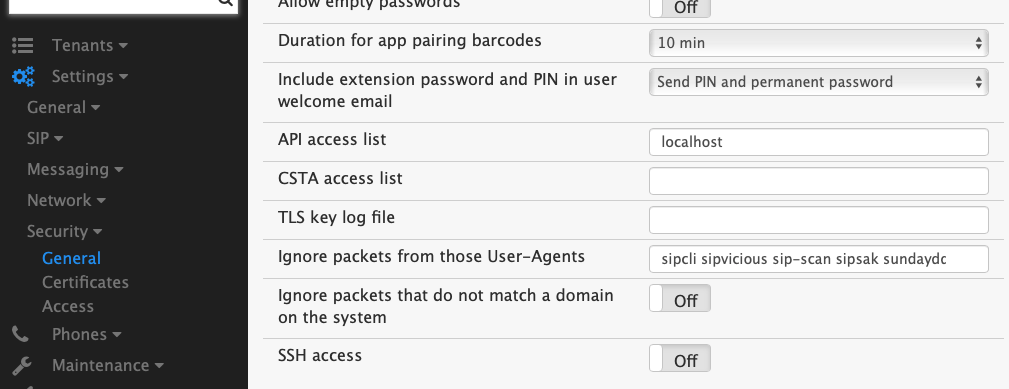
SSH Access
Vodia IOP is based on Raspbian. Providing SSH access to Vodia IOP enables a large range of additional features and makes it easy to access the file system of the PBX, e.g. for backup or migration. In order to enable SSH, navigate to Settings → Security → General, turn the SSH flag on and hit the save button.
The username for login is "root". After you enable SSH, when you set the administrator password for the system, this password will also be used for the root account. After enabling SSH, set the password (on the same page) for the administrator and try logging in through SSH.
Factory Reset
If you can login to the web interface, please use the page reg_reboot.htm to factory reset the IOP from there.
If you are not able to login e.g. because you don't have the admin password, you can use the following method:
- Create a blank file named
reset-macwheremacis the MAC address of the device. E.g.reset-d8e00400e7h7without a suffix (e.g.txt) at the end of the file name. - Put that file on a USB stick.
- Insert the USB stick into the IOP and power it on.
- Wait for it to reset and reboot within 2-3 minutes.
Alternatively you can physically remove the SD card from the device and change the file system:
- Mount the SD card as the root file directory (
/pbxor/usr/local/pbx) on your system and then set the write and execute access on the card. - Delete everything except for the
pbxctrl,pbxctrl.datand thepbxctrl-license.xmlfile (unless you want to reset the license as well). - Restart the server.
The factory reset will not affect changes that were made from SSH or the network settings, e.g. the static IP address of the device.