ALE Phone Provisioning

Basic Information
Default Login Credentials (Out of Box)
The default login of any of the ALE (Alcatel Lucent Enterprise) Desktop Phones is:
- Username: admin (all lowercase)
- Password: 123456
How to Hard Reset/Factory Default Reset
Steps to hard reset or factory default any of the ALE Desktop Phones:
- Connect your phone to PoE switch and let it come up.
- Look for "Step 1" or "Initialization" on the screen and immediately press 1,3,7,9 keys at the same time.
- Then enter *46*46*253*
- The phone will now reboot automatically and will be factory reset.
Provisioning Methods
1. Manual Provisioning
When manually provisioning a phone, you should first set the required settings on the PBX as shown in provisioning document Steps Before Provisioning.
Important PBX Settings
It is important to note in the document "Steps Before Provisioning":
-
How to map the MAC address of the phone to the PBX extension using Device Management.
-
Settings under
Domain>Advanced>General Settings>Provisioning Parameters
The Authentication user, Authentication password and Authentication PIN settings allow administrators to provision phones and log into a phone's web interface remotely. These settings enable administrators to use identical usernames and passwords for all devices in a domain, simplifying the authentication process from the GUI of the phone. The password will bypass users' passwords (the web interface passwords), so users will not be able to use their passwords; hence, this setting can be used to keep users out of the phone's web interface and prevent them from inadvertently changing anything.
Button Configuration
For provisioning buttons, the setting up of buttons is described in buttons. There, you will see how to prepare a new buttons profile, how to set up the individual buttons (like BLF) and how to map that profile to a specific extension. The numbers for the buttons correspond to the buttons on the phone. If a number is not added in the profile, that button will not be set on the phone.
Security Settings
For security reasons, navigate to the Device Management under Tenant Advance settings and start provisioning for the Device i.e. click on the MAC address and then click on Start.
ALE Phone Web Interface Configuration
Log into the web interface of the phone, and according to the model, navigate to the page where you can enter the provisioning server address.
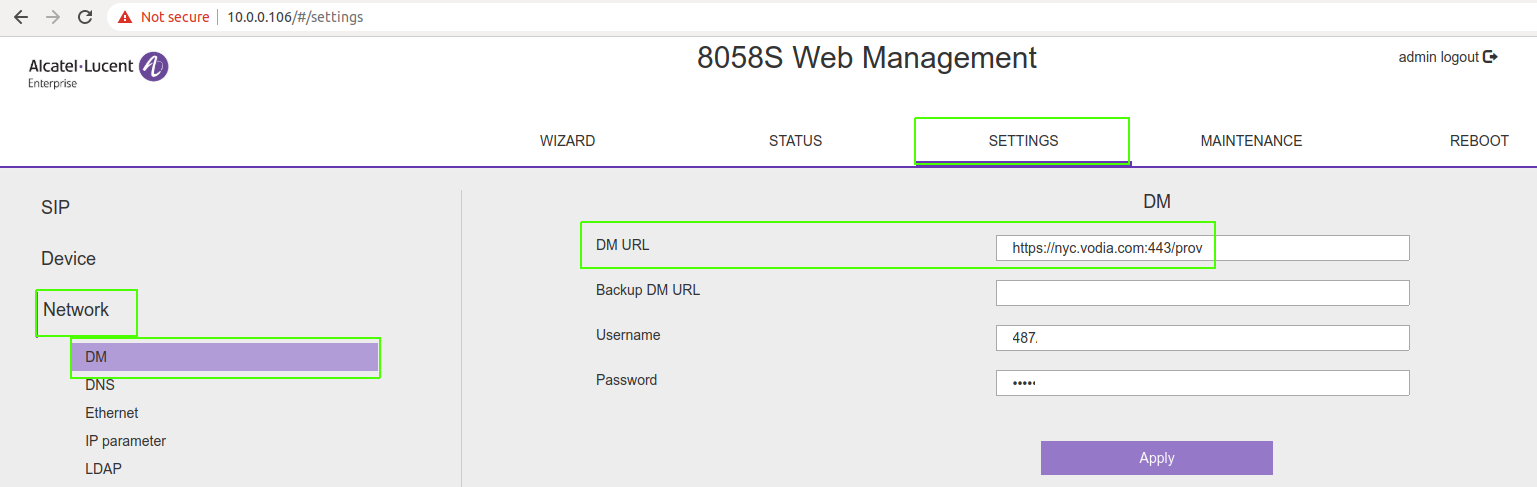
For model 8085S:
- Go to Settings > Network > DM
- In "DM URL" setting, add this URL: https://PBX_IP:port/prov OR http://PBX_IP (where the PBXIP is the IP or resolvable domain of the pbx server)
- No need to enter the Username/Password field, as that will be populated by the PBX after successful provisioning
- Press Save
- Reboot the phone for provisioning
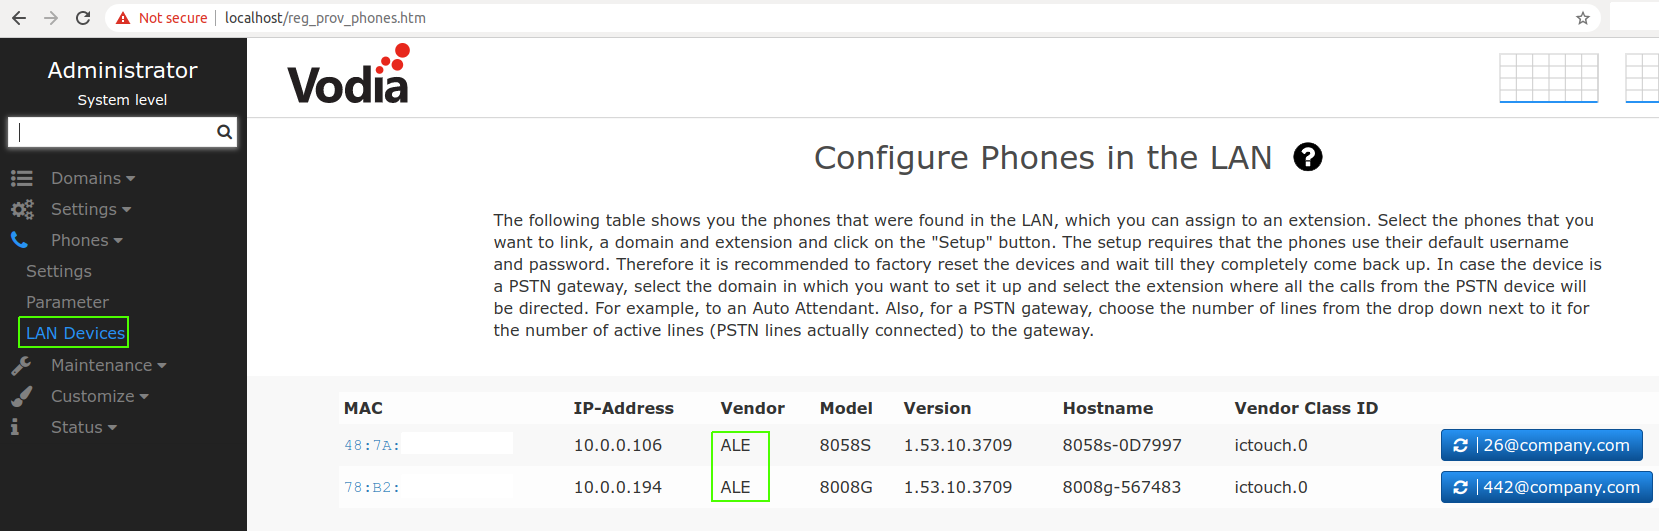
2. Setup Devices in LAN
If your phone is in the same LAN as the PBX, then you don't have to do many of the above things and simply be able to provision almost any phone with a single press of a button by using this feature of the PBX.
Steps:
- Make sure the phone is factory reset (or at least have the default username and password)
- Complete the Steps Before Provisioning
- Go to the PBX page Setup Devices in LAN where the PBX will show you all the phones it has automatically detected in the LAN
- Choose the phones you want to provision, assign each one a domain and extension and press "Setup"
- The phones will be provisioned
For details on this feature, please go to: Setup Devices in LAN.
3. Auto Provisioning via ALE RPS Server
Please contact the ALE administrator account.eds@al-enterprise.com to create an RPS account before beginning with the following process.
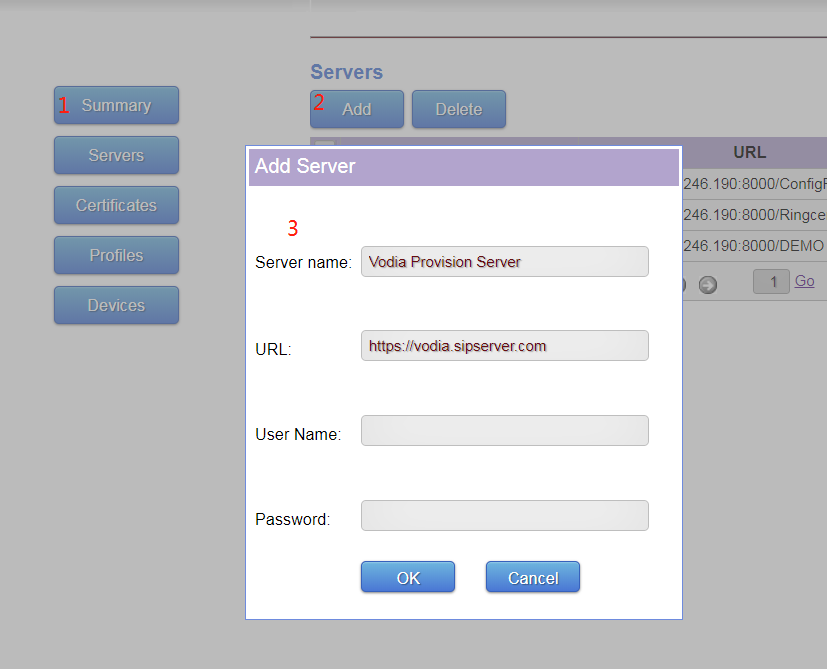
Step 1: Create ALE Provisioning Server
Provision server means this server allows the SIP phone downloading config file via HTTP/HTTPS way. If your PBX integrated this service and then your PBX will be the provision server.
- Click "Servers" and Click "Add"
- Enter server name and URL (must be http or https)
- Username and password are optional. They are applied for your server name authentication
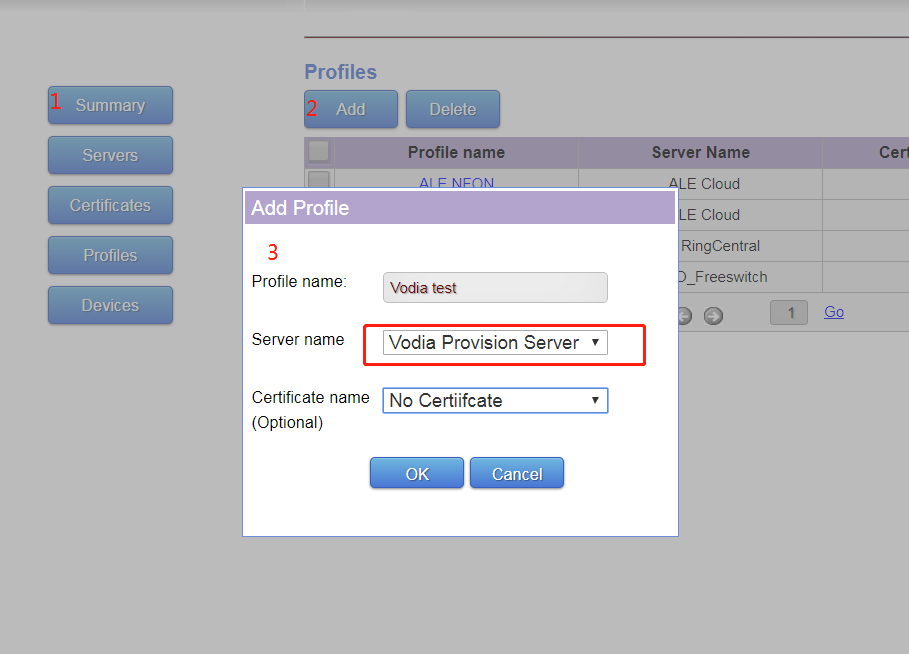
Step 2: Create a Profile
- Click "Profiles" and Click "Add"
- Add a new profile with a name of your choice
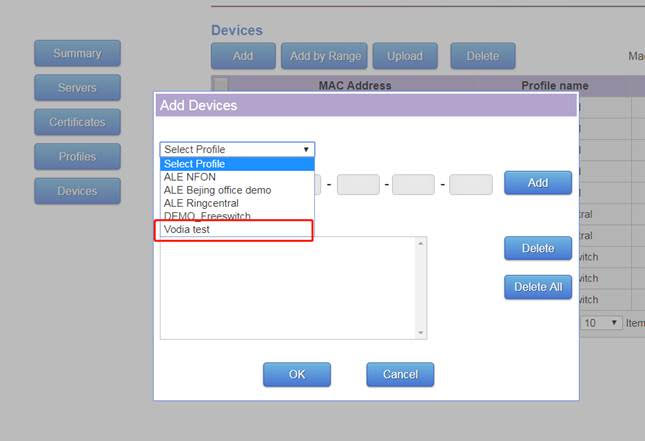
Step 3: Create Devices
- Click "Devices" and Click "Add"
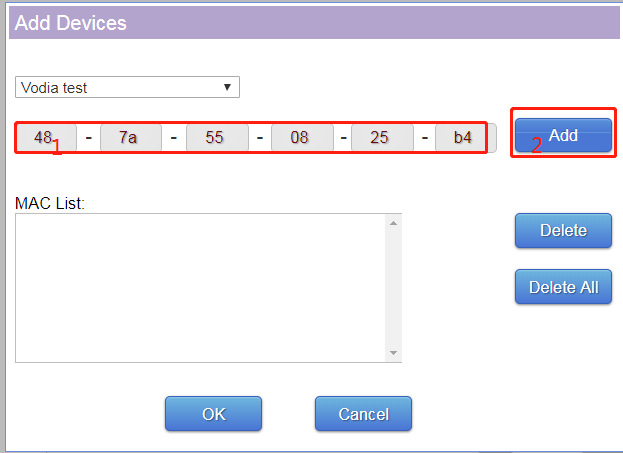
- Select profile (e.g., "Vodia test") from the menu list
- Fill the DUT's/phone's MAC address, click "Add"
- Click "OK" when finished
Step 4: Manually Add the MAC Address of the Phone
- Add the MAC address of the phone
- Click on "Add" to see it populate in the MAC list below it
Step 5: Verify Profile and Device Setup
You should now see the Devices been added along with appropriate profile.

Step 6: Reboot the DUT/Phones
Just restart the DUT which will send request to RPS to get the DM URL.
Note: You must remove all DM URL settings (factory reset the phones) from DUT before restarting it.
Button Assignment After Provisioning
Users can assign the buttons to the ALE phones from Extension level or Domain level. Please refer here.
Bulk/Mass Deployment to the RPS Server
Customers can add the devices by Range and by uploading a file for mass new devices deployment.
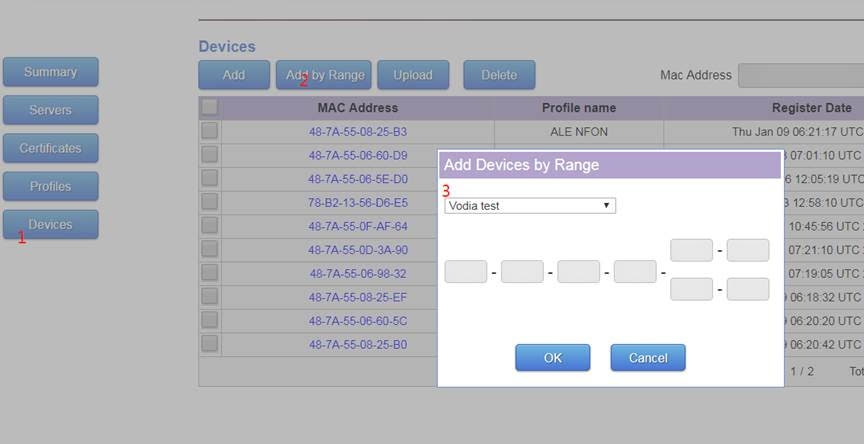
Adding Devices by Range
Useful for less than 50 devices to be deployed and these device MAC addresses are in one range.
- Go to "Devices" and Click "Add by Range"
- Input the MAC address range
- Click OK to confirm
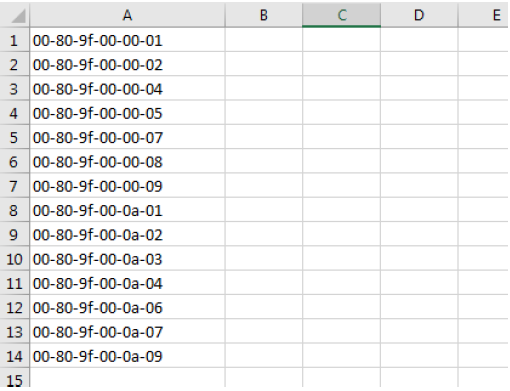
Adding by File Upload (txt, csv, or xls format)
Text File Format:
The text file should be a list of MAC address, each address in a line.
The MAC address can be formatted as:
- "48-7a-55-xx-xx-xx"
- "48:7a:55:xx:xx:xx"
- "48 7a 55 xx xx xx"
- "487a55xxxxxx"
The address string is case insensitive
Excel File Format:
The excel file should be a table with MAC address in the first column.
Upload Process:
- Go to "Devices" and click on "Upload"
- Select your profile (e.g., "Vodia test")
- Click on "Choose File"
- Select the file to upload

You should be able to upload mass of MAC addresses of new devices.
P.S: New provision server named "EDS: Easy Development System" is coming out soon. All the data user has on the RPS server, will be merged in the new system. ETA, TBD.