Yealink

Features
When using the automatic provisioning, some of the supported features are:
- Basic call features including transfer, hold and voicemail notification
- Status synchronization of the DND and redirection status
- BLF mode for buttons
- Time zone settings etc.
Factory Default a Yealink Phone
To reset a Yealink phone to factory default settings, hold down the "OK" button for 5-10 seconds. The phone will prompt you to reset to factory default, press OK. For devices that don't have an "Ok" button like the T58 model, use the redial button.
Manual Provisioning
When provisioning a Yealink phone, you should first set the required settings on the PBX as shown in provisioning document Steps Before Provisioning.
Step 1: Add the MAC address in the extension
It is important to note in the document "Steps Before Provisioning", how to map the MAC address of the phone to the PBX extension using Device Management.
Step 2: Add password and the PIN
It is also important to note in the document "Steps Before Provisioning", under "Configuring the Domain Settings", the "Provisioning Parameters".
-
This is the password which will act as web password to get into the GUI of the phone, AFTER it provision
-
The default username is admin , and the default password is password .
-
For provisioning buttons, the setting up of buttons is described in buttons.
Step 2: Open MAC Provisioning
For security reasons, navigate to the Device Management under Tenant Advance settings and start provisioning for the Device i.e. click on the MAC address and then click on Start.
Step 3: Steps to be carried out on Yealink's GUI for manual provisioning.
-
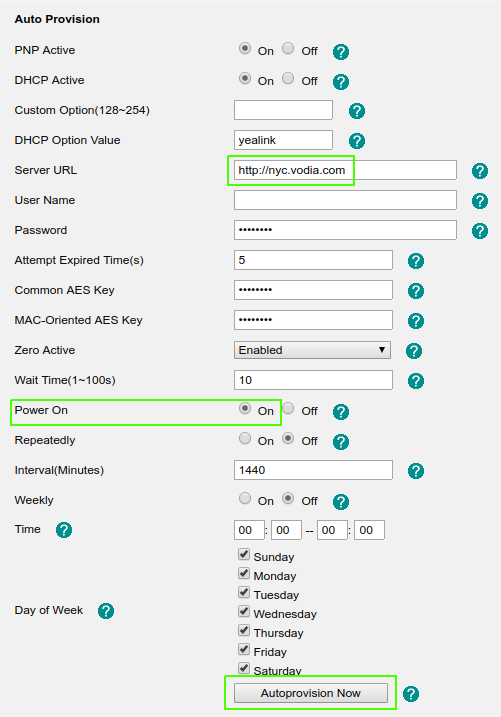
Log into the web interface of the phone and navigate to "Upgrade" > "Advanced". In newer models, it may "Settings" and "Auto Provision". In provisioning server, add the URL http://PBX_IP_OR_Domain_name.
-
Make sure that "Check New Config" is set to "Power on".
-
You don’t have to reboot the Yealink phones for provisioning, it is okay to save the information and then use the Autoprovision Nowbutton.
Yealink RPS / Auto Provisioning
Effective with PBX version 69.5.16+, the PBX now uses the Yealink RPS API V2. As part of this transition, Yealink now requires the Serial Number to be included when adding Yealink devices under the Device Management section of the PBX.
- Step 1: Make sure the PBX is publicly accessible.
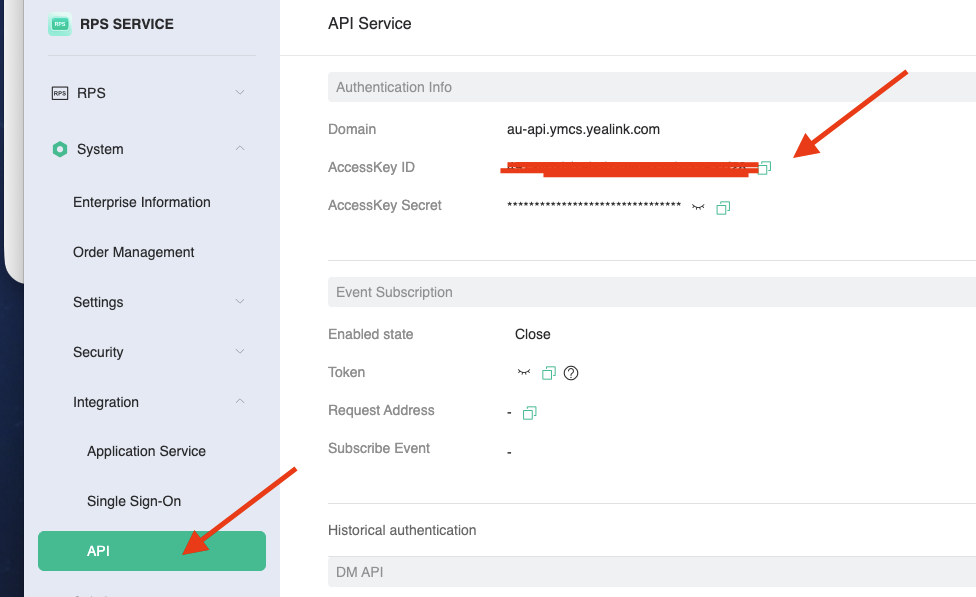
- Step 2: Get the API username and the API Key from the Yealink's RPS server's section to enter it on the PBX as shown below.
- Step 3: Make sure that the phone is factory reset before going further.
- Step 4: Map the MAC address of the phone to the PBX extension using Device Management.
- Step 5: The phone needs to reboot. If it doesn't do it by itself, manually reboot.
- Step 6: The MAC address along with the domain name of the PBX should now be seen populated in the RPS server. The phone should be fully provisioned and registered now.