IP Access Control
It is important for the stability of the system to control who has access to the network ports. This is controlled in the Settings → Security → Access page. There are several reasons why a system administrator might want to define who has access to the system:
- Protection against denial of service attacks: If you are operating the system on publicly available addresses, there is always the risk that someone will try to interrupt the service. Although the system has several protections against such attacks, it might be easier to rule out such attacks from the beginning.
- Limiting the service to authorized addresses: You might also want to limit the service to specific IP addresses only. For example, while you might allow users to register their IP phones in the office, you might allow only selected users with their associated IP addresses to register their phones from home.
Status
- Version 69
- Version 70
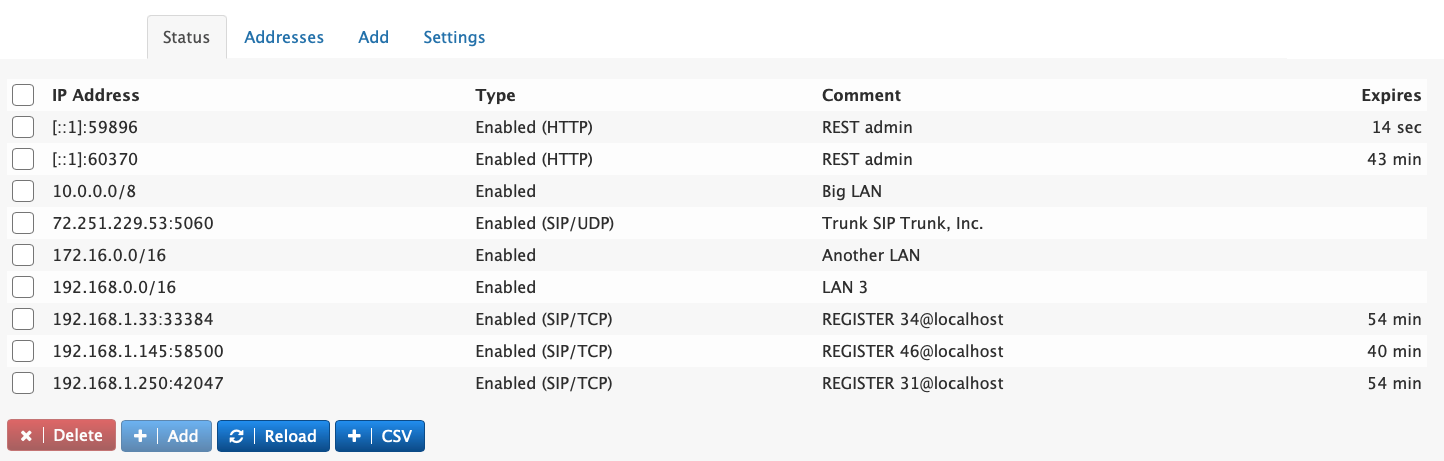
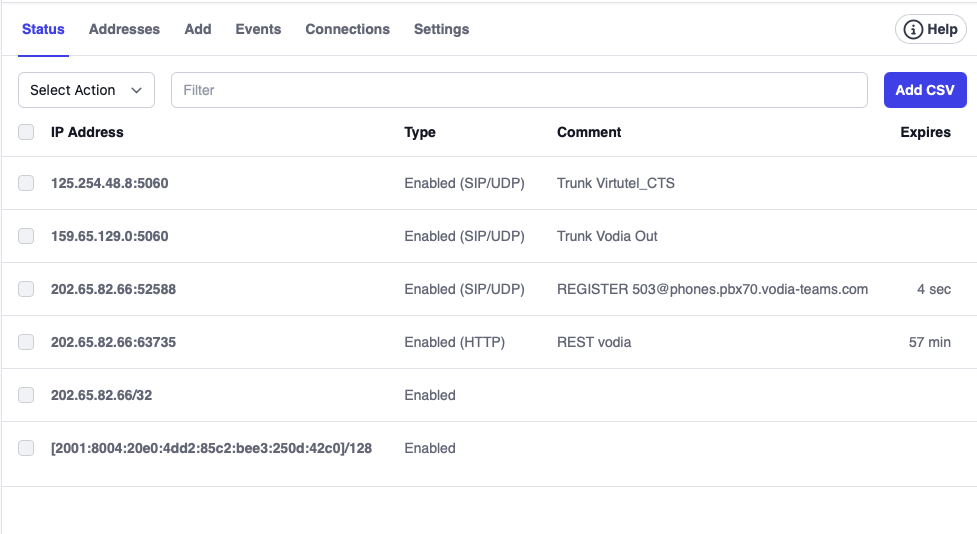
The status tab shows what IP addresses are allowed and which are blocked. When the system automatically blocks an address, it does that either for the entire address or for a specific port on the address. When manually enabling or disabling addresses, this can be done in a netmask basis, e.g. to enable a whole subnet. Automatic enabling or disabling is done one SIP or on HTTP basis (which includes protocols like LDAP and CSTA). Comments are either entered manually or are automatically generated by the system. For automatic entries, the system will show the duration that remains for the entry.
The delete button can be used to manually delete entries, for example because a entry was disabled during a false alarm. To permanently add a record that was automatically generated, use the add button. This will bring up the dialog where the administrator can also add a comment and further modify the add request (see below). The reload button reloads the table.
In order to import bulk addresses, the CSV button can be used. The format must be Address;Netmark;status;comment, where the netmask is the number of relevant bits (e.g. 8 for 10.0.0.0) and the status must be either enabled or disabled. When clicking on the CSV button the text field will show the currently loaded entries that don't have an expiration. This is useful for copy/pasting the content to another file. The CSV import will not delete any records, it will only add or overwrite records.
Addresses
- Version 69
- Version 70

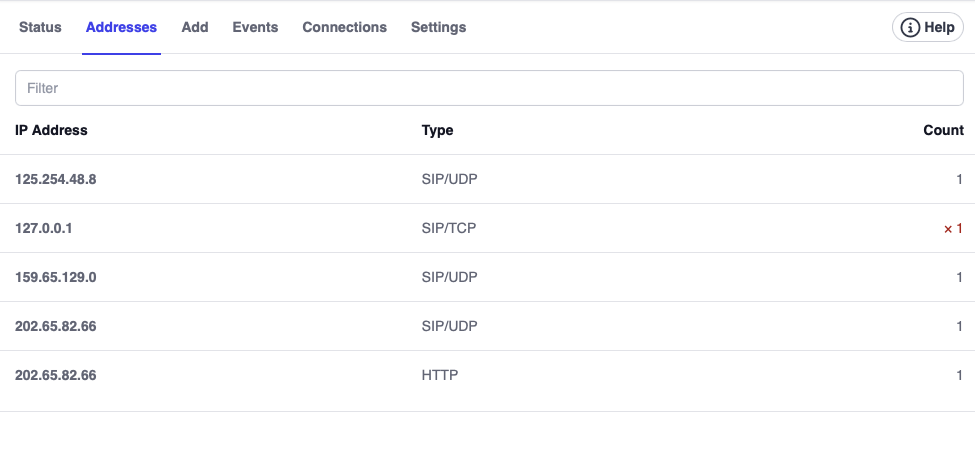
This tab will show what TCP connections were accepted by the system without authentication. This counter does not consider authentication attempts. This is critical information for keeping the system safe and may trigger the disabling of IP addresses (see below). TCP connections are counted with the value 1, TLS are counted with value 3 to reflect the extra efford for setting up the TLS connection.
Browsers tend to open multiple connections simultaneously. For example, when a browser opens 10 connections on HTTPS, the connection counter would increase by 30.
Add
- Version 69
- Version 70

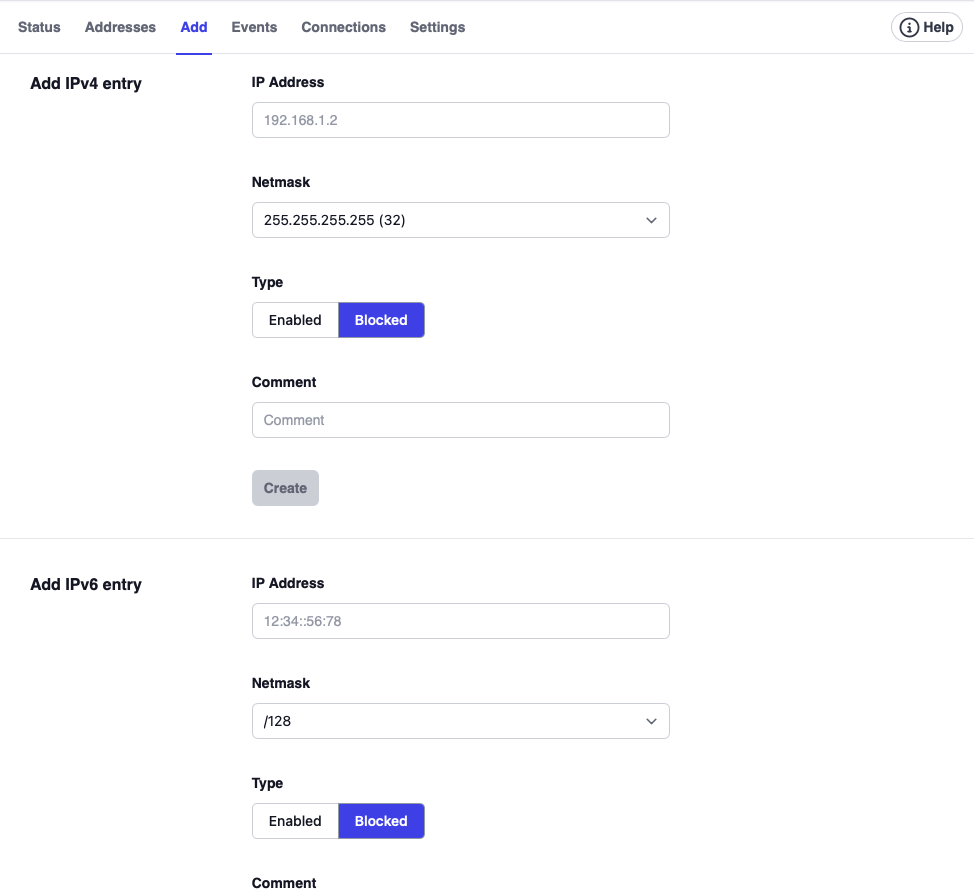
In order to manually add an entry, the add form can be used. There are two forms, one for IPv4 and another one for IPv6. Just enter the IP address, the net mask, and the access type, and click Create.
Events
The system keeps a log of events that caused the denying of access to the PBX. The table in the tab shows the events. A search field can be used to search for specific IP addresses.
Connections
The connections tab keeps track of the connections that were made to the PBX. The connection counts are measured in 6-minute intervals. A search field can be used to search for specific IP addresses.
Settings
- Version 69
- Version 70
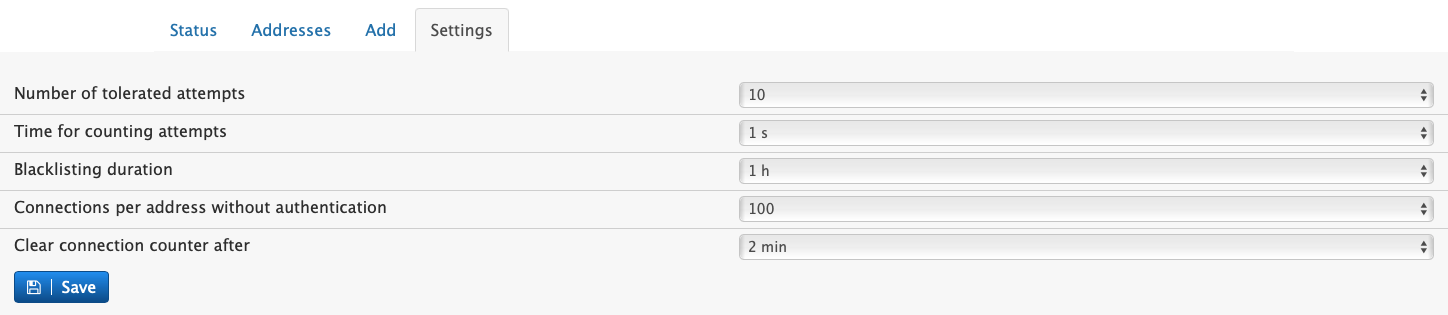
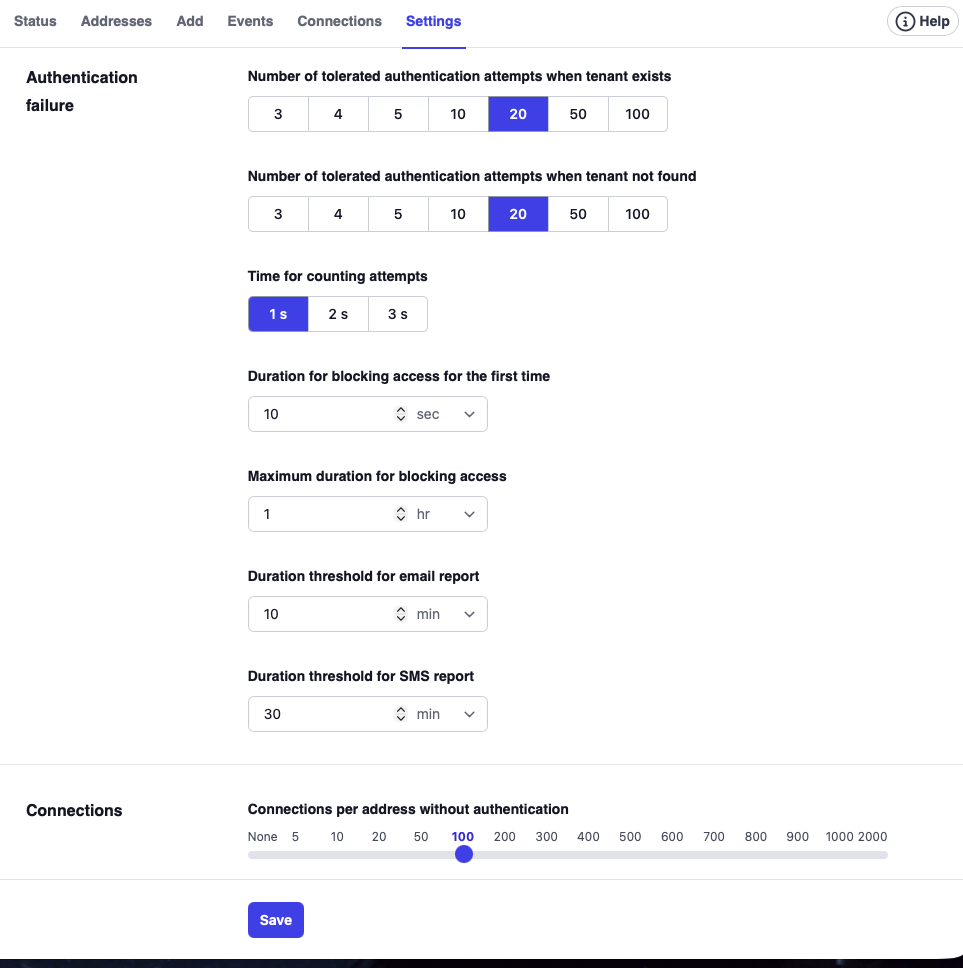
The following settings affect the enabling and disabling of IP addresses after a packet (e.g. SIP or HTTP) has been received by the system:
Number of tolerated authentication attempts when tenant exists: How many attempts one needs to give to the user to login into the system when the tenant address exists.
Number of tolerated authentication attempts when tenant not found: How many attempts one needs to give to the user to login into the system when the tenant address exists.
The tenant is acting like an additional password for accessing the PBX. Most scanners don't know a tenant DNS address, thus the number of tolerated attempts can be lower than for those who have the address.
Time for counting attempts: Time (in seconds) between which the attempts should be accounted for.
Duration for blocking access for the first time: When the system blocks access for an IP address for the first time, it keeps that block duration relatively short. This helps in case of false alarms to give the user shortly after a second chance without the need to open a trouble ticket.
Maximum duration for blocking access: If futher attempts fail, the system will double the duration for blocking the access until the maximum duration has been reached.
Duration threshold for email report: In order not to bother the administrator with short-lived blocks, this setting defines when an email should be triggered about the blocking.
Duration threshold for SMS report: The SMS duration can be different than the email duration. Because text messages to the administrators phone will be much more visible, this setting should have a higher value than for the email.
These settings control after how many connections the system will disable addresses:
Connections per address without authentication: This is the number of TCP connections made without authentication yet before the packet itself was received. Web browsers typically open a number of requests to download content as fast as possible without having authenticated yet. Because of this the threshold should not be too low, as this would trigger a false alarm.
Clear connection counter after: Clear the counter for the field mentioned above, after specific amount of time.
Duration for keeping access history: On busy systems, there can be a lot of connections. Because of this, the default duration for keeping the records is 24 hours. For extremly busy systems, this setting should be set shorter. For systems that get only casual administrative attention, the setting can be set to a longer duration.
More information on how it works
When a packet reaches the system, the system checks the list of enabled and disabled addresses for a match. If the request is ignored, the system discards the packet without answering. When the system checks the list for matches, a match occurs if a "source address" matches a "check address" with the mask. More specific addresses are checked first, making it possible to define exceptions to the general rule. Also, the system checks IPv4 and IPv6 addresses separately. If there is a match, the system checks for the type. If the type is Allow, then the system accepts the packet. If the type is Block, then the system blocks that request. If there is no match in the list, then the request is accepted. If the list is empty, the access control is disabled. This is the default behavior after the installation of the product.
For UDP-based requests, this is relatively easy—the request is just not answered. But because the UDP port is open, there is no ICMP request sent to the origin, which means if someone wants to attack the system, it might be possible for the attacker to figure out that there is an open port. But since the system just discards these messages, the damage is limited.
For TCP ports, the situation is more complicated. In Linux, there is no way for an application to determine where a TCP connection is coming from until the connection is accepted. This is why the system first accepts the connection and then examines whether the connection was allowed or not. If the connection was not allowed, then it is turned down immediately. In Windows, there is a special system call that first checks where the connection is coming from. If the source is not enabled, then the system does not accept the connection. However, because the operating system has already answered the TCP connection request with an acknowledge, in Windows it will be obvious that an application is running on the ports.
The behavior is to a certain extent similar to a firewall. However, especially for TCP, a firewall will be able to keep the traffic completely out. Someone testing the system out will not get any response back for a TCP request if the source IP address is not listed.
Example
The following table shows a scenario in which all users in the LAN are given access, but access from the public Internet is not allowed, except for an employee working from home and a trunk that comes from a service provider with a small range of IP addresses.
| Address | Netmask | Type | Description |
|---|---|---|---|
| 127.0.0.1 | 255.255.255.255 | Allow | This will ensure that you can always access the HTTP interface from the local computer. |
| 192.168.0.0 | 255.255.0.0 | Allow | This will ensure that everyone in the LAN can access the system. |
| 213.1.2.3 | 255.255.255.255 | Allow | This will give the remote worker access to the system. Repeat the same entry for other IP addresses. |
| 12.23.34.45 | 255.255.255.248 | Allow | This entry is intended for the IP addresses of the ITSP. |
| 0.0.0.0 | 0.0.0.0 | Block | This entry will disable all packets by default. |