Wasabi Object Storage
Overview
This guide walks you through configuring Wasabi object storage for call recordings with Vodia PBX. Once configured, all call recordings will be automatically stored in your Wasabi S3 bucket.
Wasabi Configuration
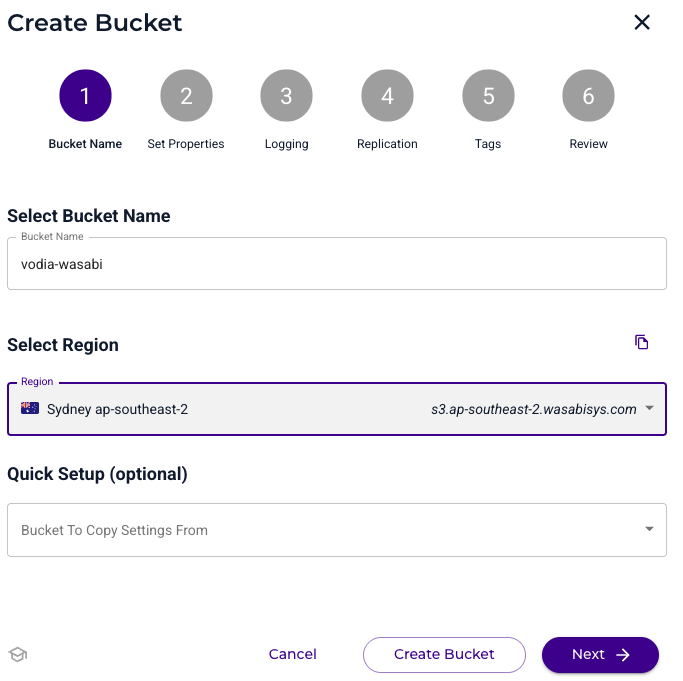
Step 1: Create a Wasabi Bucket
- Log into your Wasabi account and navigate to the bucket creation page
- Choose a descriptive, general-purpose bucket name
- Follow the bucket creation wizard
- Enable versioning and other settings as required for your use case
Step 2: Create an Access Key
- Navigate to the Access Keys section in your Wasabi account
- Create a new access key for programmatic access
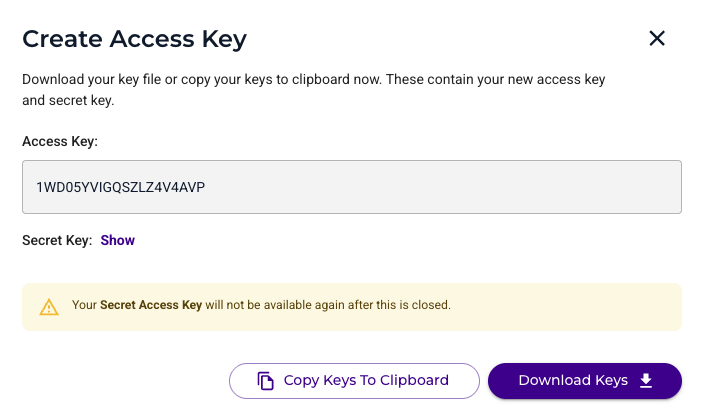
- Important: Copy and securely store both the Access Key ID and the Secret Access Key immediately - you will need these for the PBX configuration
Step 3: Record Key Information
Make note of the following information for later use:
- Wasabi bucket name
- Wasabi region where the bucket was created
- Access Key ID
- Secret Access Key
PBX Configuration
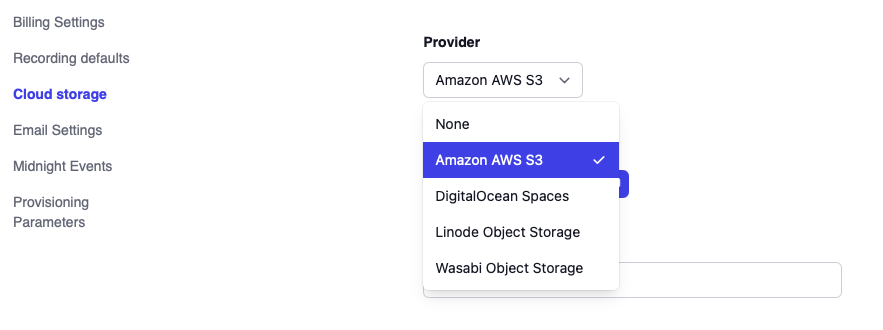
Step 1: Configure Cloud Storage Provider
- Log into your Vodia PBX web interface
- Navigate to the tenant's general settings
- Locate the Cloud Storage Provider settings section
- Select "Wasabi Object Storage" from the dropdown menu
- Version 69
- Version 70

Step 2: Enter Wasabi Credentials
- Enter the following information:
- Address: Your Wasabi region endpoint
- Access Key ID: The access key from Wasabi
- Secret Access Key: The secret key from Wasabi
- Set the File Access Type to Private
- Version 69
- Version 70
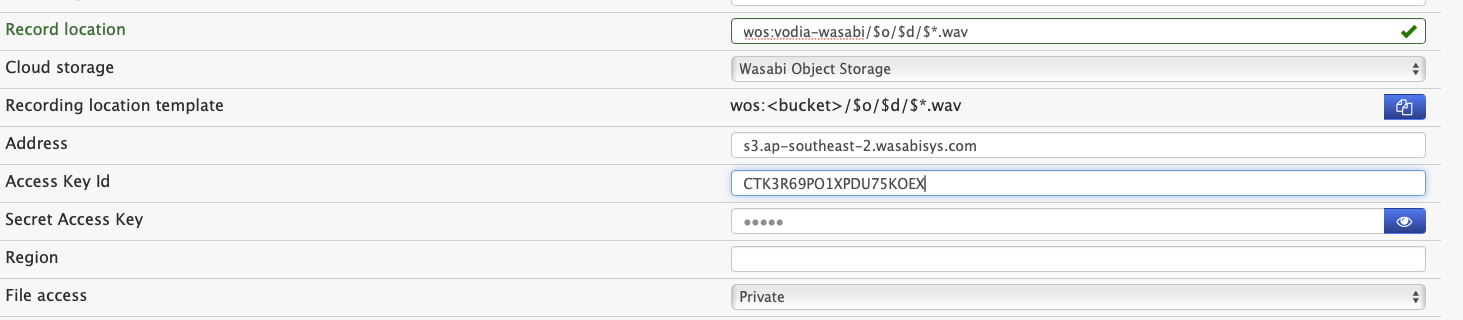
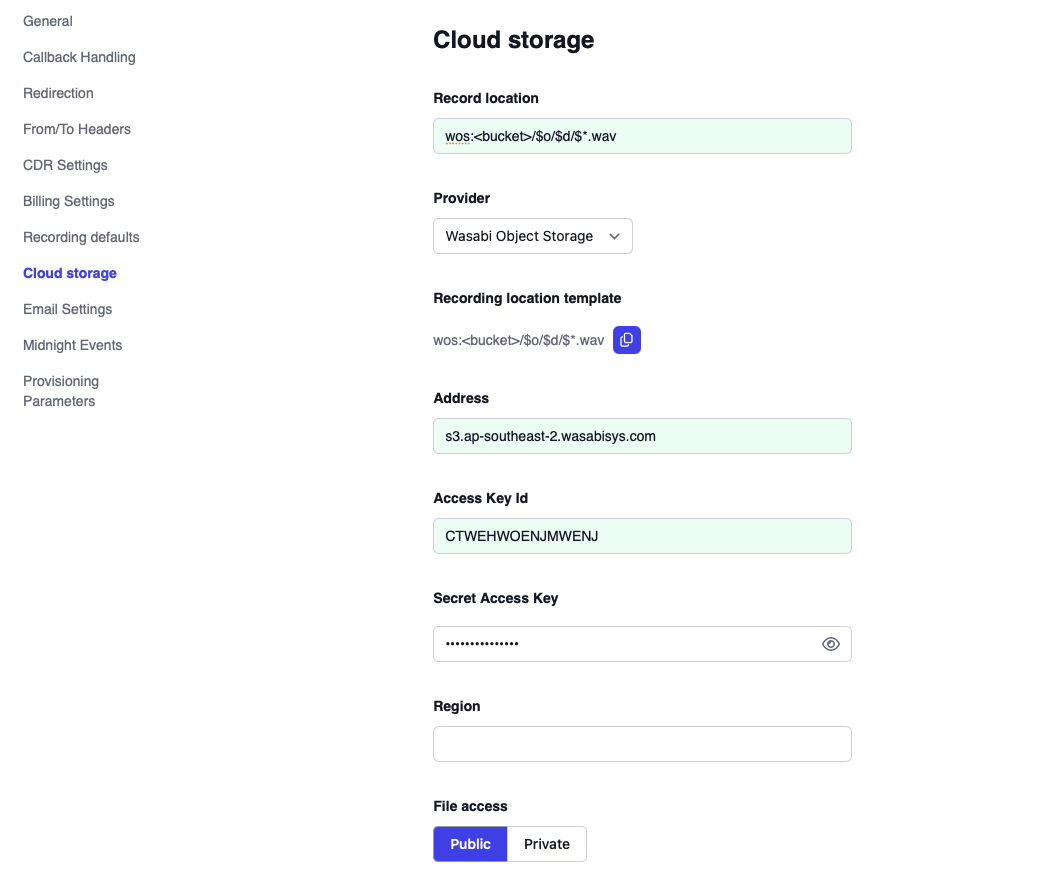
Step 3: Configure Recording Location
- Click the "Copy" button next to the "Recording location template" field
- Paste the copied template into the "Record location" field
- Important: Replace the placeholder
<bucket>in the "Record location" field with your actual Wasabi bucket name
Step 4: Test the Configuration
- Make several test calls with call recording enabled
- Log into your Wasabi account
- Navigate to your configured bucket
- Verify that the call recording files are being successfully uploaded
Recording Playback Access
To enable playback of recordings directly through the PBX web GUI, you need to configure network access for your Wasabi bucket.
note
Wasabi requires you to contact their support team to enable public access for your bucket. Then you can restrict file access to your customer's WAN IP address(es)