Connecting Branch Offices
This section describes how to connect two Vodia PBX systems so that calls from the first location to the second location will be routed through VoIP rather than through the local PSTN. This can be useful for calls inside the company where someone from the branch office 1 wants to talk to someone on the branch office 2; but it can also be used to use the branch office 2 PSTN gateway to terminate calls made from branch office 1. This can significantly lower termination costs, for example when the first office in one country and the second one in another. Two different scenarios are presented:
-
Two Vodia PBX telephone systems with "routable" IP addresses. Routable can be a public IPv4 or IPv6 address, preceived from the first office. It does not mean that the branch office must be visible to the entire internet; for example a firewall rule might limit the visibility to the first branch office. This model is also suitable for two systems on a private network with no NAT issues. Large organizations also use VPN to establish the same effect.
-
Two Vodia PBX telephone systems: A head office site and a remote site that neeed NAT traversal for the remote site. In this case the only way to reach the branch office is through registering a trunk from the branch office to the head office.
Using a Gateway Trunk
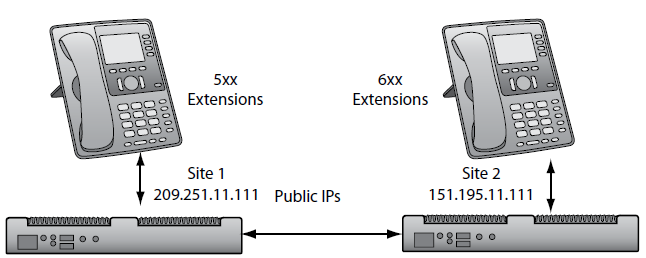
SIP gateway trunks are the best method for connecting two Vodia PBX telephone systems, as long as both systems either have routable IP addresses or are on a private network with no issues with NAT. Likely candidates for this configuration are the classroom environment and organizations with a large private network (as long as the system has an interface directly on a public IP address). The image below shows two remote sites connected by two gateways. Callers from either system can dial the other system using four-digit dialing.
Create a trunk for each branch office, using the instructions that are shown below.
Branch Office 1
- From the Type dropdown, select SIP Gateway.
- Enter the IP address into the Domain field:
- Version 69
- Version 70
Branch Office 2
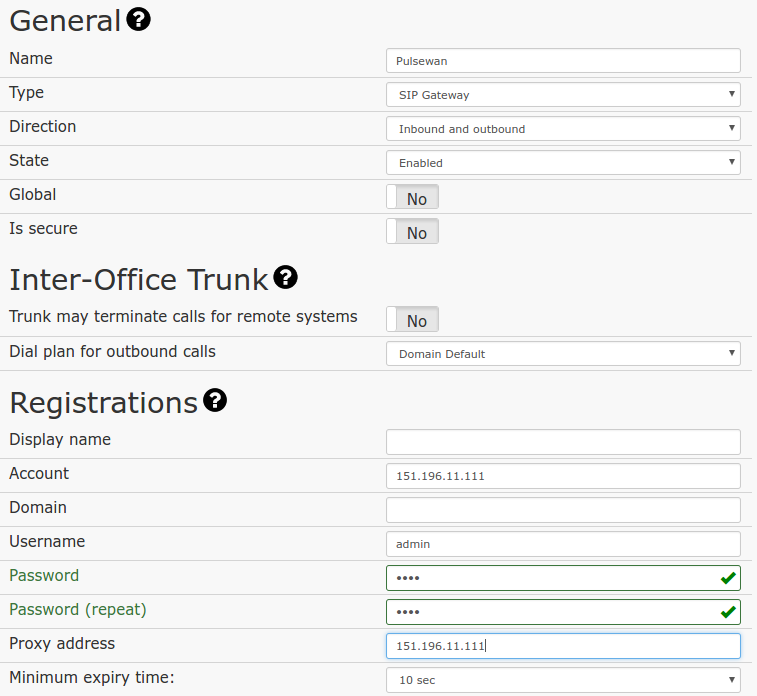
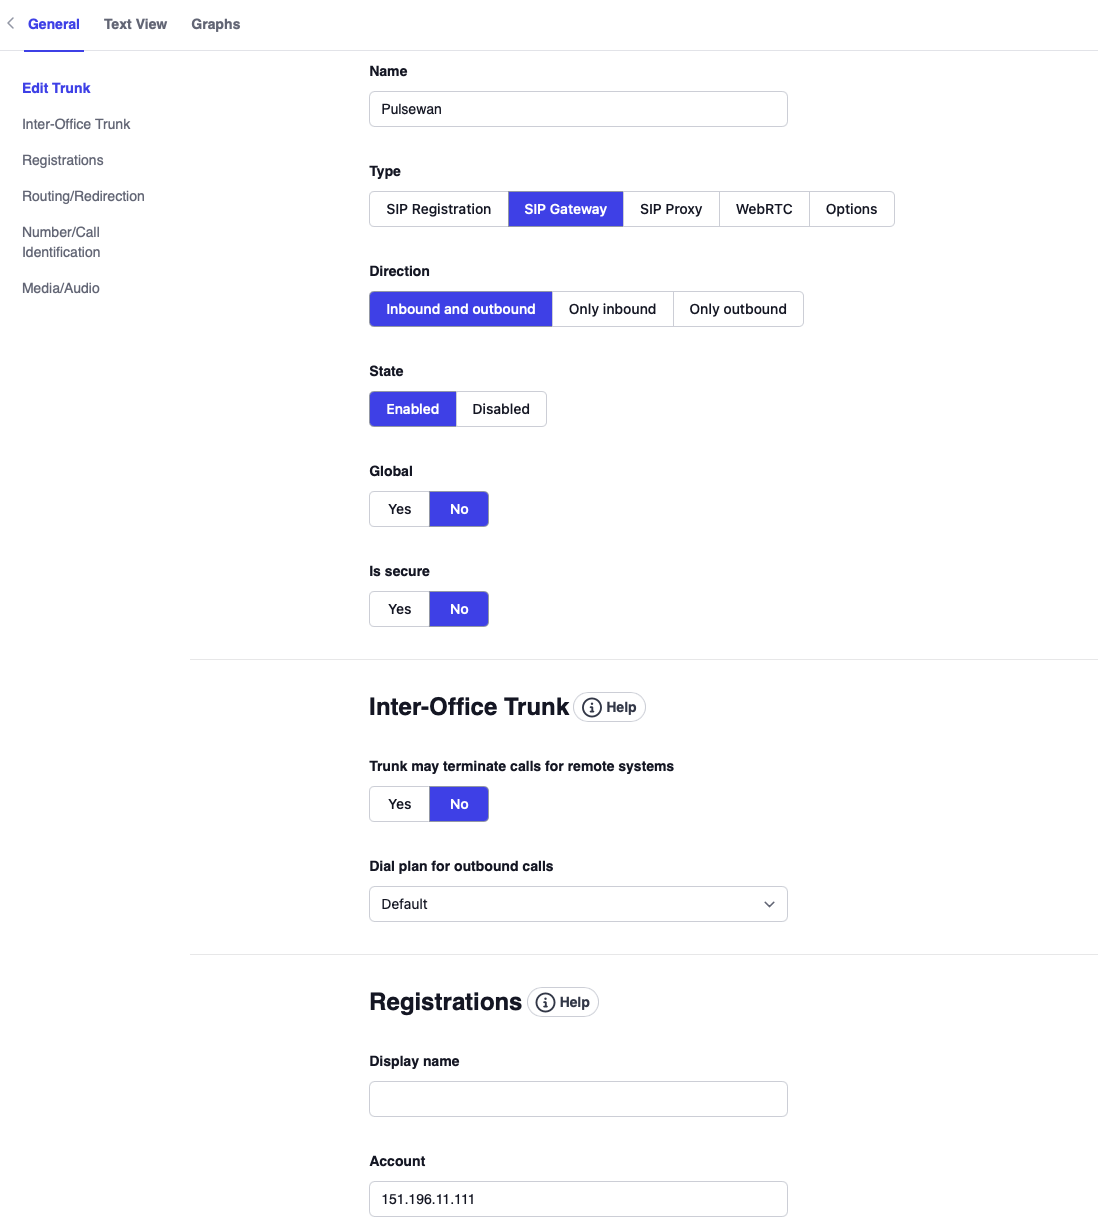
- From the Type dropdown, select SIP Gateway.
- Enter the IP address into the Domain and Outbound Proxy fields:
- Version 69
- Version 70
-7697ad39040acdf63605c96357fa86e5.png)
-v70-d2b7776b805927c8f44ee96e4215f5b4.png)
You then need to enable the Inter-Office Trunk (Trunk may terminate calls for remote systems) and select a dial plan that will be used when the called number is not available on the branch office 2 system.
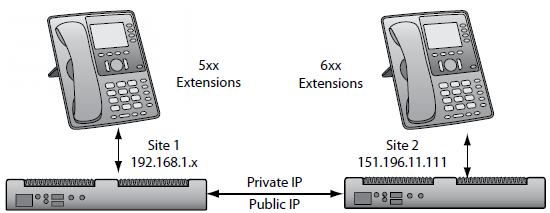
Using a SIP Registrations Trunk (SIP Tie Line)
The SIP registration trunk can be used to connect two branch offices when one of the offices has a private IP address. For example, a corporate head office has a pubic IP address, and a remote branch office has only one public IP address and requires that the system be on a private address but still wants to have connectivity back to corporate.
Branch Office 2
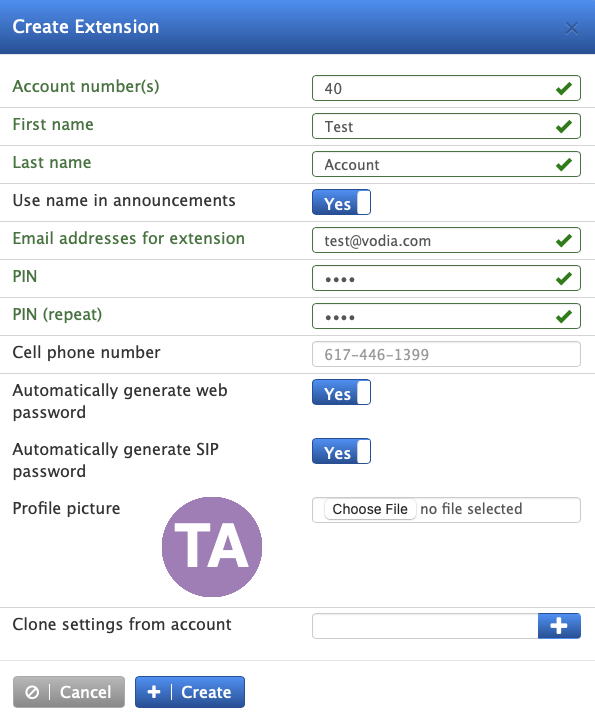
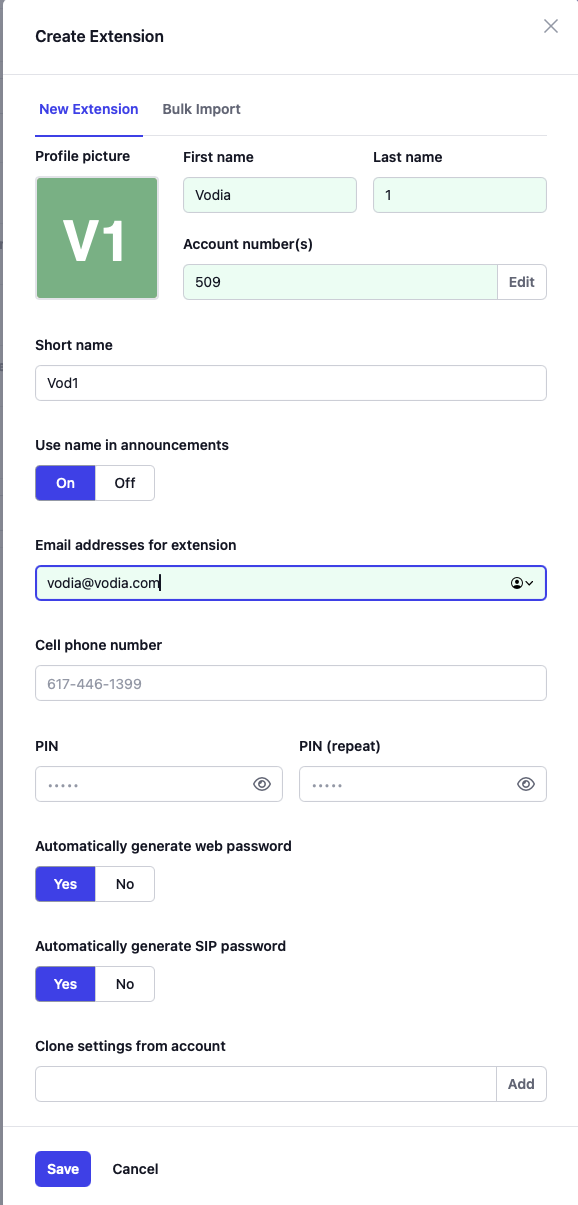
- Create an extension that will be used by the trunk to route the calls:
- Version 69
- Version 70
Branch Office 1
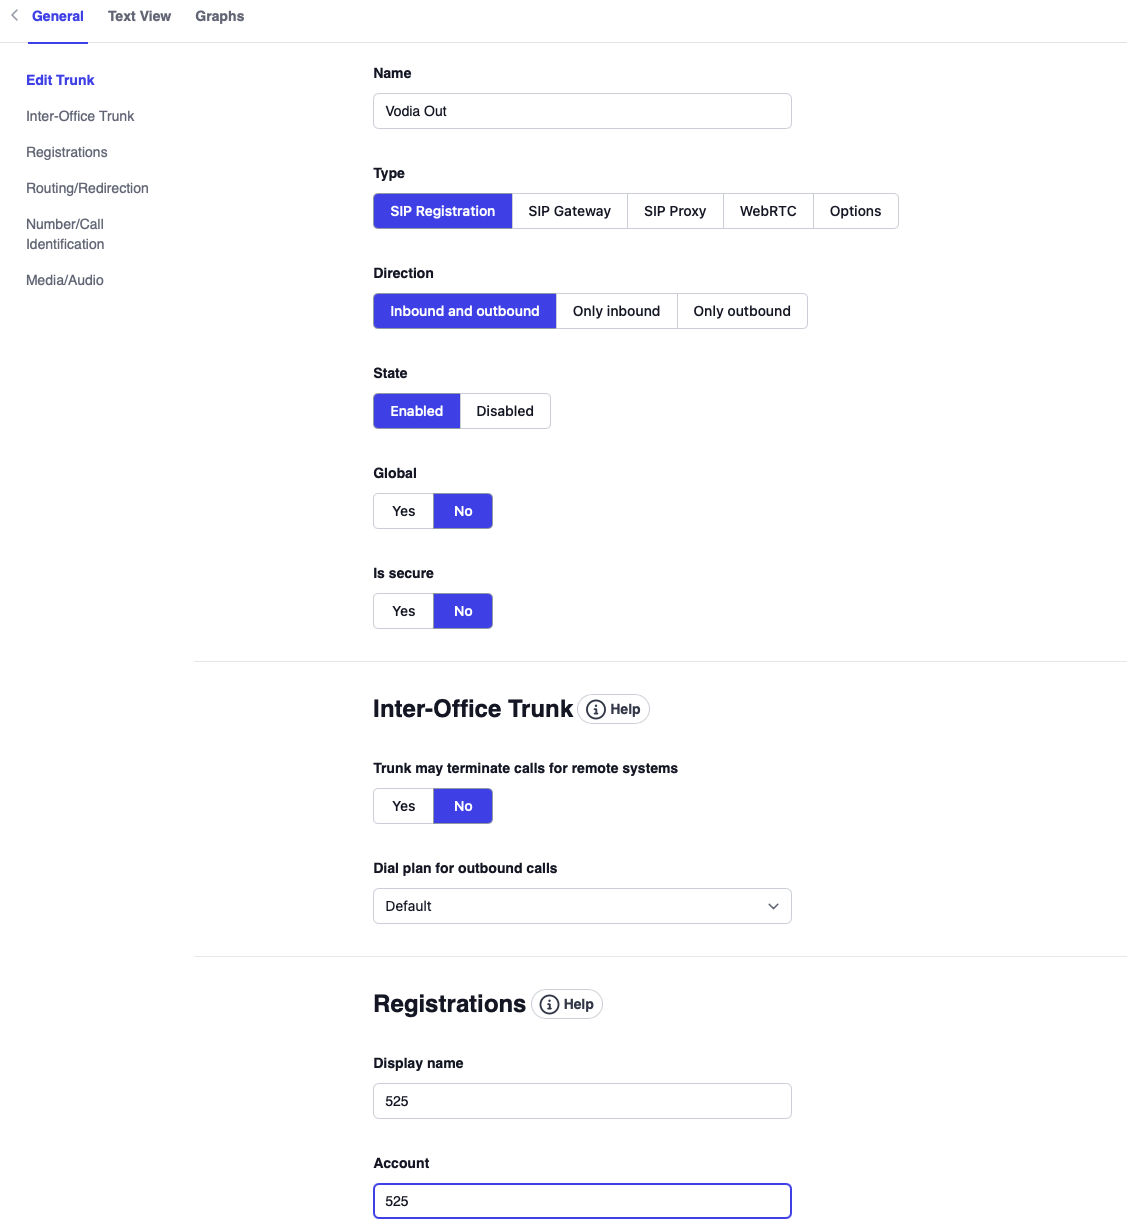
- Create a SIP registrations trunk for the branch office, entering the extension that will be used to route the calls (e.g., 525).
- Version 69
- Version 70
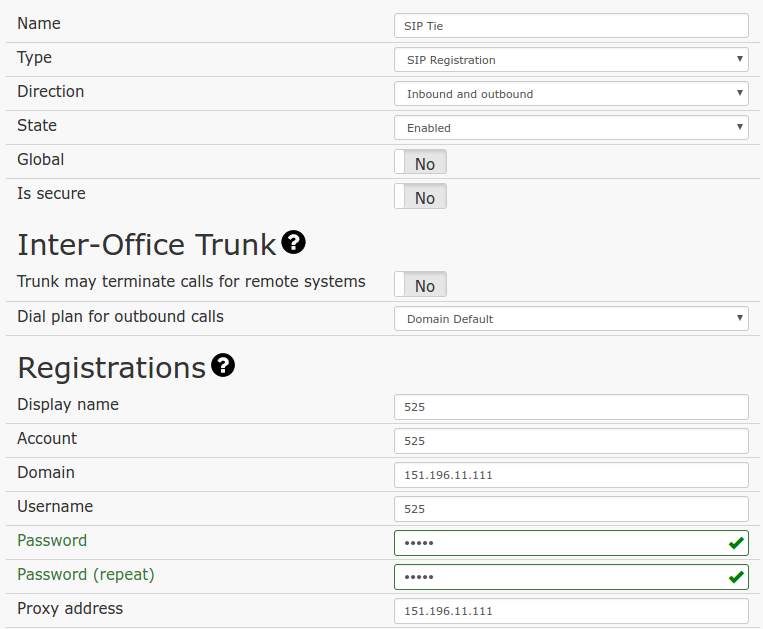
Don't forget to set Trunk ANI to 525 in the trunk settings.
Once the offices have been connected, the headquarters will need to dial the extension that the trunk is routed to. Once the call hits the branch office, it will be sent to the auto attendant so that the headquarters can dial the remote extensions. The trunk has to register to the extension just as a phone would, so the system at the branch office will need to register the trunk to the system at the headquarters, the same way an ITSP would need to be registered. Then anyone in the world can dial the DID, much like they would dial that extension.
Calls from Site 1 to Site 2
To make calls from Site 1 to Site 2, you must add a dialplan to route, for example, all calls to 6xx through the Branch office trunk. For example you would have 9* as pattern and * as replacement and trunk set to the Branch office trunk.

Calls from Site 2 to Site 1
To make calls from Site 2 to Site 1:
- Create an auto attandant on Site 1, for example with number 500.
- Send all calls coming through the "SIP Tie" trunk to number 500 (by setting "Send call to extension" to 500 in the trunk's settings).