Nexxtra Registration Guide
Nexxtra Registration Guide
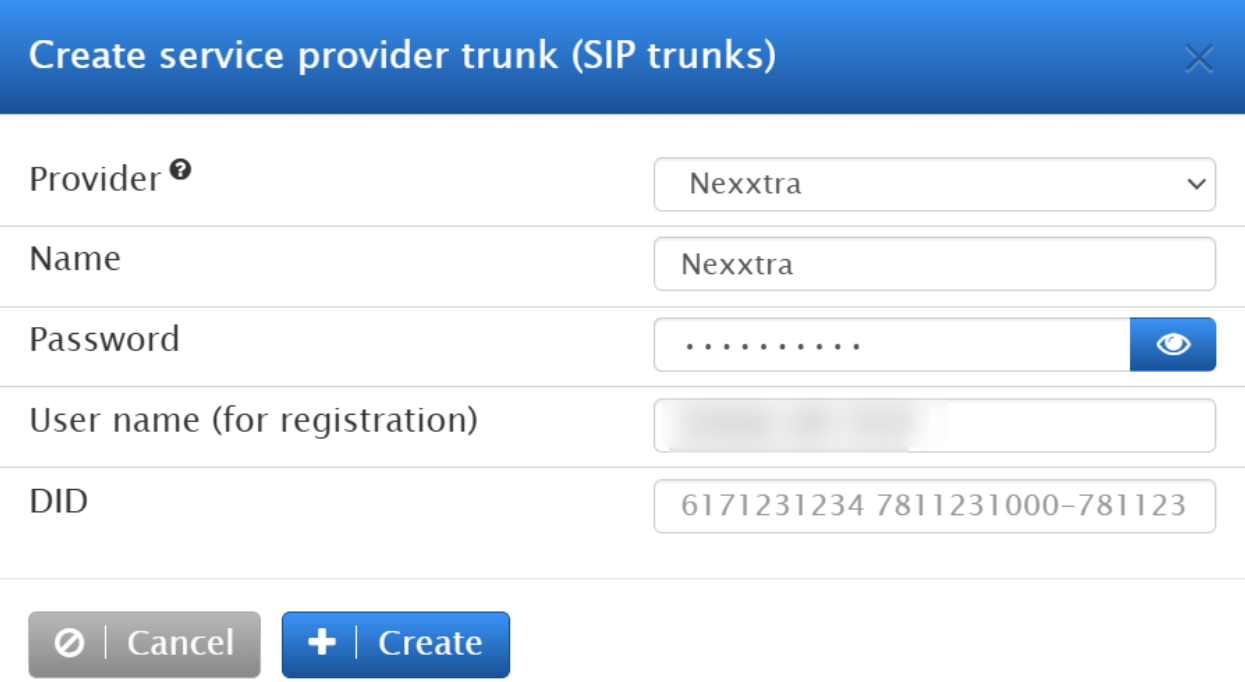
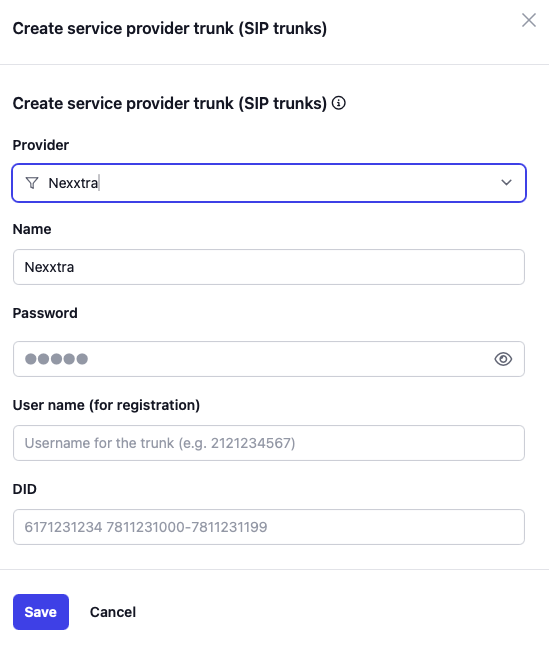
In this short setup guide, we shall walk you through how to register your Nexxtra SIP Trunk on the Vodia PBX. To get started, log in to your tenant administration account. Navigate to Trunks >> SIP Trunks and click Add. Find Nexxtra on the SIP Trunk list. Now fill in the username and password that was given to you by Nexxtra:
- Version 69
- Version 70


Click Create.
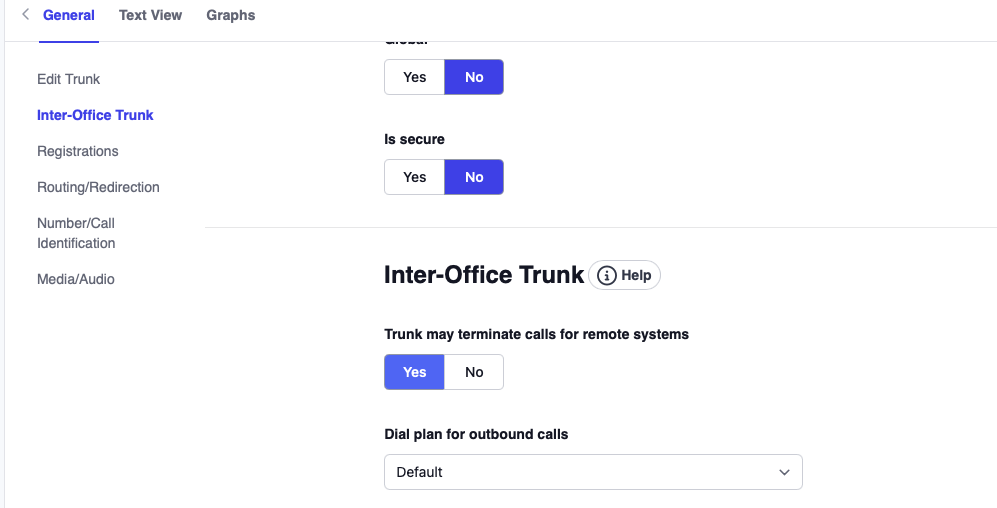
In most cases you can remove the Proxy address and should not need it. If you do need it - it is sip:sip.calls.login-service.com. Ensure that in the Inter-Office Trunk settings, you have selected a Dial plan that you have created for your Nexxtra Trunk. If you have not made one, save the settings and navigate to Dial Plans and add a new plan for your Nexxtra SIP Trunk.
Once done, enter the SIP Trunk settings again, and change “Dial plan for outbound calls” to your newly created dial plan:
- Version 69
- Version 70


Lastly, scroll down to Media/Audio and ensure that the active General codec preference is correctly set to G.711A automatically. Save the settings and confirm that your trunk is registered.

Now you can start making and receiving calls on your Nexxtra trunk!