TAPI Service Provider (TSP)
This is a legacy feature and is no longer supported
About
The Vodia TAPI service provider (TSP) allows you to control the Vodia PBX conveniently from Microsoft Windows applications that support the TAPI API. Examples include Microsoft Outlook, the program "dialer.exe" that comes with Windows and other programs that use the TAPI API to have a unified access to the telephony subsystem, such as many CRM tools. The Vodia TSP supports in version 3.0.1 only the initiation of outbound calls and the disconnect of such calls. This provides the most popular application, "click to dial" from Windows applications, so that you don't have to copy numbers from the screen to your phone. Other features might follow in later versions.
Version 3 of the TAPI service provider requires PBX version 69.2.3 or later.
Installation
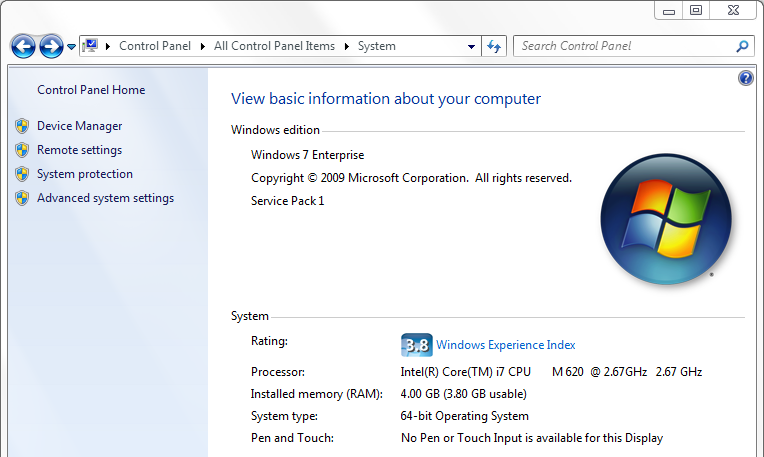
The Vodia TAPI service provider comes in two flavors: 32 bit and 64 bit. First you must check if your system is 32 bit or 64 bit. You can do this by checking the system properties from the Windows control panel, check the System type:
 The software is available for download from the following locations:
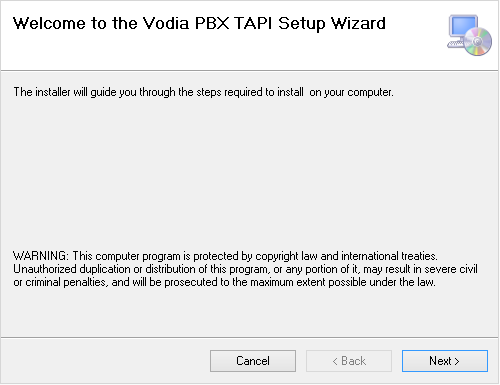
After double-clicking on the setup.exe file in the distributable, you will see the welcome screen:
Clicking on theNext button will take you to the license agreement:
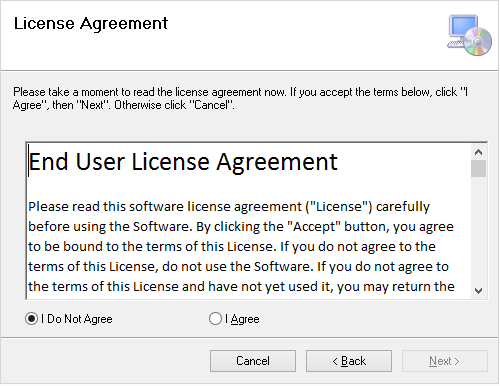
You will have to agree to the license agreement in order to be able to use the TSP. Using the scrollbar, you can read the contents of the agreement and then accept it with theI agree button. After this, you can click next to get to the next screen:
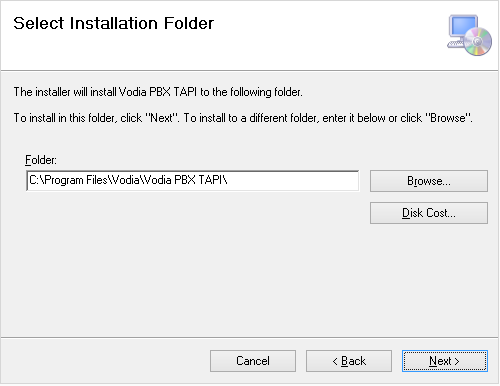
The installer proposes a standard location for the TSP. If you like to change it, you can do so with theBrowse button. You may also check how much disk space you will need; however the required space is small, so this should be not an issue. After clicking the "next" button, you'll get to the confirmation screen:

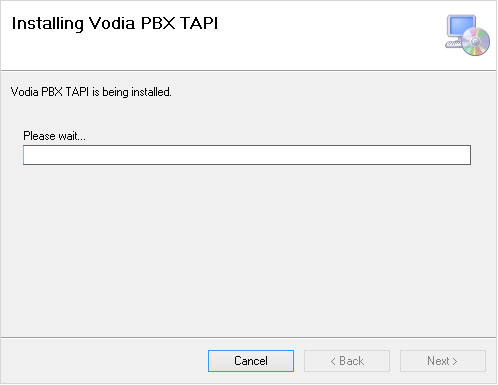
After you click theNext button here, the installation will start. You will see a progress bar that shows you how much of the installation is completed. The installation should just take a few seconds.
After the installation was done successfully, you will see a final confirmation dialog:

If you are using Outlook in Office 365, you need to manually enable using TAPI. More information about this can be found for example at community.office365.com.
Depending on your version of Windows, you might have to manually allow the TSP to access the registry. The location is Computer\HKEY_LOCAL_MACHINE\SOFTWARE\Vodia\tapi.
Connect to the PBX
After you have installed the TSP, you have to set up the connection to your telephone system (PBX). In order to do that, you have to use a TAPI program that offers you the configuration dialog for the TSP in your system.
For example, you can use the program "dialer.exe" to do this. Please run this program as administrator, so that when you save the settings they are actually written to the file system. You can run the program as administrator when you right-click on the icon in the start menu and select the "Run as administrator" option.
In the menu bar, select "Tools", and then "Connect Using...". The following dialog will appear:

In the Line dropdown list, you should see "Vodia PBX". Select it and then click on "Line Properties". This will get you to the configuration dialog for the Vodia TSP:

You need to fill in a few settings for your account:
The username is the name of your extension. Typically, this is a 2, 3 or 4-digit number that colleagues dial when they want to reach you from another phone.
The password is the web password for your extension. This is the password that you use to log into the web interface of the telephone system. Please note that this is usually different from the password that you use to register your phone using the SIP protocol. You have to enter the password twice to make sure that there is no typo in the password.
The domain name is typically the name if your organization or unit. You have received this name with your username and password. The domain correspondents to the second part of an email address, for example, 6179@company.com. If your telephone system has only one domain and your system administrator has included the name "localhost", you may put here as well the name "localhost".
The address of the PBX is the IP address or DNS address of your phone system. This might be the same as the domain name, but typically it is just an IP address like 192.168.1.2 or a name that can be resolved to an IP address using the DNS protocol. The TSP uses that address to locate the server in the Internet or LAN.
The port number is needed to connect to the right port on the server. The TSP uses the HTTP ports for the message exchange with the telephone system. For encrypted traffic, the default port number is 443; for unencrypted traffic it is 80. Your system administrator might have chosen different ports for you.
By default, the PBX will encrypt the traffic between the PC and the server. If your server does not have a valid certificate, you don't want that or for whatever reason encryption is not available on the server, you may turn it off. Then you have to check the port setting as well and make sure that the TSP connects to the right port.
For your convenience, you may instruct the PBX to automatically connect the call on your side of the outbound call. This way, you don't have to press any additional button on the phone device and the phone call will start right away. This feature is useful when you are regularly using headsets. It works only if you have exactly one phone registered with your extension.
On the bottom right of the screen, you see the version number of the TSP. After clicking the Ok button, you will be taken back to the line dialog. If you open the dialog again, you should now see your extension number below the line text as shown in the next screen shot:

After this, you should be able to use the TSP.
Uninstallation
In order to uninstall the TSP, you can use the standard Windows procedure to uninstall the software. You can do this by opening the Windows control panel, then select "Programs and Features", locate the Vodia TSP and select "uninstall" with the right mouse button. A dialog will guide you through the uninstallation procedure.
Troubleshooting
The TAPI service provider will follow the log level for CSTA and send messages to the which will the show up in the tenant and system log. This will help understand the inner workings of the TSP and provide clues what might be wrong.
Registry
The Vodia TSP stores the settings in the registry of the system. You may use regedit.exe to review the settings. You'll find the settings under Computer\HKEY_LOCAL_MACHINE\SOFTWARE\Vodia\tapi. Apart from the fields described above, the registry also contains additional invisible settings that you may use to troubleshoot problems. The settings are only read when the TSP is loaded into the system. You might have to restart your TAPI application to take setting changes into effect.
The logfile setting can be used to instruct the TSP to write log messages into the designated location. A typical value would be c:\vodiatsp.log.
The loglength limits the number of messages that are being written to the file. This settings makes sure that after a successful trouble shooting session, you are not filling up the file system with log messages.
The loglevel controls the message detail level. The settings may contain values from 0 (which means no messages are being written) to 9 (which means that all possible messages are written).
Checking what TSP are installed The Vodia TSP comes with a program installer.exe, which is put into the installation directory of the TSP. This directory is set during the installation of the TSP:
- If you call this program without any arguments, it will attempt to register the Vodia TAPI service provider.
- If you call it with the argument
/Uninstall, the installer will attempt to uninstall the TSP. - If you call it with the argument
/Listit shows you which TSP are registered with the system.