Counterpath Provisioning
![]()
With a click of a button, you can easily set up a CounterPath account through Vodia PBX which will automatically register with the PBX, so you can make and receive calls from the PBX using the CounterPath Bria Stretto App.
But before that, you have to take a few simple one time steps for setup.
Initial Steps
-
The PBX has to be reachable. It must have a public IP or DNS name, and its SIP ports for signaling and RTP should be reachable publicly from the Stretto server.
-
Get an account from CounterPath (license which allows a number of users according to your needs). They will create a group for you (usually the company name .com e.g. company.com) in their system with the profile you selected, and give you a username and password for that groups Stretto API (these credentials are for the API and not the Web GUI login). So now, you have the group name, username and password.
-
Put the username, password and group name in the CounterPath settings in the PBX admin mode under Devices->settings RPS page as shown:
- Version 69
- Version 70


-
Make sure the email server for the PBX is set so that it can send out emails.
-
Make sure the email address of the user (extension in PBX) for whom you want to activate the CounterPath account is set.
Activating CounterPath Account for an Extension
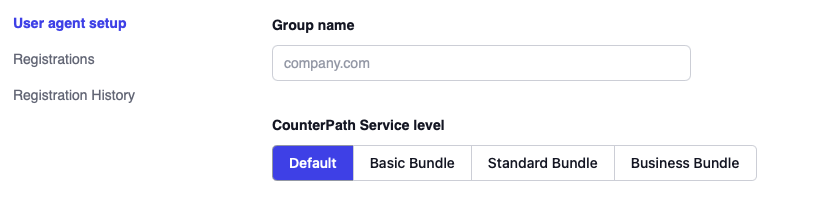
You are just a few clicks away. When you turn on the CounterPath account for a particular extension (under registration) as shown below. You will need to set the group name and select CounterPath service level.
- Version 69
- Version 70

An email should be sent to that user (make sure his email is set), where he/she will receive the username and password for the Bria Stretto App. The user can enter those credentials in the Bria Stretto App login screen to enter. That should be it.
Using that, the user should be able to make and receive calls from the app.