Windows installation
Download the Software
The Vodia PBX runs as a Windows service. The service is called "Vodia PBX" and can be started and stopped through the service manager. The PBX generally runs on a large number of Windows versions. We recommend using a recent Windows edition, however even older versions back to Windows XP might be working. The PBX requires the 64-bit version of the Windows operating system.
To make the installation easier on Windows there is an installer program. Before installing the software, you have to download a copy of the installer package. The current location is https://portal.vodia.com/downloads/pbx/win64/pbxctrl-v69.5.9-64.zip.
If you previously had installed an older version of the PBX, please make sure that you uninstall the PBX and the PBX service (see below for troubleshooting). If you need to update the PBX, you don't need/should not use the installer. You can update the PBX through the web interface of the PBX.
Installing
For newer versions of Windows, you will have to run the setup.exe program as administrator because the system will need permissions that go beyond the logged-in user's permissions. For that, click on the right mouse button and select "Run as administrator".
After starting the setup.exe, perform the following steps (the images might differ slightly from version to version):
- Open the downloaded file and double-click
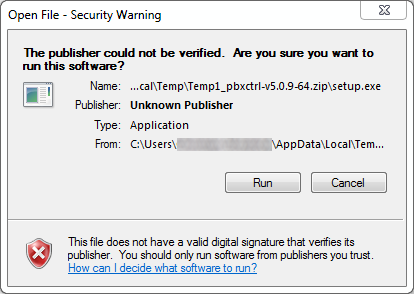
setup.exe. You will see a window that warns you about the signature of the executable (see the screenshot). At this moment, the Vodia PBX does not use a signature; this feature might be added at a later point in time. - Click on Run.
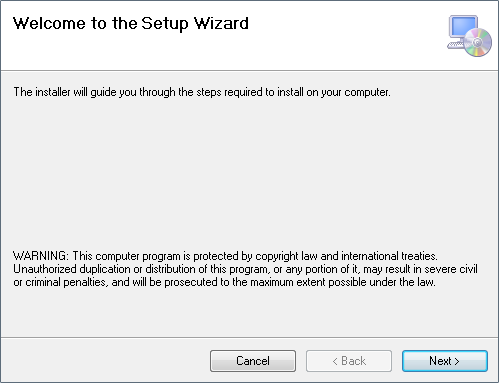
- The setup wizard will appear.
- Click on next.
You need to decide where to install the PBX. The setup wizard will propose a standard location, which is reasonable in most cases. Keep in mind that the PBX will put the configuration into the same directory. Especially if you intend to record phone calls, you need to make sure that this directory has enough space left or choose a different location. Usually, you want to make sure that everyone can use the software. This is a requirement if the service should be run by the administrator.

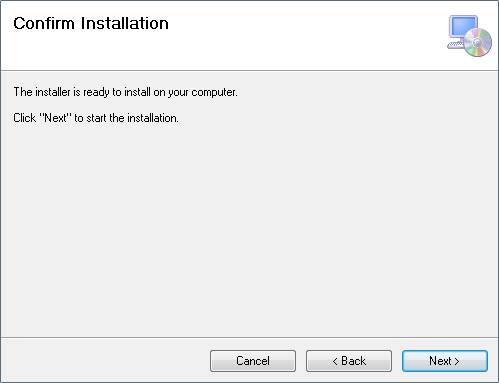
Then you will have to kick off the installation process with the Next button. You will see a progress bar that shows you how much progress the installation has made so far. The installation should take just a few seconds on a modern computer. You will also see a short command window showing up this will take care of the installation of the service.
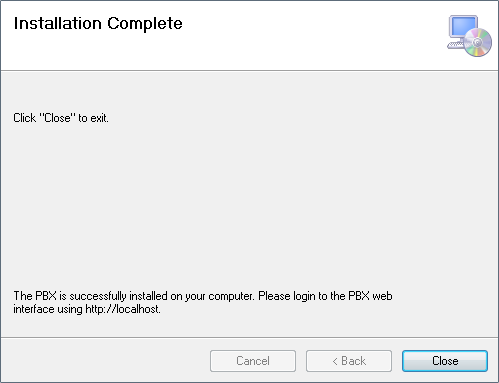
After some time, you see the confirmation screen. This means that the service has been installed. You should now be able to log in and start configuring the PBX service. Click here to see the instructions to log in.
We recommend that you reboot the server after the initial installation. This will make sure that everything will come up automatically in case you have to restart the server. It will also make sure that there is only one PBX process running on the server.
Configuring the Windows Firewall
In Windows, you must configure the Windows Firewall to allow the PBX process. Depending on the Windows version, the best approach is to grant access to the pbxctrl.exe process to access the network on all ports. Depending on the firewall in use, it might be necessary to re-enable this after the software update of the PBX.
Configuring the Windows Defender
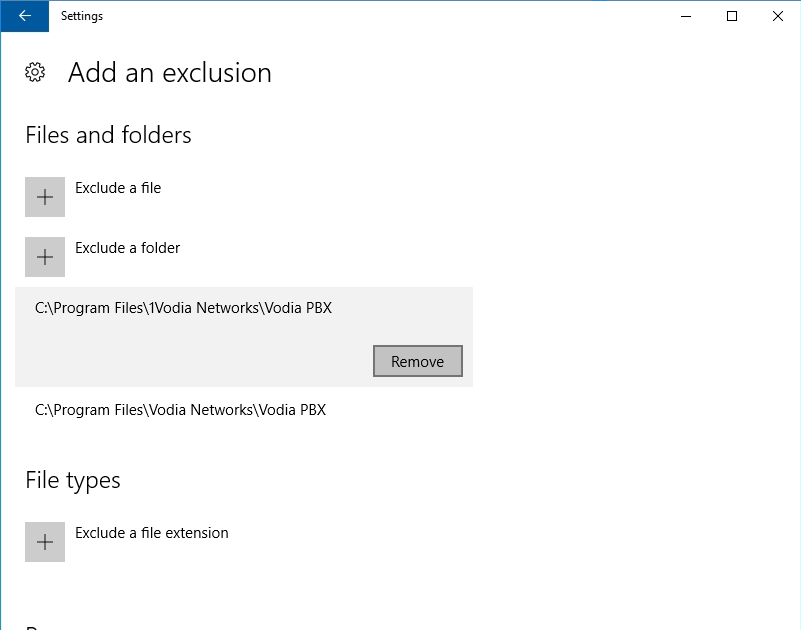
Windows Defender is a built-in antivirus and anti-malware software that comes with the Windows operating system. if this is active you will need to add the Vodia working directory as an exclusion to the Windows Defender interface.
Add Exclusions Scroll down to the "Exclusions" section and click on "Add or remove exclusions".
Add an Exclusion: Click on the "Add an Exclusion" button. Choose the type of exclusion you want to add (File, Folder, File type, or Process). Add the Vodia folder, which should be C:\Program Files\Vodia Networks\Vodia PBX
Troubleshooting
If you cannot log in to the service, check the following items:
- Is the PBX process running? You can check this using the Task Manager (taskmgr) that comes with Windows. Click on the Processes tab in the Task Manager and search for pbxctrl.exe. If the process is not on the list, try starting the PBX manually. For this, change the directory to the working directory of the PBX and start the process with .\pbxctrl.exe --version. It should print the actual version. If not, you might be running the wrong version (32 or 64-bit) or run the PBX on an operating system that does not support this build of the Vodia PBX.
- Is the web interface available? If the process is running, but you cannot access the web interface, you can use the netstat program to check what ports are open on your local system and identify what program is using the web server ports and what ports the PBX has opened.
If you have to uninstall a previous version of the PBX, please use the "remove program" utility on Windows to install the PBX. Also make sure that the service has been unregistered. You can do this with the command line sc delete PBX or sc delete "Vodia PBX", respectively. If you remove the service from the command line, you will typically have to restart Windows so that this takes effect.
If you cannot start your PBX manually, there might be DLL missing. In that case, try to download the Opus DLL and the runtime DLL and put them into the same directory where the pbxctrl.exe is. Please be careful with the runtime DLL as this is a common backdoor for malware.
If your PBX runs on a server where neither port 80 nor port 443 are available, you can edit the pbx.xml file and change the ports. This will require a restart of the PBX service.
Installing Window's on an AWS Instance
Vodia's IP PBX is compatible and ready to install on the AWS (Amazon Web Service) server for the IP PBX server running a Windows Operating system. The step by step installation procedure, configuring the firewall, setup the IP Routing list (for two way audio fluency) and adding the license and getting the PBX ready to go has been explained in great detail in the following video tutorial. After using the AWS installaton template be sure to check for software updates, because this template is not updated with every release. The Vodia PBX also runs on other cloud servers running the Windows operating system. If that server is running on a private IP address like in the AWS example, you will have to follow a similar approach on exposing the PBX to a public IP address.
Next Steps
Most hosting environments provide convenient wys to generate daily backups of the virtual machine. It is highly recommended to take advantage of that and get familiar with restoring a backup.
It takes just a few steps to generate file system backups and store them outside of the hosting environment. Especially after major changes in the configuration this takes just a few minutes. Please consult the backup documentation here.