AWS Vodia Prepaid Offer
AWS Vodia Prepaid Offer
This guide provides step-by-step instructions for deploying the Vodia Prepaid PBX on Amazon Web Services (AWS). The deployment process involves subscribing to the marketplace offering, configuring the software, and launching an EC2 instance with the proper permissions. Find Vodia's Prepaid offer on AWS marketplace here. This offer includes multiple plan options and each PBX build comes with the appropriate license pre-installed.
Essential Prerequisites
- Active AWS account with appropriate permissions
- Understanding of EC2 instance management
- SSH key pair for instance access
- IAM role configured for marketplace entitlements
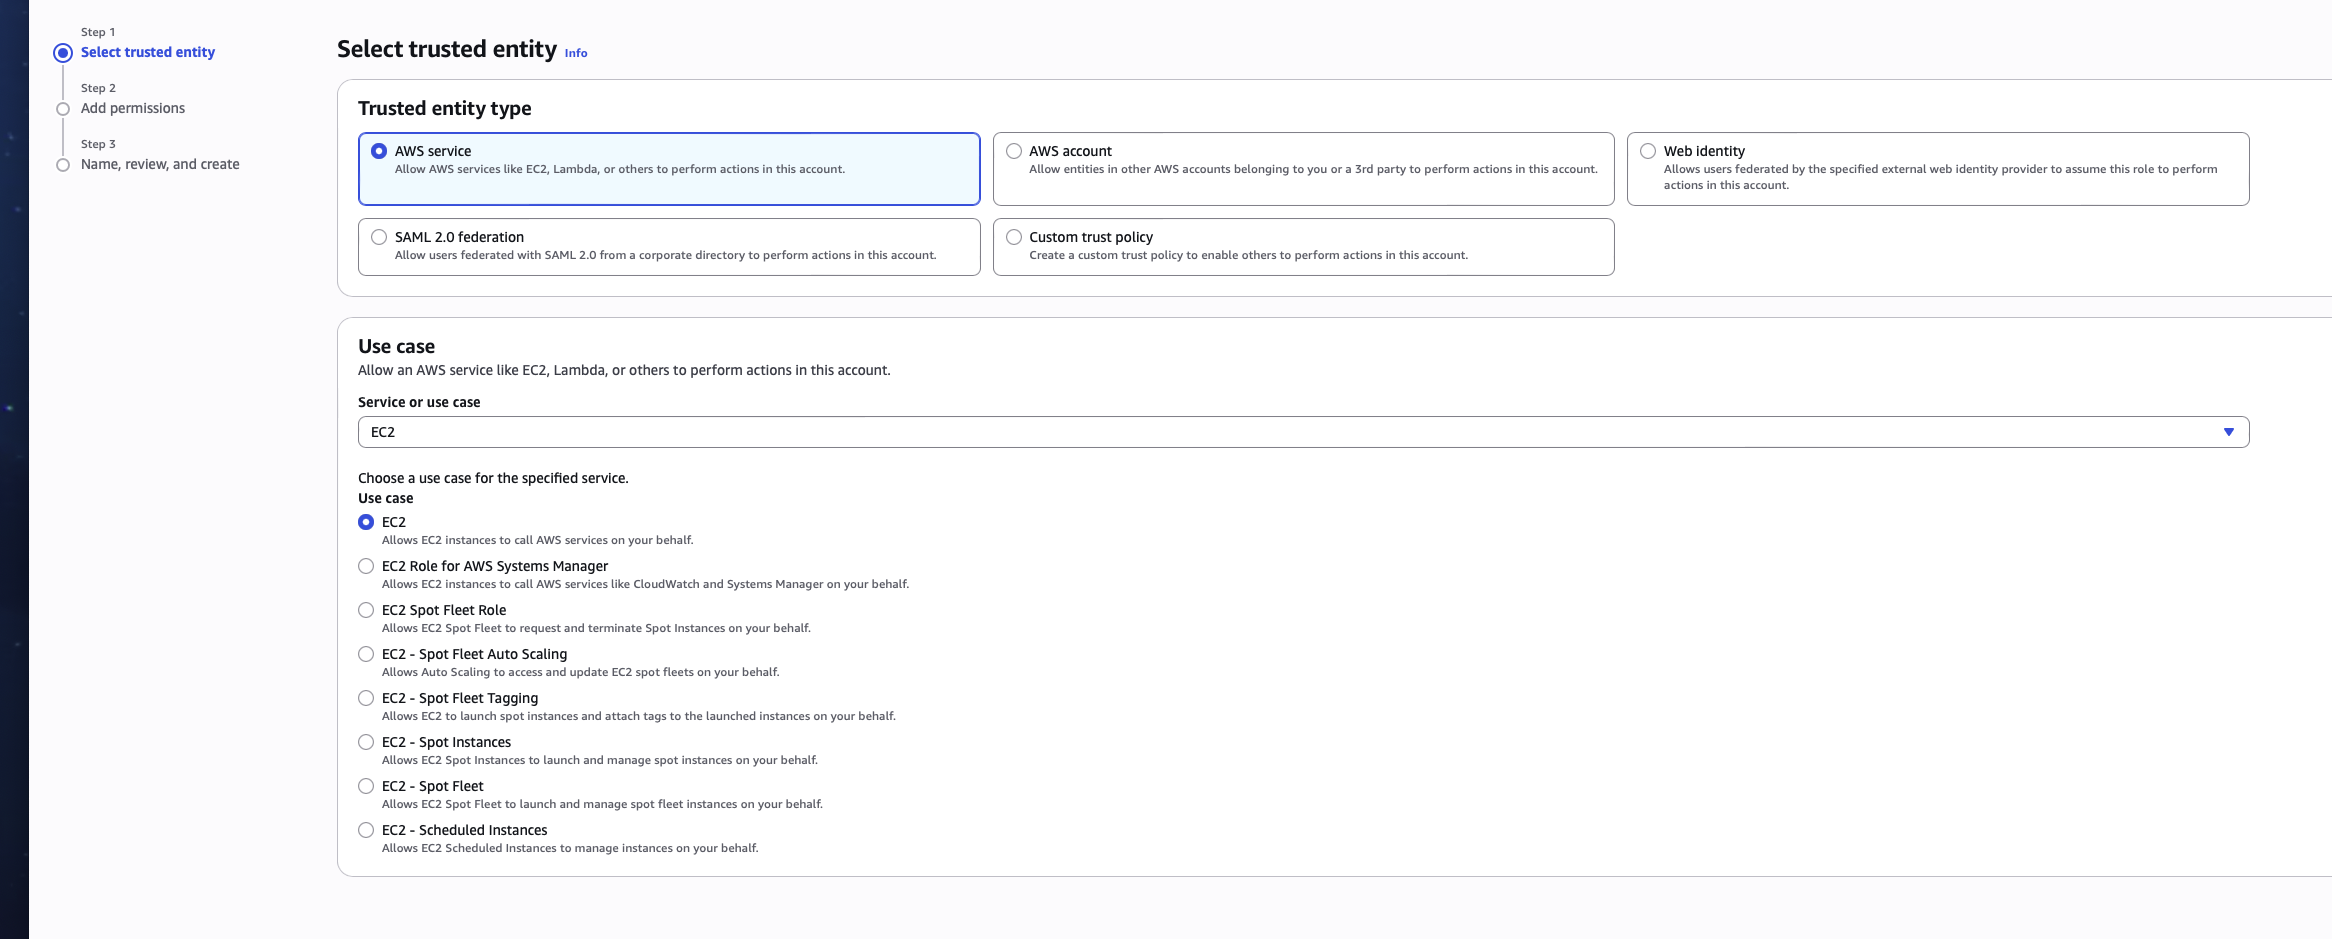
- To create the IAM role required, follow these steps
-
First, create a new IAM role and select "AWS service" as the trusted entity. For the use case, choose "EC2".
-
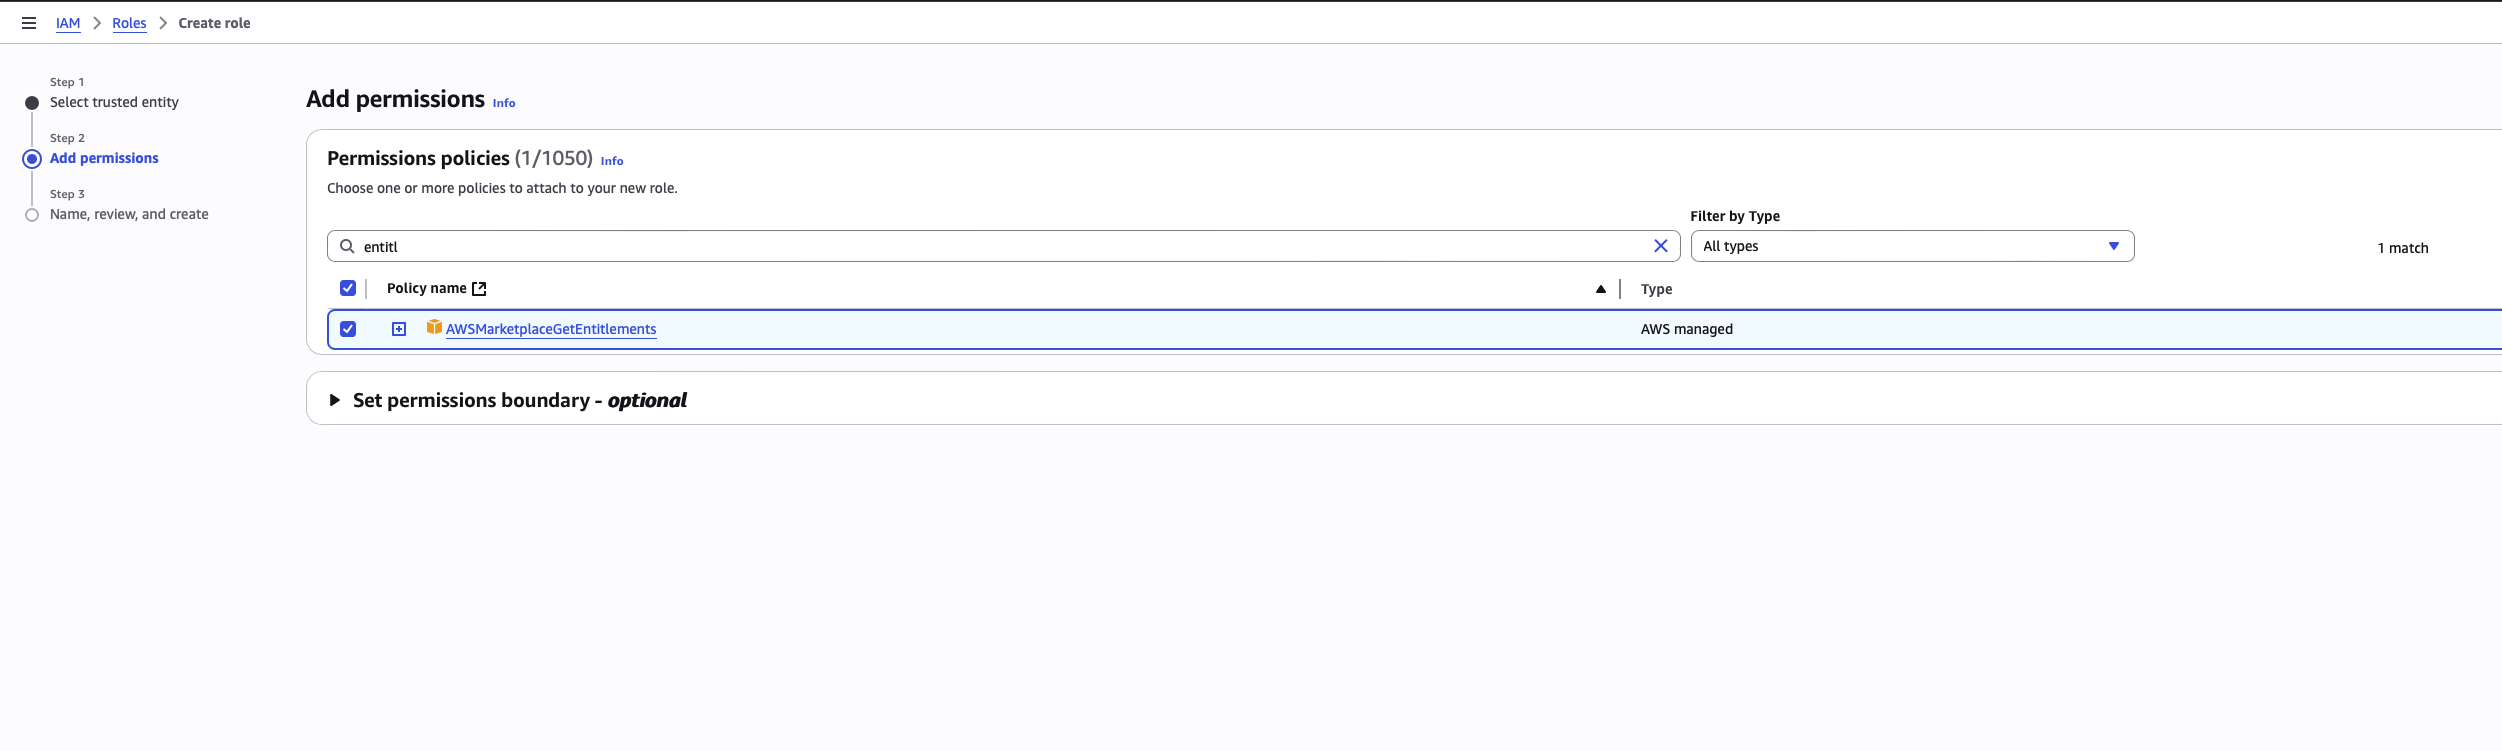
Next, on the permissions page, search for and attach the policy named AWSMarketplaceGetEntitlements.
-
Finally, complete the role creation process and attach this newly created role to your EC2 instance. This will grant the instance the necessary permissions to access its AWS Marketplace entitlements
-
Deployment Steps
-
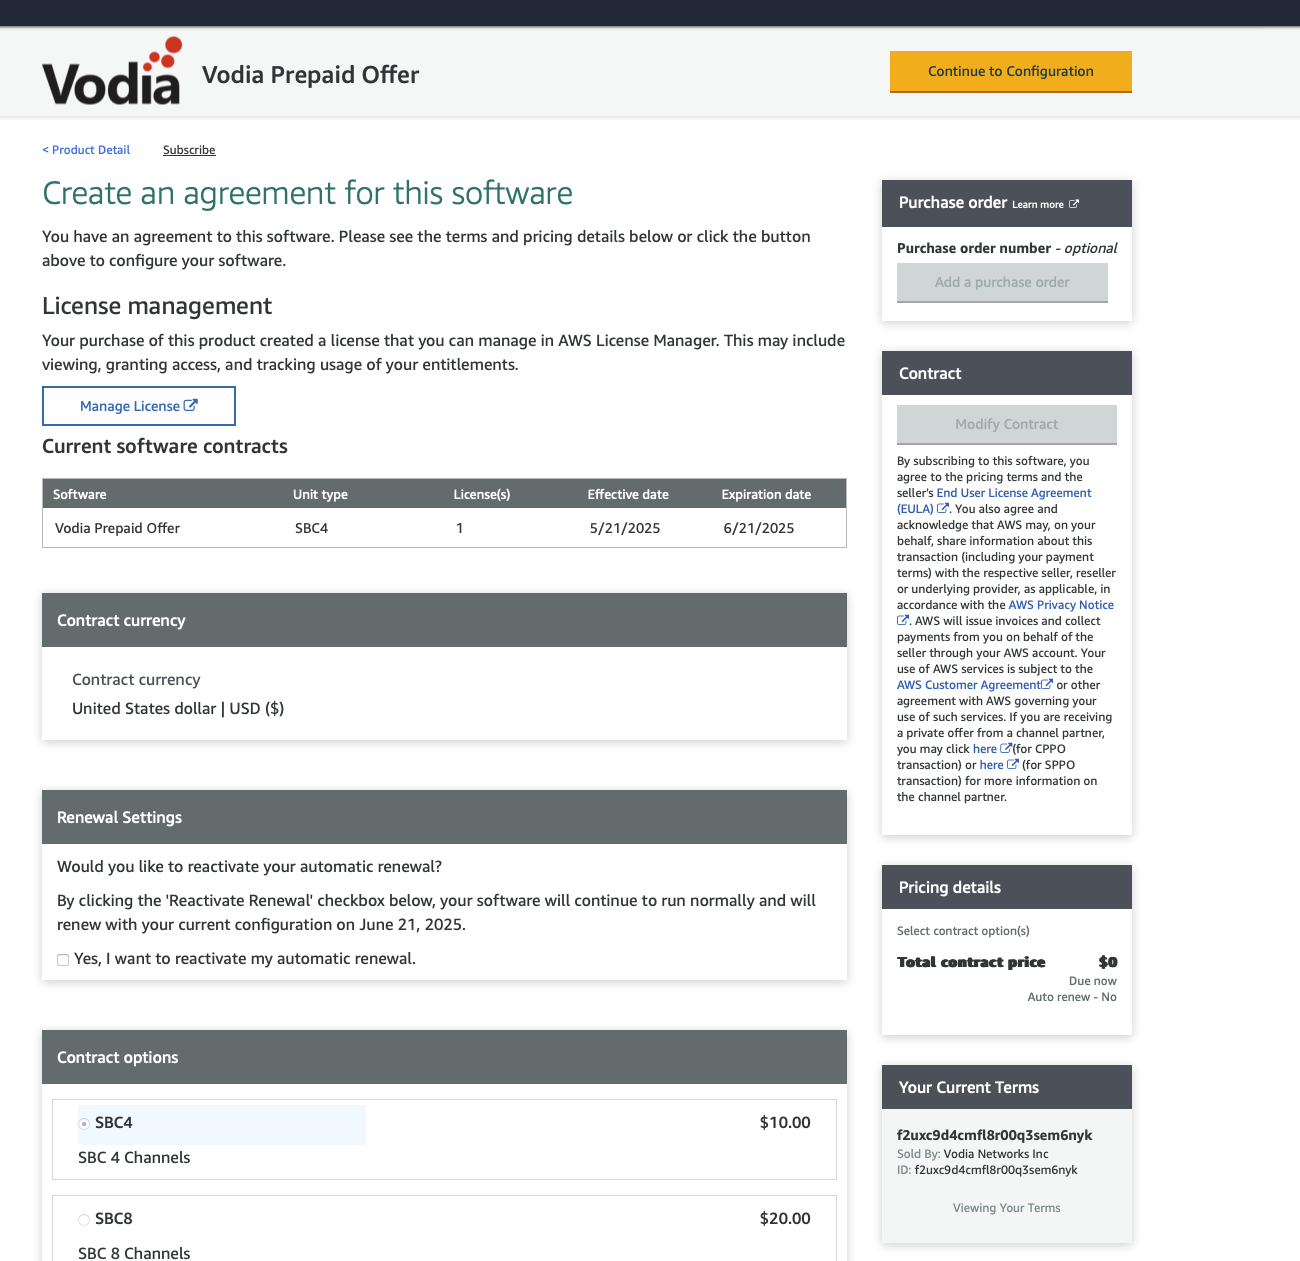
Subscribe to the Marketplace Offering
-
Navigate to the AWS Marketplace
-
Locate the Vodia Prepaid PBX offering
-
Review the terms and pricing
-
Create an agreement for the offer by accepting the terms
-
-
Configure Software Settings
-
In the marketplace configuration page, select your preferred AWS region
-
Ensure the region aligns with your geographic requirements and compliance needs
-
Review any additional configuration options available

-
-
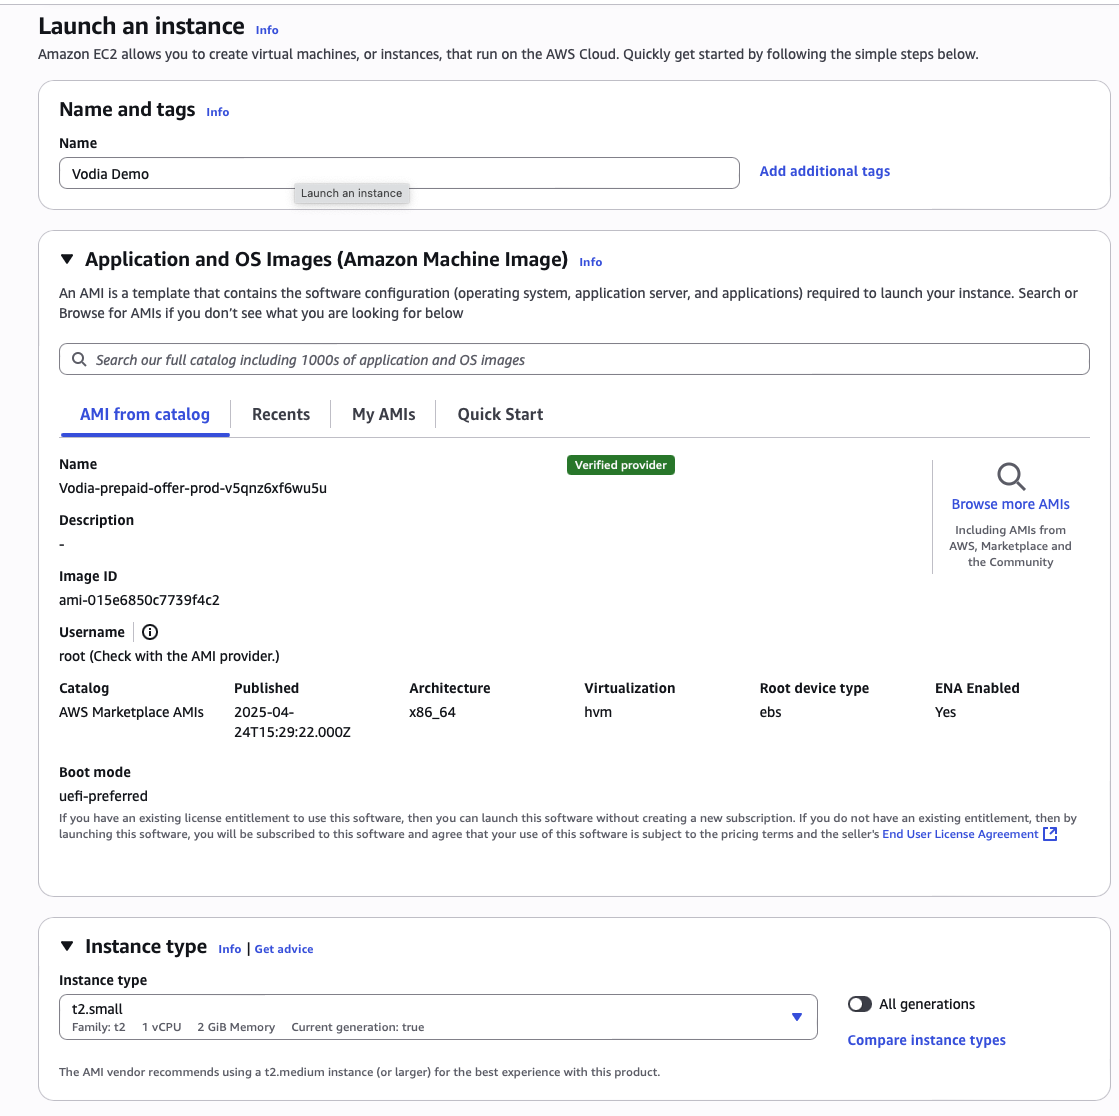
Launch the EC2 Instance
Important: Always launch the software through the EC2 service to ensure proper licensing. Instance Configuration:
-
Instance Name: Assign a descriptive name for your EC2 instance (e.g., "vodia-pbx-production")
-
Select t2.medium for most standard deployments.
-
SSH Key Pair:
- Select an existing SSH key pair or create a new one
- Ensure you have access to the private key file for future management
-
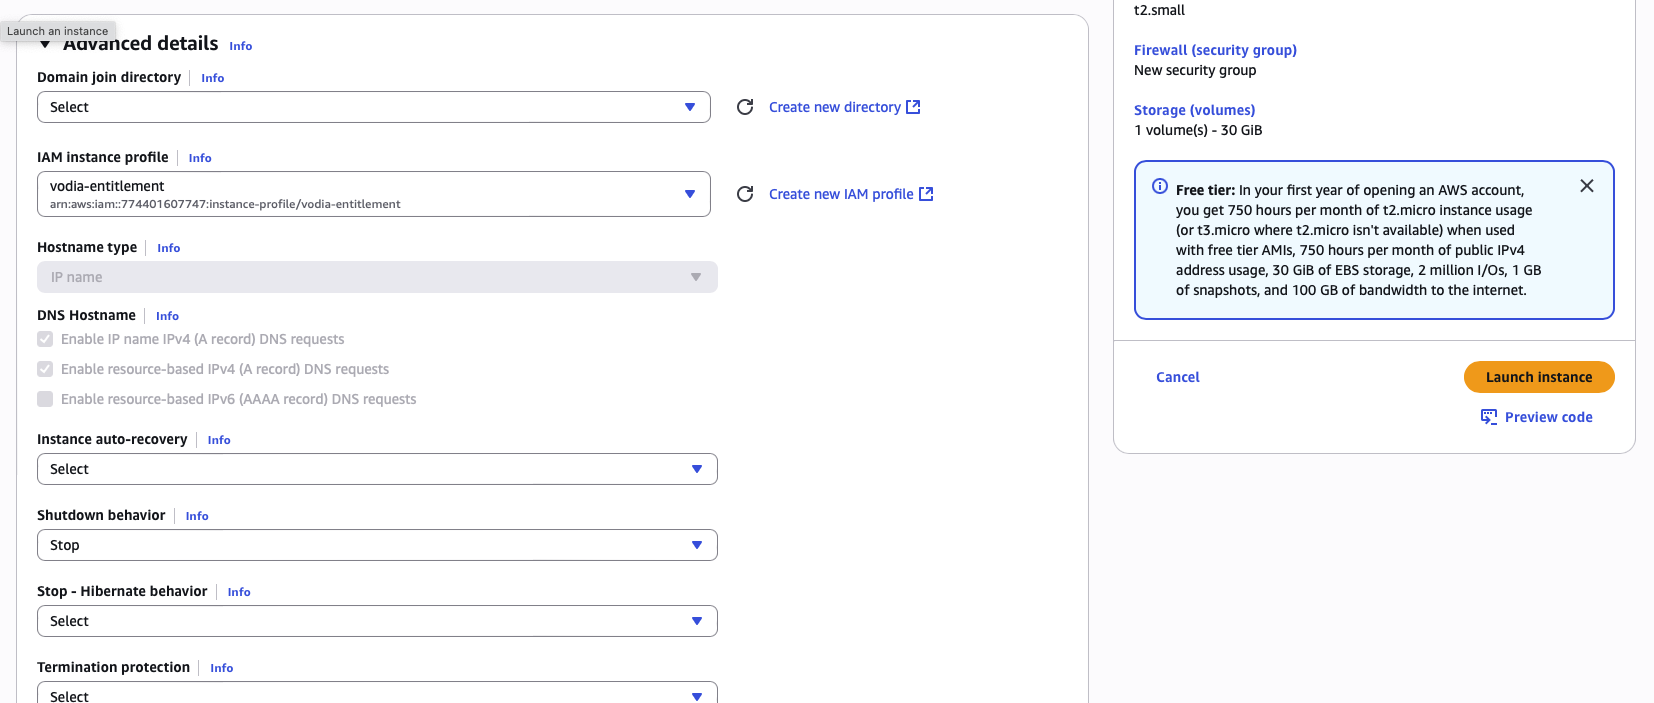
Advanced Settings - IAM Configuration:
Critical Step: Navigate to Advanced Settings
-
Set the Instance IAM Profile to the IAM role you created for marketplace entitlements
-
Warning: Without this IAM profile, the software license will not be granted and the deployment will fail
-
Launch and Provisioning
- Review all configuration settings
- Click "Launch Instance" to begin deployment
- Wait Time: Allow approximately 5 minutes for the PBX software to be fully provisioned and licensed
Accessing the PBX:
Access the PBX Admin Web interface by entering http://ip_address in your browser. You will then be automatically redirected to the secure HTTPS URL, such as https://dgrebn.vodia-pbx.com. Use the credentials below
username: vodia
password: your instance id (for e.g. i-064c600098f2b090c)