Requirements
We have made the MacOS image on the Intel-based Mac mini running OS X "El Capitan" (Version 10.11.3). Older versions might also work, but we recommend to install the PBX on a recent OS version. There is currently no special version exclusively available for the Apple M-chipset, but the operating system takes care about this this.
Step 1: Install the service
Download the package from http://portal.vodia.com/downloads/pbx/darwin10/pbx-69.1.3pkg . Double click on the package and install it.
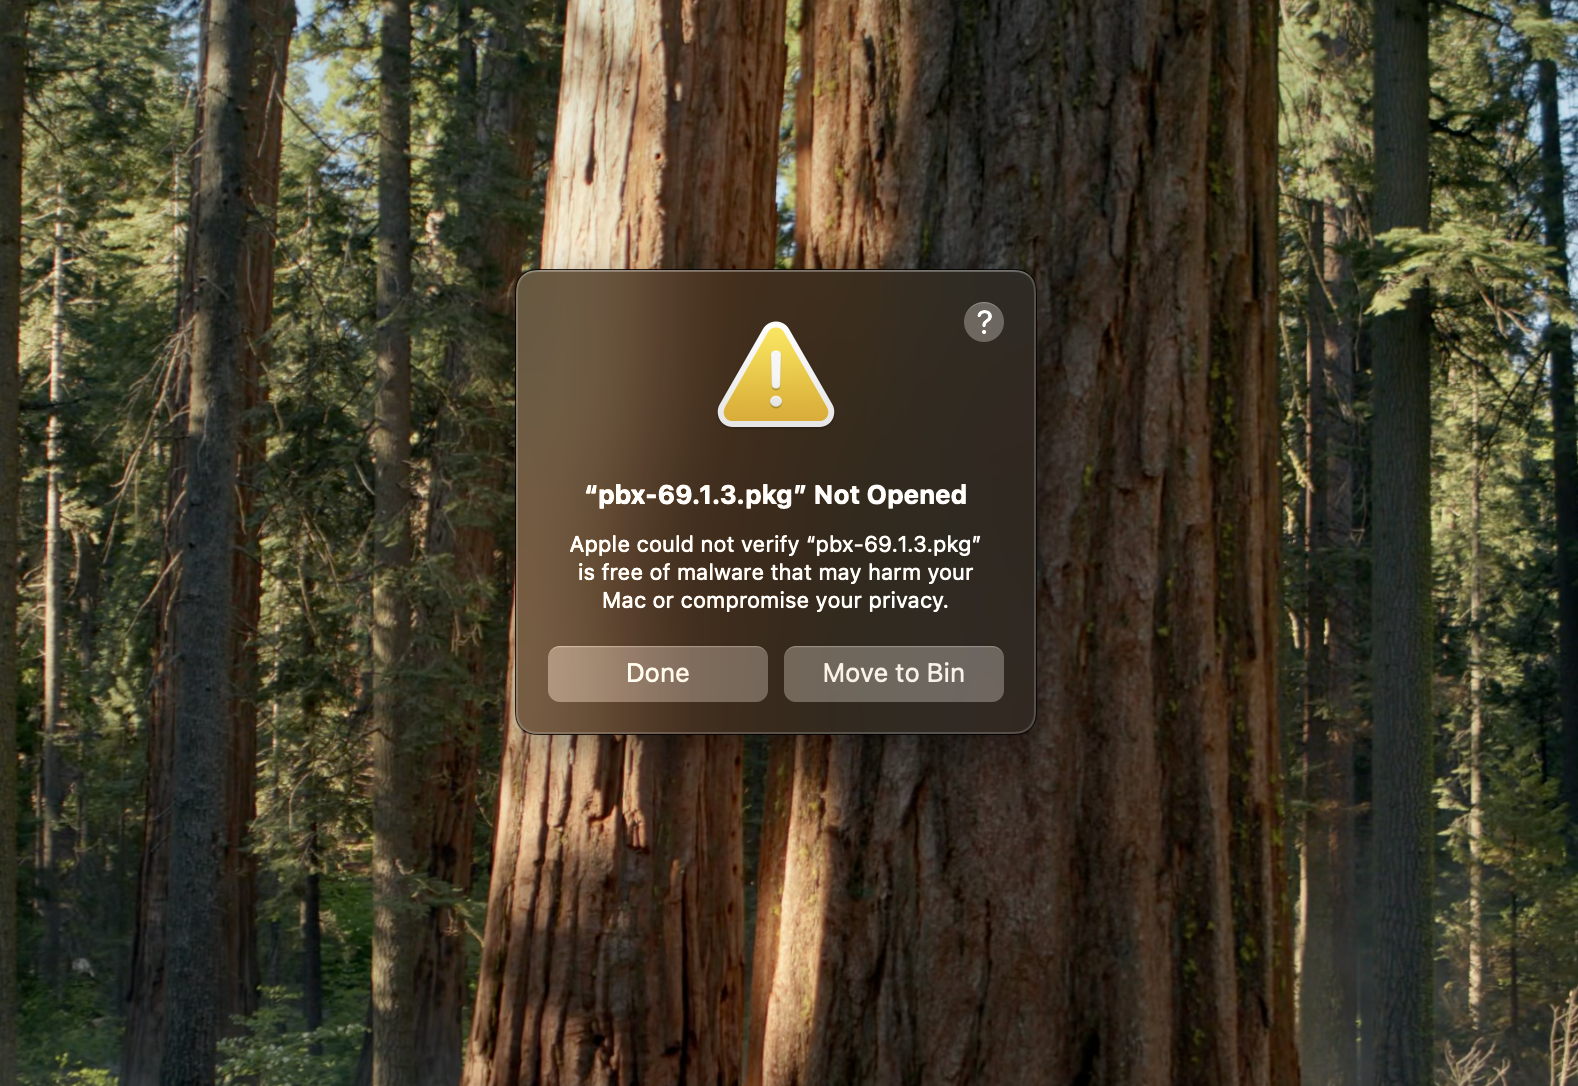
The installer will probably inform you that the package is not coming from the Apple store and that you should be careful installing this service ("pbx-69.1.3.pkg" can't be opened because it is from an unidentified developer). We did not digitally sign the application (yet), so at this point you really have to trust the installation source. In order to fix this, open the system preferences select the "Security & Privacy" section.
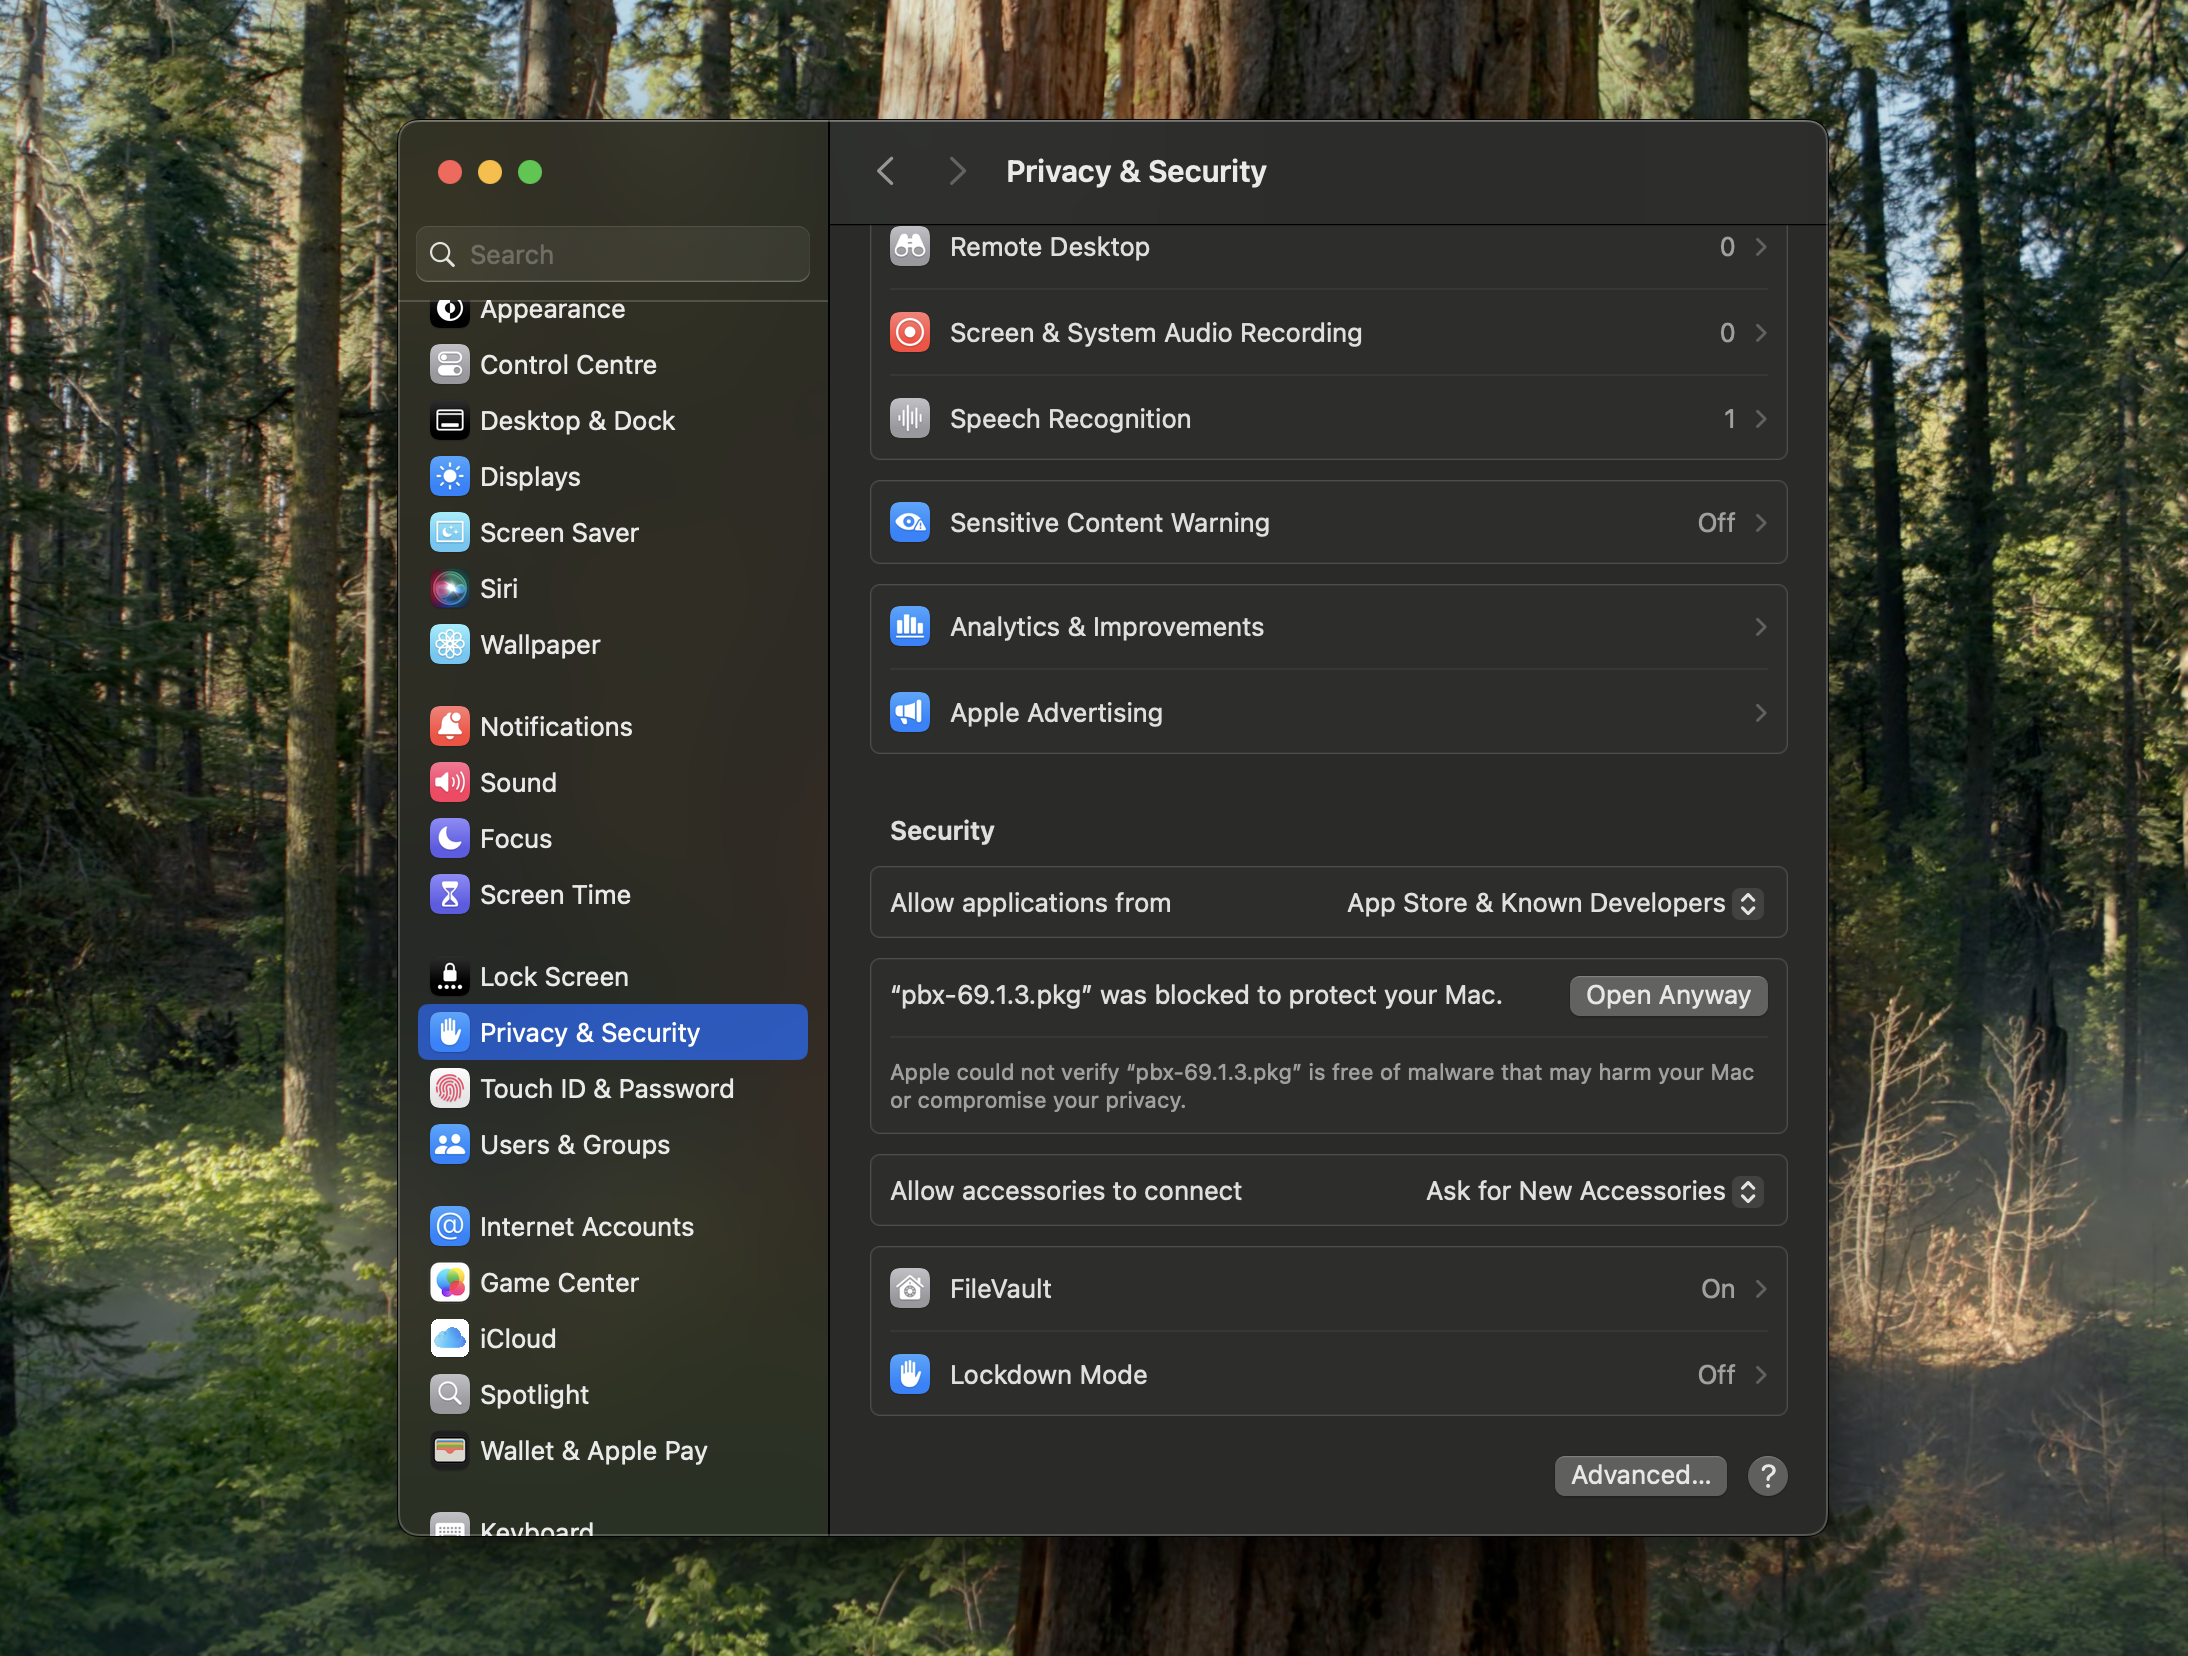
There you should see the message that "pbx-69.1.3.pkg" was blocked from opening because it is not from an identified developer. Click on "Open Anyway". You can then click through the installation dialog, after which the service should be running.
Please check after the initial installation if there are software updates available. Sometimes Vodia provides software updates for the latest versions without installer.
You might want to change the installation directory. However we recommend to install the software in the /usr/local directory and not in the Applications directory as it is not a regular user application; it runs in the background and should be started even if there is no user logged in.
Like with any other installation please make sure that there is no other service occupying port 80, 443, 5060 or 5061 which are essential for operating the PBX (for example Apache). If you want to change the port, edit the file pbx.xmland restart the PBX service, e.g. with the commands sudo launchctl unload /Library/LaunchDaemons/com.vodia.pbx.plistto stop the service and sudo launchctl load /Library/LaunchDaemons/com.vodia.pbx.plistto restart it again.
Step 2: License
After the installation, you should be able to log in using the address localhost . The default username is "admin" with no password. You can get the license code from vodia.com . For this you need to be registered there and have purchased a license; there is also a free demo license available. After accepting the license agreement and entering the license code, don't forget to change your password for the administrator.
Step 3: Install languages
In order to install languages, you need to use the software update page. Enter the URL for the language that you need and click on the Load button. You don't have to restart the service in order to use the language prompts. The URL can be found on Installing Languages .