Skill Based Routing
Overview
Skill based routing enables intelligent call distribution by matching incoming calls to the most qualified agents based on their expertise levels. This ensures callers are connected to agents with the appropriate skills to handle their specific needs, improving first-call resolution and customer satisfaction.
Configuration Steps
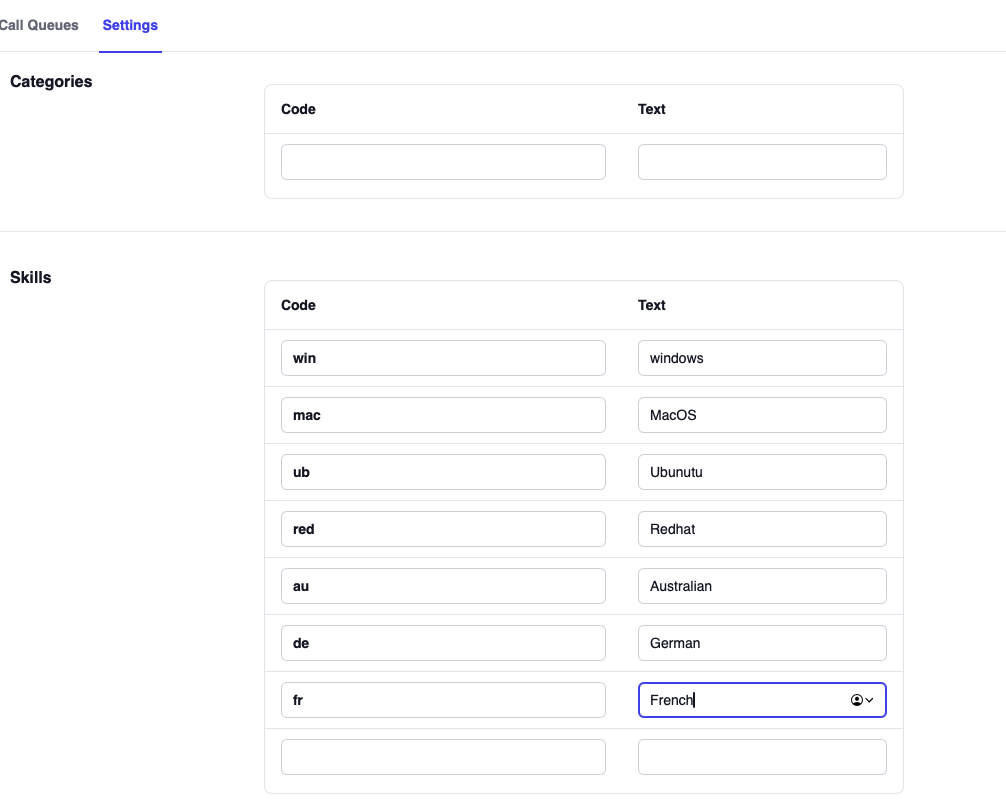
Step 1: Create Skill Sets
- Navigate to Call Queues from the Accounts menu
- Click on the Settings tab
- Create the skill sets that represent the expertise areas in your organization
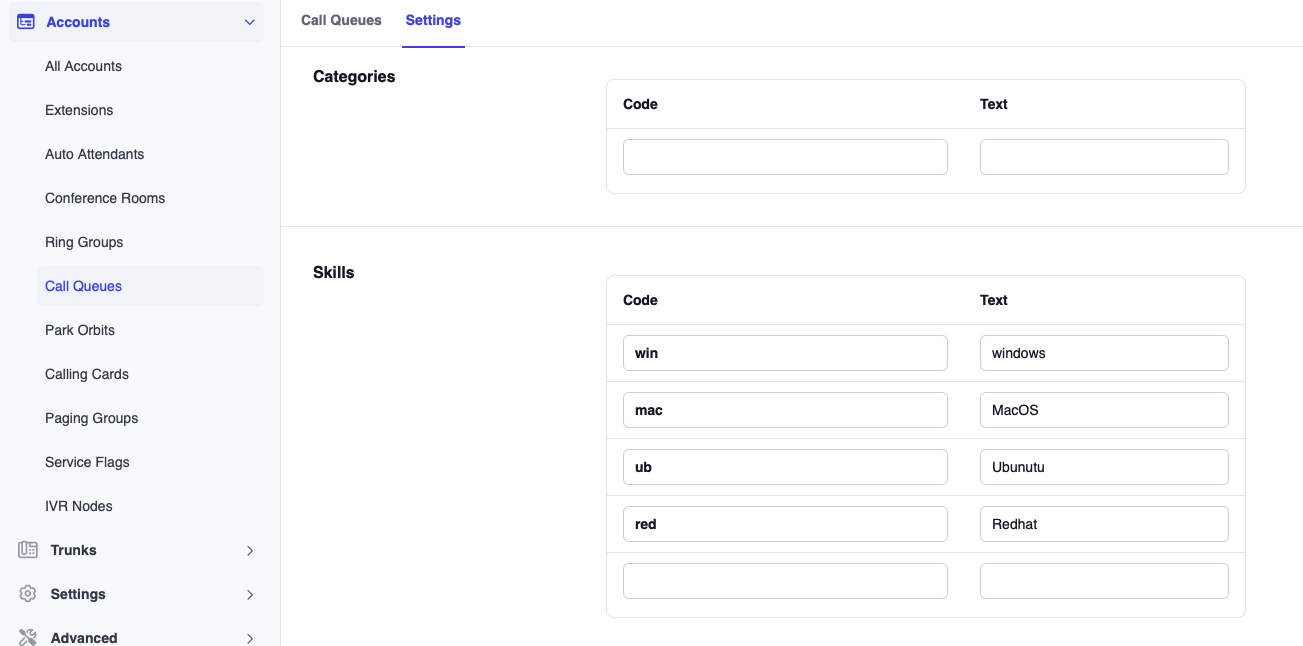
Each skill set represents a specific area of knowledge or capability that agents may possess.
Example Skill Sets:
- Windows
- Mac OS
- Ubuntu
- RedHat
Choose skill names that clearly represent expertise areas.
Step 2: Enable skill based Routing for Call Queue
- Go to the Call Queue List
- Click on the call queue you want to configure
- Select the Edit tab
- Under Agent Selection, locate Algorithm for selecting next agent
- Select Skill based from the dropdown menu
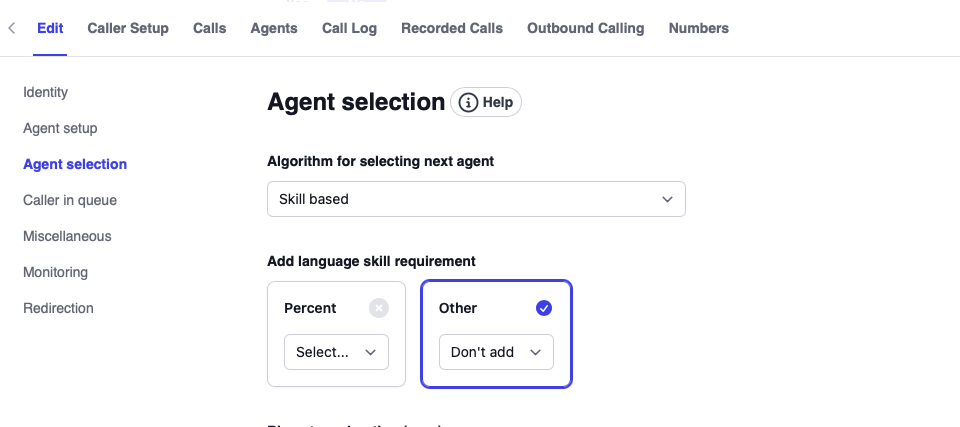
This setting tells the system to use skill levels when determining which agent should receive the next call, rather than using round-robin or other distribution methods.
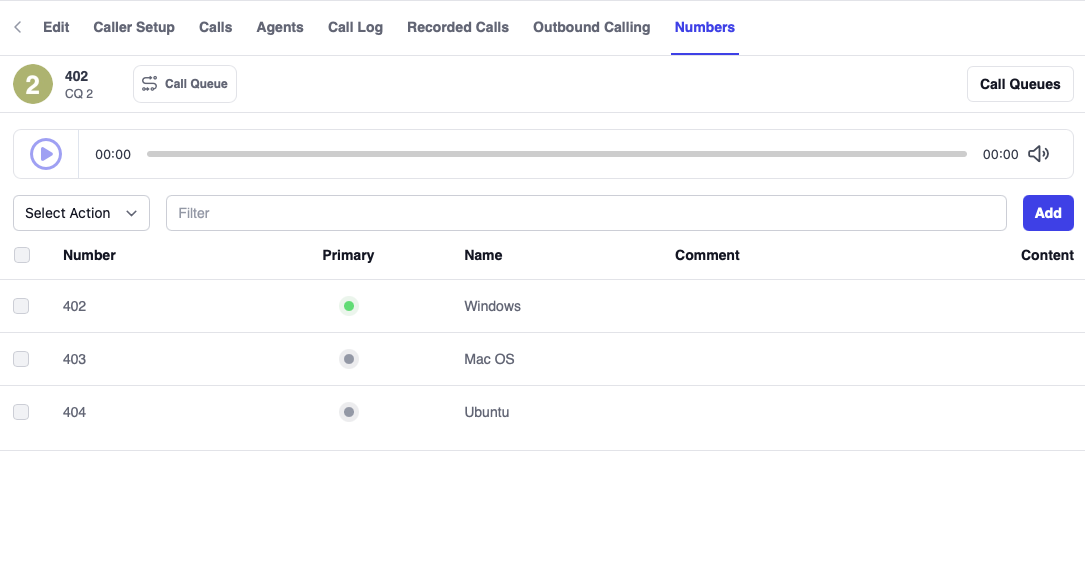
Step 3: Assign Skills to Numbers
- Within the call queue settings, navigate to the Number tab
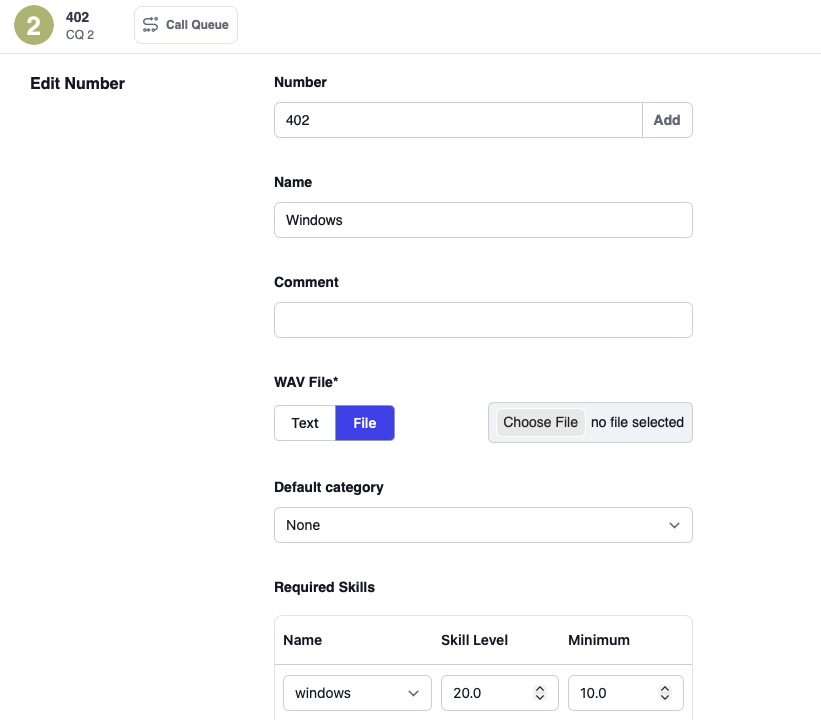
- For each numberconfigured for the call queue, you could set the following:
Descriptive Name
A friendly name that identifies the purpose of this number (e.g., "Windows Support Line", "Mac Help Desk").
Comment
Optional notes about the number's purpose or any special handling instructions.
Skill
Select which skill is required for calls coming to this number. You can assign one skill per number.
Skill Level
Set the target skill level for this number (0-100). This represents the ideal expertise level for handling calls to this number.
Minimum Skill Level
Set the minimum acceptable skill level for agents to receive calls from this number. Agents with skill levels below this threshold will not be selected to handle calls from this number.
Each number can only have one skill assigned. If you need to route based on multiple skills, consider creating separate numbers or using IVR menus to collect caller information before routing.
Step 4: Configure Agent Skill Levels
- Navigate to Extensions
- Select an agent's extension
- Go to General Settings
- Locate the Skills section
- For each skill, assign a proficiency level (0-100)
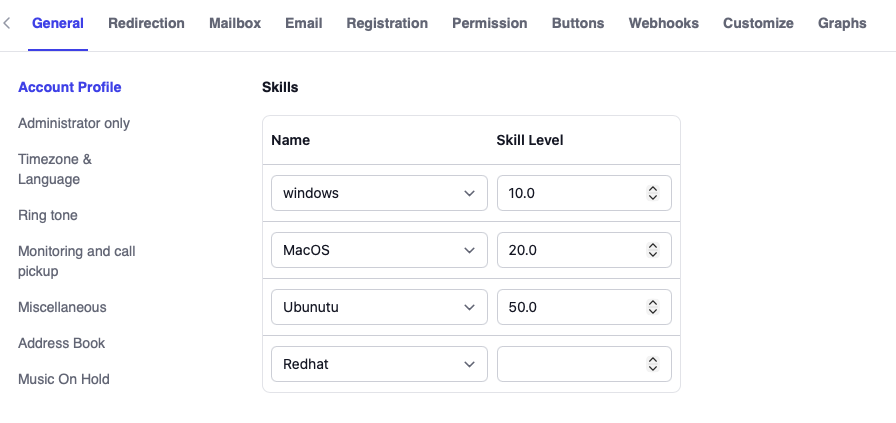
Agents can have multiple skills with different proficiency levels, allowing flexible routing across various call types.
How skill based Routing Works
The system evaluates agents based on their skill levels and selects the most qualified available agent for each incoming call.
Selection Process
- Call arrives at a specific number
- System identifies the required skill and minimum level for that number
- System filters agents who meet the minimum skill requirement
- System ranks qualified agents by skill level (highest first)
- System presents the call to agents in order of qualification
Example
Call Queue 402 Configuration:
| Number/ | Skill | Target Level | Minimum Level |
|---|---|---|---|
| 617-861-3490 | Windows | 20 | 10 |
| 617-861-3491 | Mac OS | 40 | 10 |
| 617-861-3492 | Ubuntu | 50 | 30 |
Agent Skills:
| Agent | Windows | Mac OS | Ubuntu |
|---|---|---|---|
| 500 | 10 | 20 | 50 |
| 501 | 20 | 10 | 5 |
| 502 | 5 | 60 | 30 |
Queue Setting:
Ring 1 agent per stage
Routing Scenarios
Scenario 1: Call to 617-861-3490 (Windows Support)
- Minimum skill: 10
- Qualified agents: 500 (skill: 10), 501 (skill: 20)
- Agent 502 is excluded (skill: 5, below minimum)
- Routing order: 501 → 500
- Agent 501 is selected first (highest Windows skill: 20)
Scenario 2: Call to 617-861-3491 (Mac OS Support)
- Minimum skill: 10
- Qualified agents: 500 (skill: 20), 501 (skill: 10), 502 (skill: 60)
- All agents qualify
- Routing order: 502 → 500 → 501
- Agent 502 is selected first (highest Mac OS skill: 60)
Scenario 3: Call to 617-861-3492 (Ubuntu Support)
- Minimum skill: 30
- Qualified agents: 500 (skill: 50), 502 (skill: 30)
- Agent 501 is excluded (skill: 5, below minimum)
- Routing order: 500 → 502
- Agent 500 is selected first (highest Ubuntu skill: 50)
Troubleshooting
Calls not routing to expected agents
- Verify agent skill levels are correctly configured
- Check that minimum skill levels aren't set too high
- Confirm agents are logged into the queue
- Review agent availability status
All calls going to same agent
- Review skill level distribution across agents
- Consider lowering target skill levels
- Add more agents with required skills
- Implement skill balancing strategies
Agents not receiving calls despite having skills
- Verify minimum skill threshold is met
- Check agent queue login status
- Review agent DND or wrap-up status
- Confirm queue membership
To verify skill based routing in action, navigate to Status > Call Log, click on the desired call entry, then select the Call Log tab where you will see the agent selection details. For example see below.
8	00:03.452	[ACD 402] Available agents: 500 501 502	APP
7	00:03.452	[ACD 402] Skill mapping for requirement set ", windows: 0.2" is "502: 0.01, 500: 0.02, 501: 0.04"	APP
7	00:03.452	[ACD 402] Next stage in 402 has 3 agents available, 501 selected	APP
8	00:03.452	[ACD 402] Ringing 1 agents
Language Requirements
In addition to skill-based routing, you can add language requirements to ensure callers are connected to agents who speak their preferred language. Language skills work in conjunction with technical skills to provide optimal call routing.
Setting Up Language Skills
Step 1: Create Language Skill Set
- Navigate to Call Queues from the Accounts menu
- Click on the Settings tab
- Create the language skill set using standardized language codes
Supported Language Codes:
| Language | Code |
|---|---|
| Arabic | ar |
| Australian | au |
| Danish | dk |
| Dutch | nl |
| English (UK) | uk |
| English (US) | en |
| French (Canada) | ca |
| French (France) | fr |
| German | de |
| Greek | gr |
| Italian | it |
| Japanese | jp |
| Polish | pl |
| Portuguese | pt |
| Russian | ru |
| Spanish | sp |
| Swedish | se |
| Turkish | tr |
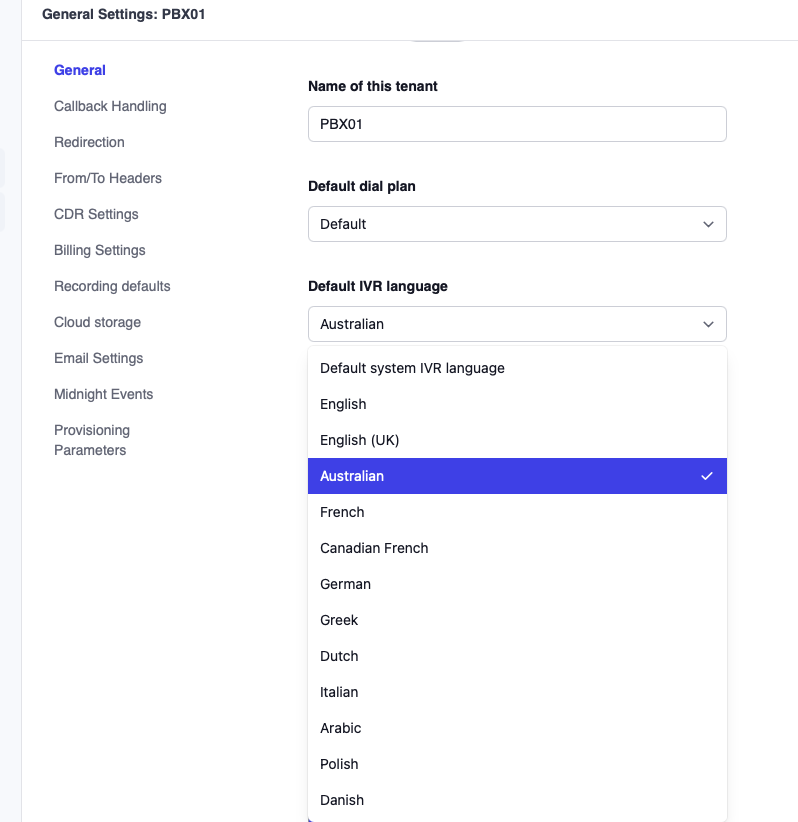
The language for incoming calls is typically set under Tenant Settings
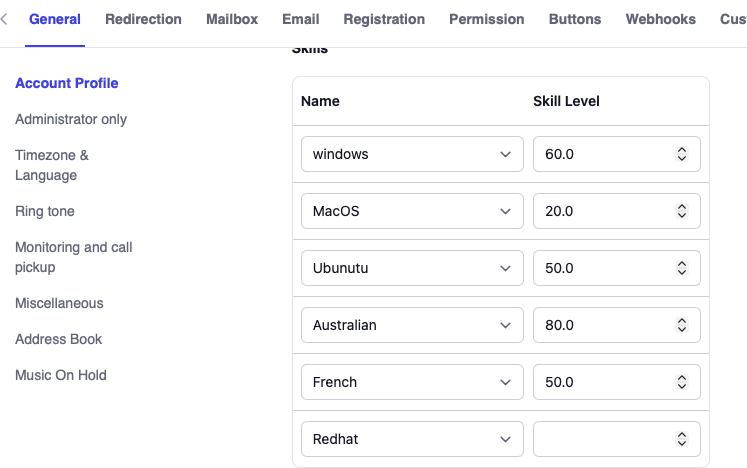
Step 2: Set Language Skill Levels for Agents
- Navigate to Extensions
- Select an agent's extension
- Go to General Settings
- In the Skills section, set proficiency levels for each language (0-100)
Step 3: Enable Language Requirement for Queue
- Navigate to the call queue settings
- Go to the Agent Selection section
- Enable Add language skill requirement
- Set the minimum percentage for the language requirement
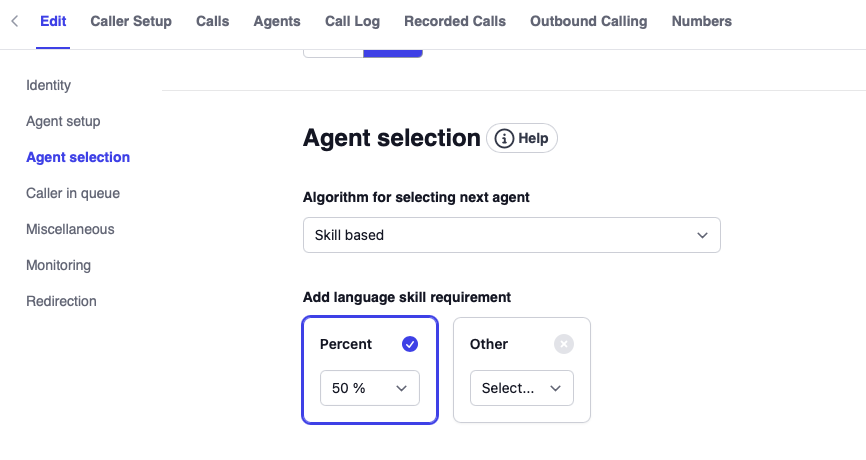
This minimum percentage determines the threshold that agents must meet to be eligible for calls requiring specific language skills.
How Language Requirements Work
The language requirement system works in conjunction with technical skills to optimize agent selection:
Scenario 1: Same Skill Level, Different Language Proficiency
If two agents have the same technical skill level, the agent with higher language proficiency will be selected first.
Example:
- Agent A: Windows skill = 80, German = 50
- Agent B: Windows skill = 80, German = 90
- Result: Agent B receives the call (higher German proficiency)
Scenario 2: Meeting Minimum Language Requirement
Agents who do not meet the minimum language requirement will be filtered out, even if they have the required technical skills.
Example:
- Minimum German requirement: 40
- Agent A: Windows skill = 90, German = 30
- Agent B: Windows skill = 70, German = 50
- Result: Agent A is excluded; Agent B receives the call
Scenario 3: Exceptional Technical Skill Override
If an agent has significantly higher technical skill (typically 3x or more), they may be selected even if their language proficiency is below the minimum requirement. This prevents calls from going unanswered when highly skilled agents are available.
Example:
- Minimum German requirement: 40
- Agent A: Windows skill = 100, German = 30
- Agent B: Windows skill = 30, German = 50
- Result: Agent A may be selected if their technical skill substantially exceeds Agent B's capability