Please whitelist the public IP of your Vodia Wallboards server in your PBX System Security Settings to allow API and WebSocket access.
PBX Servers
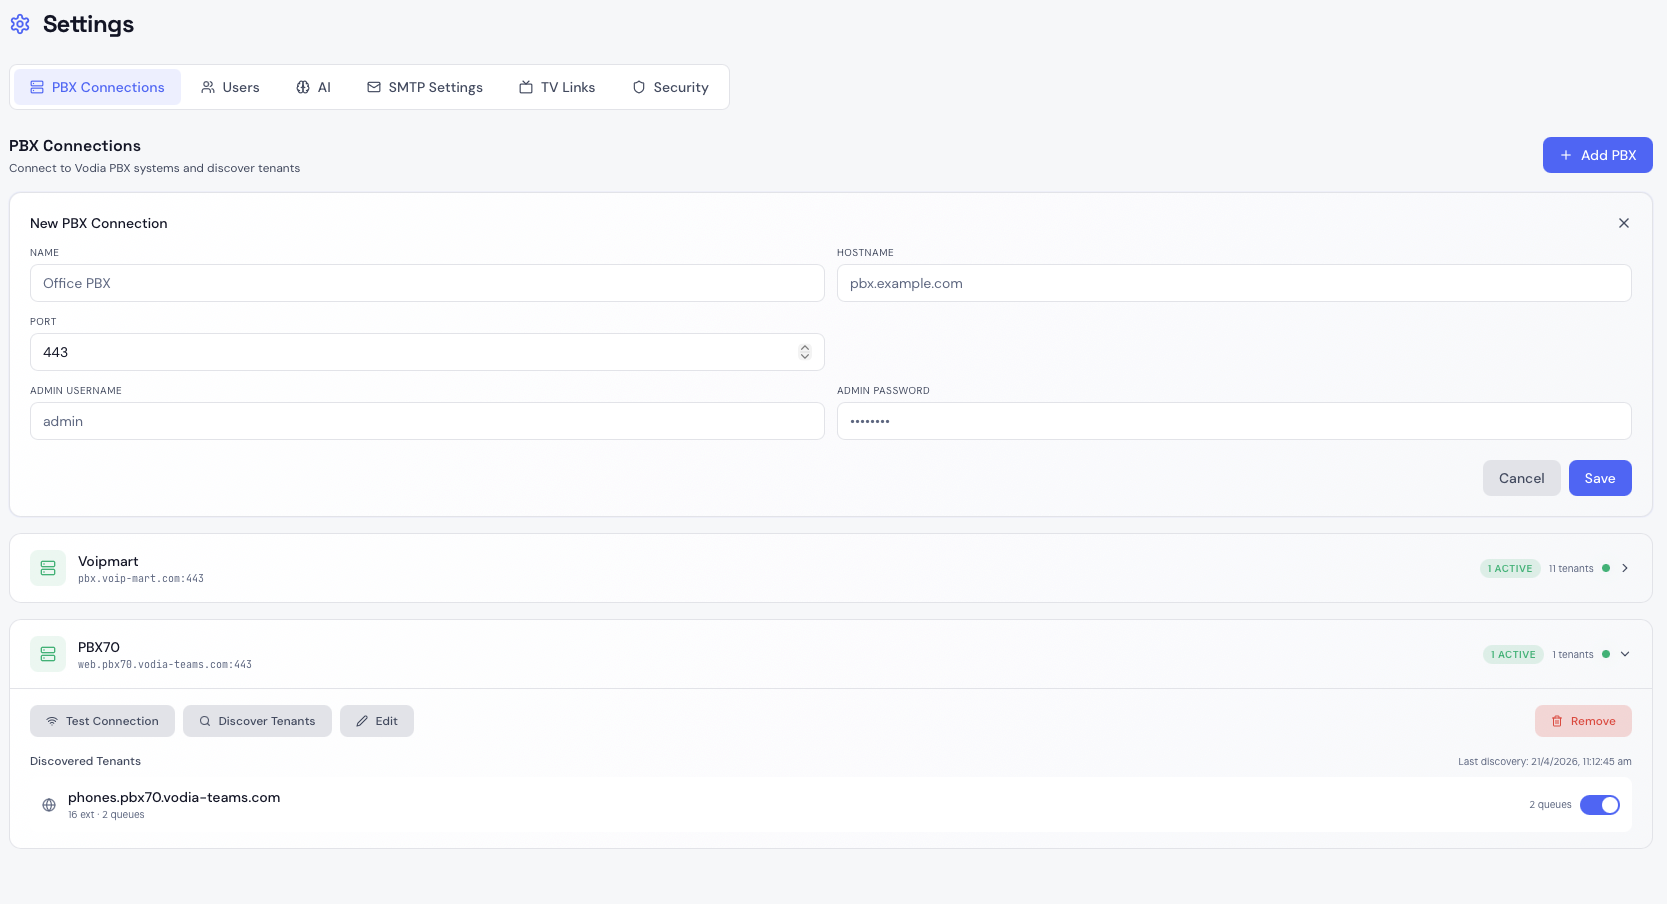
The PBX Connections tab in Settings is where you add and manage the Vodia PBX instances that Vodia Wallboards connects to. Each PBX is connected independently and can have multiple tenants enabled for wallboard monitoring.
Adding a PBX
Click Add PBX and provide:
- Name — a friendly label for this PBX (e.g.
Main Office PBX) - Hostname — the PBX's public FQDN (e.g.
pbx.example.com) - Port — defaults to 443
- Admin User — a dedicated administrator account on the PBX
- Admin Password — credentials for that account
Create a dedicated administrator account on your Vodia PBX specifically for Vodia Wallboards. Whitelist the Vodia Wallboards server's IP address on your PBX so that only this IP can authenticate using those credentials.
Tenant Discovery
Once a PBX is connected, Vodia Wallboards automatically discovers all tenants on that PBX. Tenants appear in the PBX card as a list showing their domain and extension count.
By default, wallboard monitoring is disabled for all tenants. You must explicitly enable it per tenant.
Enabling Wallboard Monitoring for a Tenant
In the PBX Connections tab, expand a PBX card and find the tenant you want to monitor. Toggle Wallboard Enabled to on. Once enabled, Vodia Wallboards will:
- Establish a WebSocket connection to the PBX for that tenant's domain
- Discover all ACD queues on that tenant
- Begin receiving real-time call state, agent BLF, and queue statistics events
- Make the tenant available in the wallboard builder and the Overview page
Editing a PBX
Click the edit icon on any PBX card to update the name, hostname, port, or credentials. Leave the credential fields blank to keep the existing stored credentials — only fill them in if you are changing the username or password.
Requirements
- Vodia PBX v69 or later
- API access enabled on the PBX
- Vodia Wallboards server IP whitelisted on the PBX