Google Contacts
With google contacts, you can sync your google contacts through OAuth2 with the Vodia PBX, using the Google People API. With OAuth2 your password information need not be stored on the system. Instead, a separate window pops up to verify your credentials and provide an auth code, which you use to sync the contacts automatically every 10 minutes. You can stop it by pressing the  button to log out form the account and stop syncing. It will also stop if the PBX is stopped.
Obtain Client ID and Client Secret
Before the users of a domain can use the google contacts, you have to obtain the client id and client secret for that domain and enter it in the PBX domain settings.
-
Sign in to the google account which you want to use for getting the id and secret .
-
Then go to: https://console.developers.google.com
-
You have to create a new project if you don't see the following option already.
-
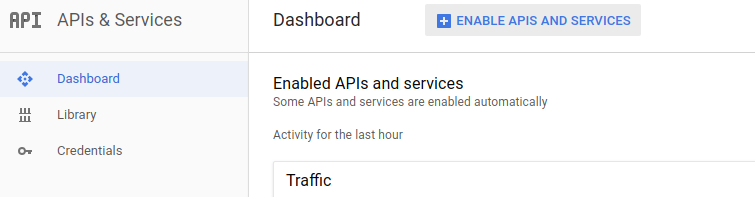
After the Project has been created (or if it already exists) click on "ENABLE APIS AND SERVICES" as shown:
-
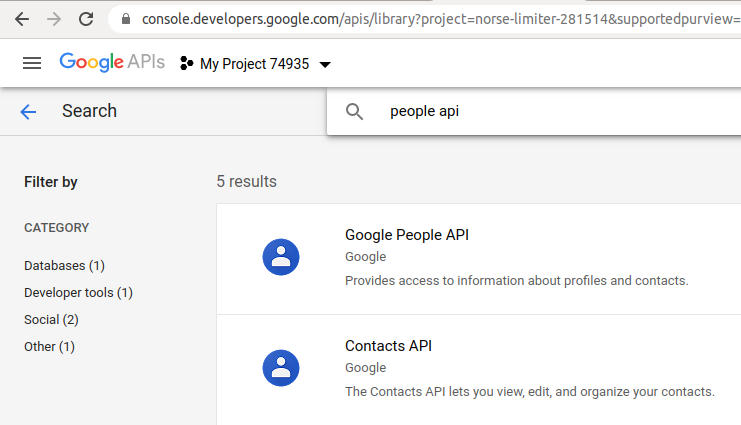
Search for "People Api" as shown, and click on Google People API:
-
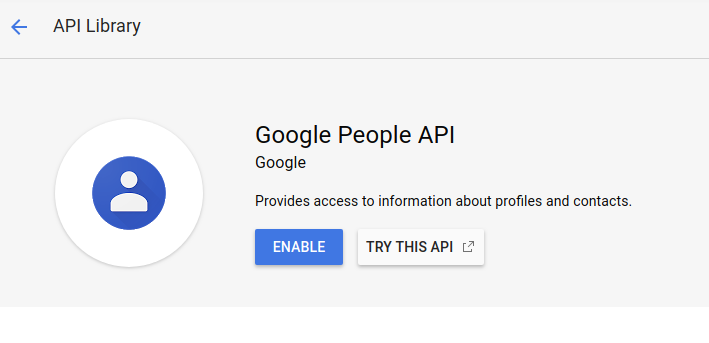
Enable this API as shown:
-
Now that the Google People API has been enabled, you can create your credentials and obtain the client id and secret
-
For that, go back to: https://console.developers.google.com
-
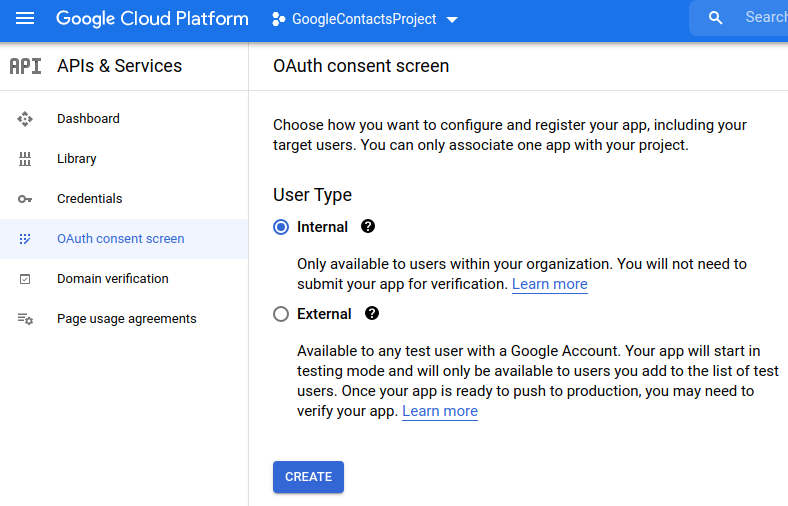
Under "Credentials", go to the OAuth consent screen as shown:

-
This is the consent information that the user will be presented for giving access to his contacts
-
The details here are only for testing, you should enter your own company and domain information here, then save.
-
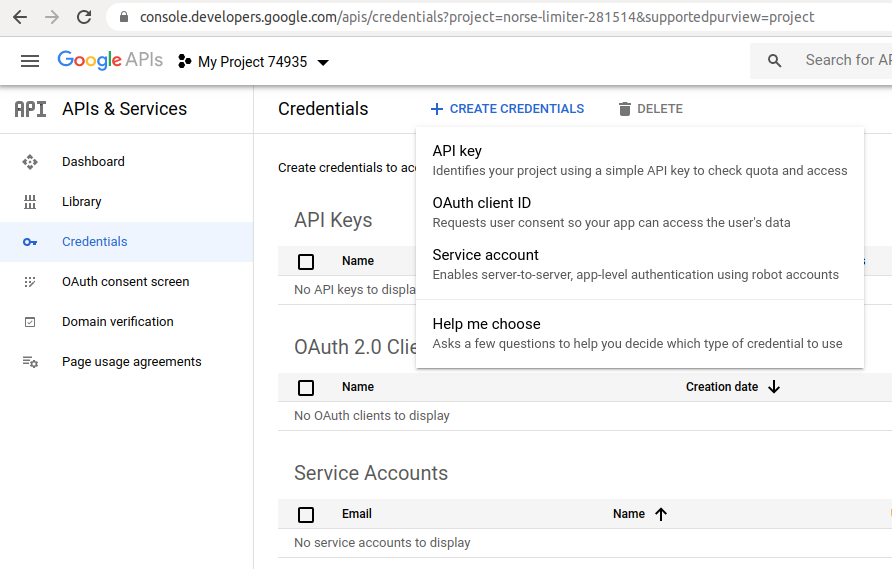
Finally, go to the Credentials tab under "Credentials" and click on "Create credentials" as shown:
-
Choose "OAuth client ID", a new screen will appear as below:
-da02a284cf7fc7300ff105e61eebd974.png)
-
Choose Web application, and give it a name by which you can identify these credentials
-
Enter the "Authorized JavaScript origins" as the domain of the PBX (the domain with which you can reach the PBX domain in the browser). We've entered "localhost" of our test bed, here.
-
Enter the "Authorized redirect URIs" as the domain of the PBX as above with "/google_token.htm" appended to the above URI.
-
This is very important that the URI is reachable to your PBX domain as that is where it will be redirected after user consent
-
For example: If the domain is https://example.com, then you will have to enter here "https://example.com/google_token.htm"
Now navigate to "OAuth Consent Screen"
- Select the user type depending on whether you need local organization's contacts or external. We've selected "Internal" and then hit Create:
Address the 3 step App registration process
Step 1: OAuth Consent Screen
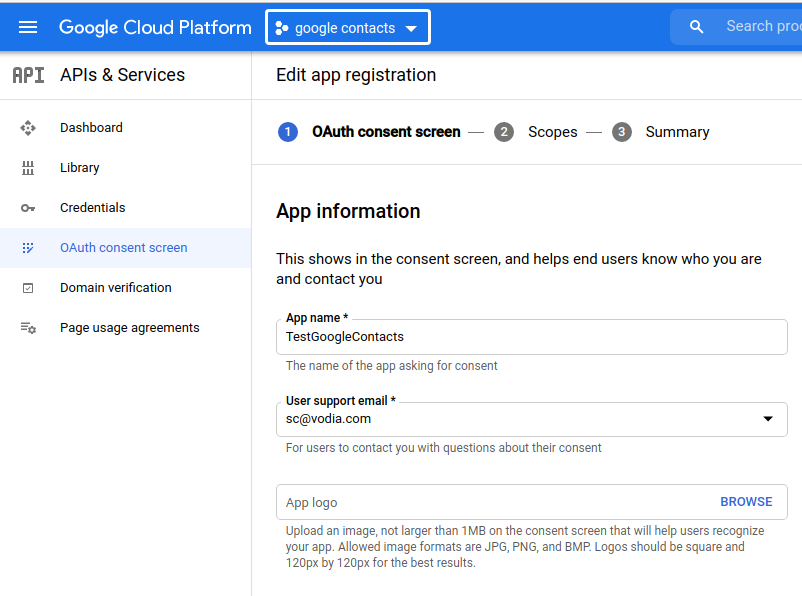
Step 2: Scopes It allows you to set the scope of your API which you can keep pretty standard.
Step 3: Summary Conclusion of your settings can be seen and edited on this step. And then hit Create.
- After you hit "Create", new credentials (Client ID and Key will pop up on your screen) will be created in the project you selected. If it's the first time a new project will be created for you and the credentials will be created there.
- Copy the client ID and client secret in the PBX domain settings in the "Google contacts client ID" and "Google contacts client secret" fields respectively, as shown:
- Version 69
- Version 70
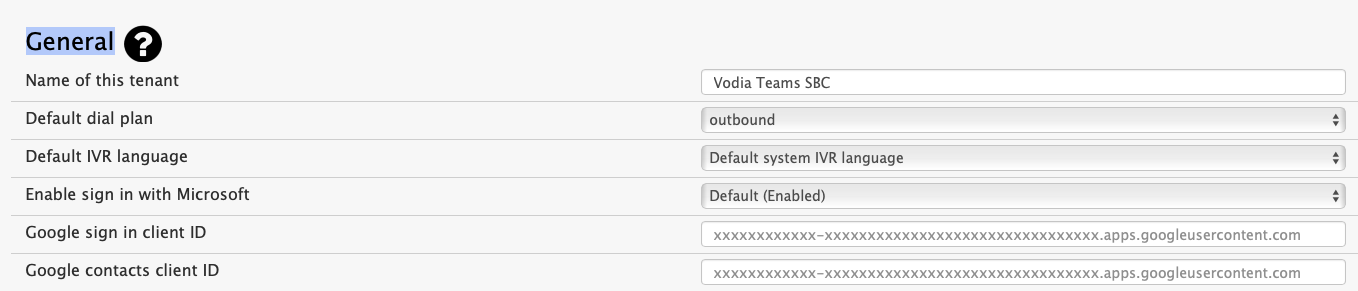

- And hit "Save".
- Now the users (extensions) in this domain can get access to their Google Contacts by providing consent using their own google account and password through OAuth authentications, explained below.
How to Sync Contacts
Before google contacts can be synced, the user has to give consent by using his own google account and password.
-
On version 69 onwards, go to your user portal Settings, you will see Google on the left side (scroll down if you don't see it). Click on it.
-
On versions below 69, go to your user portal settings as shown below (User Portal > Settings > "Ellipsis" button > Google):
-
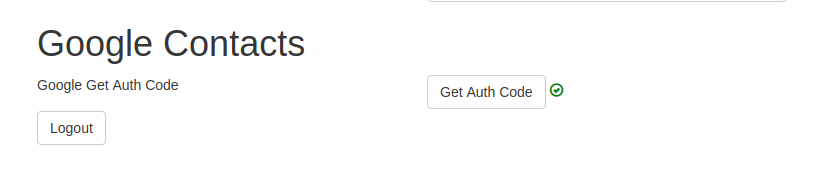
Press "Get Auth Code".
-
A new window will pop up asking you to sign in with your google account if you are not signed in already in another tab.
-
Sign in with your google account and password.
-
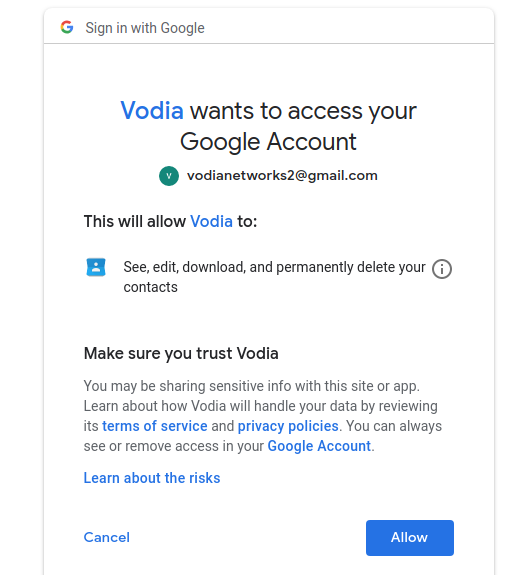
A new screen will appear asking you for consent as below:
-
Press "Allow" to give your domain consent to sync your contacts.
-
The information here for testing purposes, but here you will see what was set in the consent screen above during credentials creation.
-
The Google Contacts will be synced which you can see in your user portal contacts.
-
It may take some time to sync, so give it some time. This process needs to be done only once. After that, the system will re-sync the contacts every 10 minutes automatically.
-
These contacts will also appear on your phone through LDAP.
-
To logout from the account, press the
button.