Vodia Hub
Vodia Hub is a lightweight Windows companion app that lives in your system tray and stays connected to a single Vodia PBX extension. Its primary purpose is to handle tel: URIs system-wide — so any clickable phone number in any Windows application (a browser, Microsoft Outlook, a CRM, a document) dials out through your Vodia extension without you having to switch to the user portal or any other app. On top of that it gives you a desktop screen-pop for every inbound call with full call controls, queue call details, and the ability to fire automations — all without leaving whatever you were doing.
Platform: Windows system tray
Version: 1.0.3
Pairs with: Vodia PBX
Before You Start
You'll need a pairing link from your welcome email or from the user portal. If you don't have either, ask your PBX administrator.
Installation
You can download the installer from here.
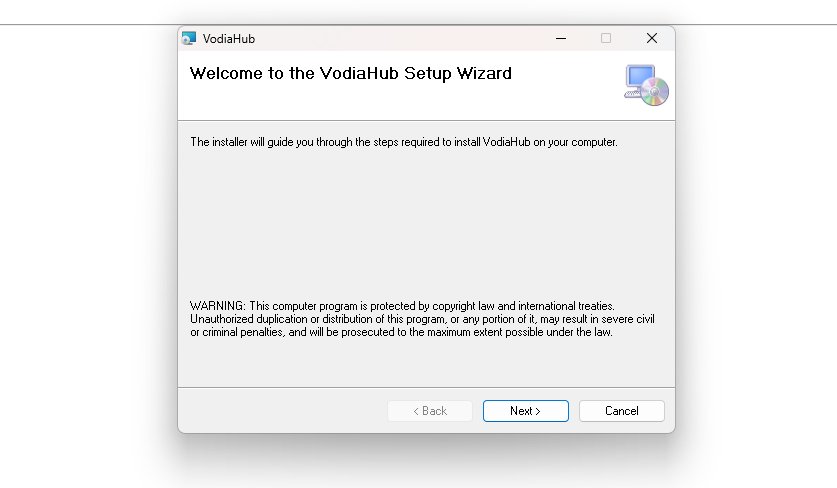
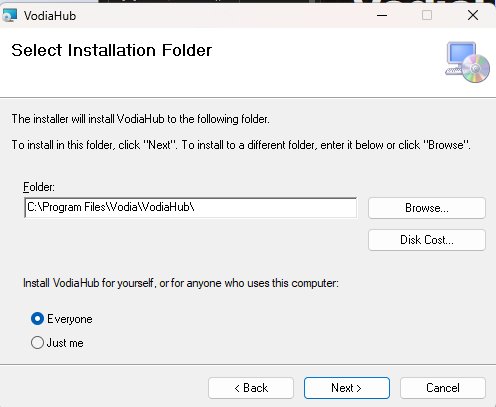
Run the Vodia Hub installer to launch the Setup Wizard. On the Select Installation Folder screen, the default path is C:\Program Files\Vodia\Vodia Hub\. Use Browse… to change it, or Disk Cost… to check available space. Choose whether to install for Everyone (all users on the PC) or Just me, then follow the remaining prompts to complete the installation.
Once installed, Vodia Hub starts automatically and registers itself to run at Windows startup — you only need to launch it manually once during installation. After that it will always be present in the system tray, including after a reboot, without any further action.
Installing for Everyone into Program Files requires Windows administrator rights. If you don't have them, choose Just me or ask your IT admin to run the installer.
Pairing with Your Server
Vodia Hub connects to your PBX using a pairing URL that contains your account credentials and server address. There are two ways to get it:
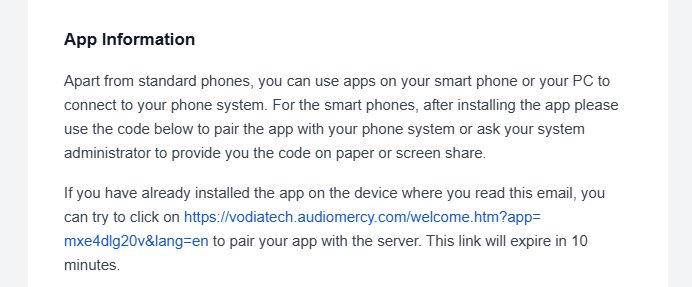
From the welcome email — when your administrator sets up your extension, Vodia sends you a welcome email with a one-click pairing link. On the device where Vodia Hub is installed, click the link and it signs in automatically.
From the user portal — log in to your Vodia user portal, navigate to Mobile Apps, find the Vodia Hub entry, and click Copy to copy the pairing URL. Paste it into your browser on the same device to connect.
In both cases the URL looks like:
https://your-pbx/welcome.htm?app=…&lang=en
The pairing link is valid for only 10 minutes. If it has expired, ask your administrator to resend the welcome email, or copy a fresh URL from the user portal under Mobile Apps → Vodia Hub.
Finding Vodia Hub in the System Tray
Once running, Vodia Hub appears as a small icon in the Windows notification area (bottom-right of the taskbar). If you don't see it, click the up-arrow (^) to expand hidden icons. Hover over the icon to confirm the Vodia Hub label.

Drag the Vodia Hub icon onto the always-visible part of the taskbar so incoming-call pop-ups are always one click away.
The Tray Menu
Right-click the tray icon to open the menu:

| Item | What it does |
|---|---|
| Dialer… | Opens the dial pad to place an outbound call. |
| Settings… | Connect Vodia Hub to your PBX and configure inbound-call behavior. |
| Exit | Fully closes Vodia Hub. Calls will no longer pop up until you relaunch it. |
Settings
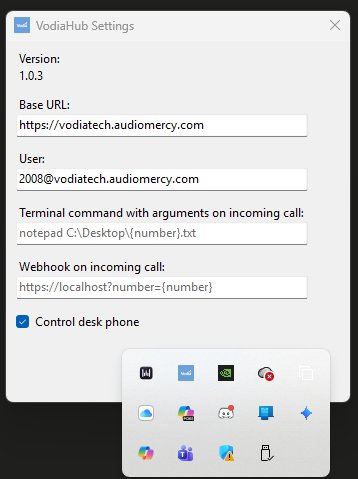
Open Settings… from the tray menu to configure call behavior and automation options. Your connection to the PBX is established via the pairing link — there are no server address or credential fields to fill in manually.
| Field | What to enter |
|---|---|
| Terminal command on incoming call | Optional. A local command to run on every inbound call. Use {number} as a placeholder for the caller's number — e.g. notepad C:\Notes\{number}.txt. |
| Webhook on incoming call | Optional. A URL called on every inbound ring, with {number} replaced by the caller's number — e.g. https://crm.example.com?number={number}. |
| Control desk phone | When checked, Accept / Hangup / Hold / Transfer are sent to your registered Vodia desk phone. When unchecked, Vodia Hub controls the Vodia user portal instead. Enable this if you primarily use a hardware phone. |
Close the Settings window to save your changes.
Making Calls

The primary way Vodia Hub places calls is through tel: URIs — any application on Windows that presents a clickable phone number as a tel: link will hand it off to Vodia Hub automatically. This includes desktop applications like Microsoft Outlook, where clicking a contact's phone number in the contact card dials out through your Vodia extension immediately, without opening a browser or switching to any other app.
There are three ways to start an outbound call:
From a tel: link — click any phone number rendered as a tel: link in any Windows application. Outlook contact cards, browser-based CRMs, web pages, and many other apps already use tel: links natively. Vodia Hub intercepts the click and dials through your extension.
From the dialer — right-click the tray icon, choose Dialer…, type or paste the number, and place the call.
With a hotkey — highlight any phone number on screen (in a web page, email, document, or chat) and press Ctrl + D. Vodia Hub opens the dialer with that number pre-filled.
Depending on the Control desk phone setting, the call is either placed through your registered desk phone or through the Vodia user portal.
Receiving Calls
When someone calls your extension, Vodia Hub displays a screen-pop in the corner of your display — regardless of what you're currently doing in Windows. You don't need to have the user portal open or visible. The pop-up shows the caller's name and number, which extension they dialed, and for queue calls, the greeting script the agent should use (as configured on the queue). This queue context is one of the main reasons Vodia Hub exists: agents can be working in Word, Outlook, or any other application and still receive the call with full context.
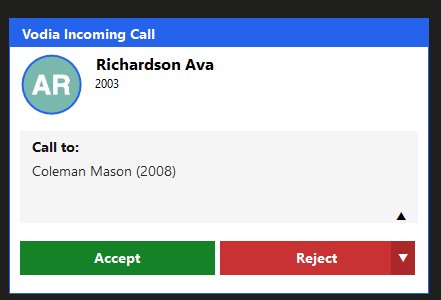
Accept — answers the call. Depending on the Control desk phone setting, this triggers your desk phone to answer or routes through the user portal.
Reject — the ▾ arrow next to Reject opens a dropdown with the following options:
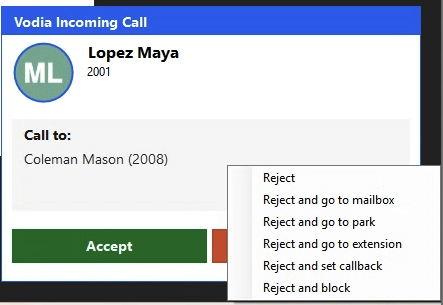
| Option | What happens |
|---|---|
| Reject | Declines the call immediately. |
| Reject and go to mailbox | Sends the caller directly to your voicemail. |
| Reject and go to park orbit | Sends the caller to a park orbit; Vodia Hub prompts you to select which orbit. |
| Reject and transfer to extension | Transfers the caller to an extension you specify. |
| Reject and callback | Declines the call and schedules a callback. (Direct extension calls only.) |
| Reject and block | Declines and blocks the caller's number. (Direct extension calls only.) |
Reject and callback and Reject and block are only available for direct extension calls. They are intentionally not offered for queue calls, where blocking or scheduling callbacks on individual agents would not be appropriate.
Queue Calls - queue calls, the greeting script the agent should use (as configured on the call queue)
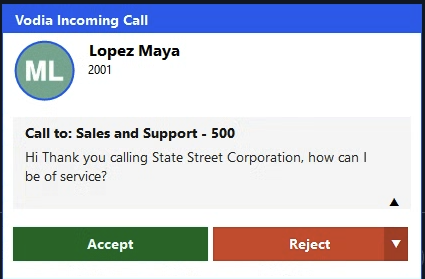
The pop-up appears for every inbound call as long as Vodia Hub is running in the tray.
In-Call Controls
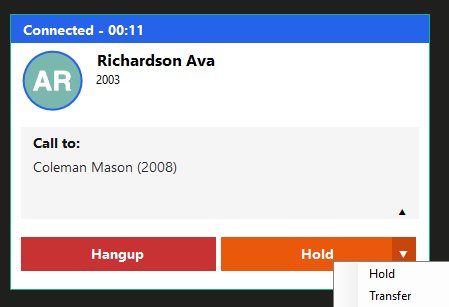
After accepting a call, the pop-up becomes a live call panel with a running timer.
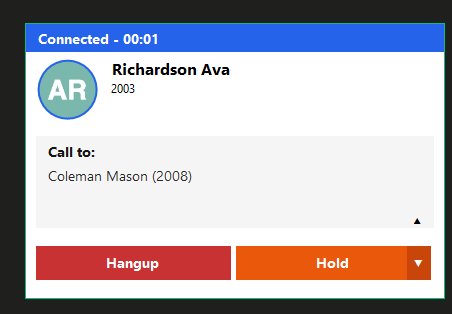
| Button | Action |
|---|---|
| Hangup | Ends the call immediately. |
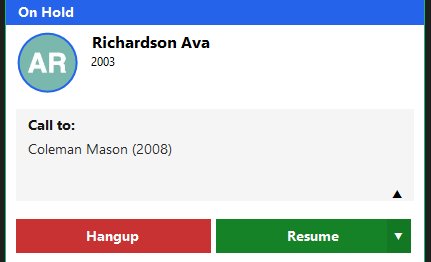
| Hold | Parks the active call. The caller hears hold music until you press Resume. |
| Resume | Returns to a held call. |
When a call is on hold, the panel switches to an On Hold state:
Handling Multiple Calls
Vodia Hub stacks each call as its own panel. You can accept, reject, hold, or hang up each one independently while others remain active.
Transferring a Call
To transfer an active call, click the ▾ arrow next to the Hold button and choose Transfer.
Enter the destination extension in the dialog and click OK. The call is handed off immediately and your panel clears.

This is a blind (direct) transfer — the caller is sent straight to the destination extension. For a consultative transfer (speaking with the colleague first), use the transfer controls on your desk phone.
Click-to-Call
Vodia Hub registers itself as the system-wide handler for tel: URIs on Windows. This means any application that presents a phone number as a tel: link — not just browsers — will route the call through Vodia Hub.
Microsoft Outlook is the most common example. When you open a contact in Outlook (including the desktop app), the phone number in the contact card is already a tel: link. Clicking it dials through your Vodia extension immediately, without opening a browser or switching to the user portal.
The same works in browser-based tools — Google Contacts, CRM web apps, and any site that exposes tel: links. The first time you click a tel: link in a browser, it will ask for permission to open Vodia Hub. Click Open Vodia Hub and select Always allow to skip the prompt on future calls.

Inbound-Call Automations
The two optional fields in Settings let Vodia Hub take automatic action the moment a call arrives. Both replace {number} with the caller's actual number at runtime.
Terminal Command
Runs a local program or script. Practical examples:
| Goal | Example command |
|---|---|
| Open a notes file per caller | notepad C:\Notes\{number}.txt |
| Launch a lookup script | C:\Tools\lookup.exe {number} |
| Open a CRM URL in the browser | cmd /c start https://crm/contact?p={number} |
Webhook
Sends an HTTP request to a URL of your choice on every inbound call — ideal for server-side logging, CRM screen-pops, or workflow triggers. Example:
https://yourapp.com/incoming?number={number}
The terminal command runs on the local PC with that user's permissions. Only point it at programs and URLs you trust, and test with a harmless command first before wiring up anything that takes action.
Working Alongside the Vodia User Portal
Vodia Hub is not a replacement for the Vodia user portal — it is a desktop companion that lets you control your calls without keeping the portal open or visible. Depending on your Control desk phone setting:
- Control desk phone enabled — Vodia Hub sends call commands (Accept, Hangup, Hold, Transfer) directly to your registered desk phone. The user portal does not need to be open.
- Control desk phone disabled — Vodia Hub controls the Vodia user portal session instead. The portal handles the audio, and Vodia Hub provides the desktop pop-ups and
tel:URI handling on top.
In both modes, Vodia Hub provides the screen-pop, reject options, and click-to-call handling that would otherwise require you to switch to the portal.
Troubleshooting
| Symptom | Try this |
|---|---|
| Installer won't finish | Run as administrator, or choose Just me if you lack admin rights. Check free disk space via Disk Cost…. |
| Pairing link won't connect | Links are valid for ~10 minutes. Ask your admin to resend the welcome email, or copy a fresh pairing URL from the user portal under Mobile Apps → Vodia Hub. |
| No tray icon | Relaunch Vodia Hub. Click the taskbar up-arrow to show hidden icons. Confirm it wasn't closed via Exit. |
| No incoming pop-ups | Re-pair Vodia Hub using a fresh link from the welcome email or the user portal. Confirm the extension is valid on that PBX domain. |
| Buttons don't affect my desk phone | Enable Control desk phone in Settings, and confirm the desk phone is registered to the same extension. |
| Browser doesn't open Vodia Hub | Make sure Vodia Hub is running, then re-try the link and choose Open Vodia Hub. You can re-enable the prompt in your browser's site/app-handler settings. |
| Automation didn't fire | Confirm the command path or URL is valid and includes the {number} token. Test the command on its own in a terminal first. |